> ## Documentation Index
> Fetch the complete documentation index at: https://vibekanban.com/docs/llms.txt
> Use this file to discover all available pages before exploring further.
# Creating Workspaces
> Learn how to create and configure workspaces for your development tasks
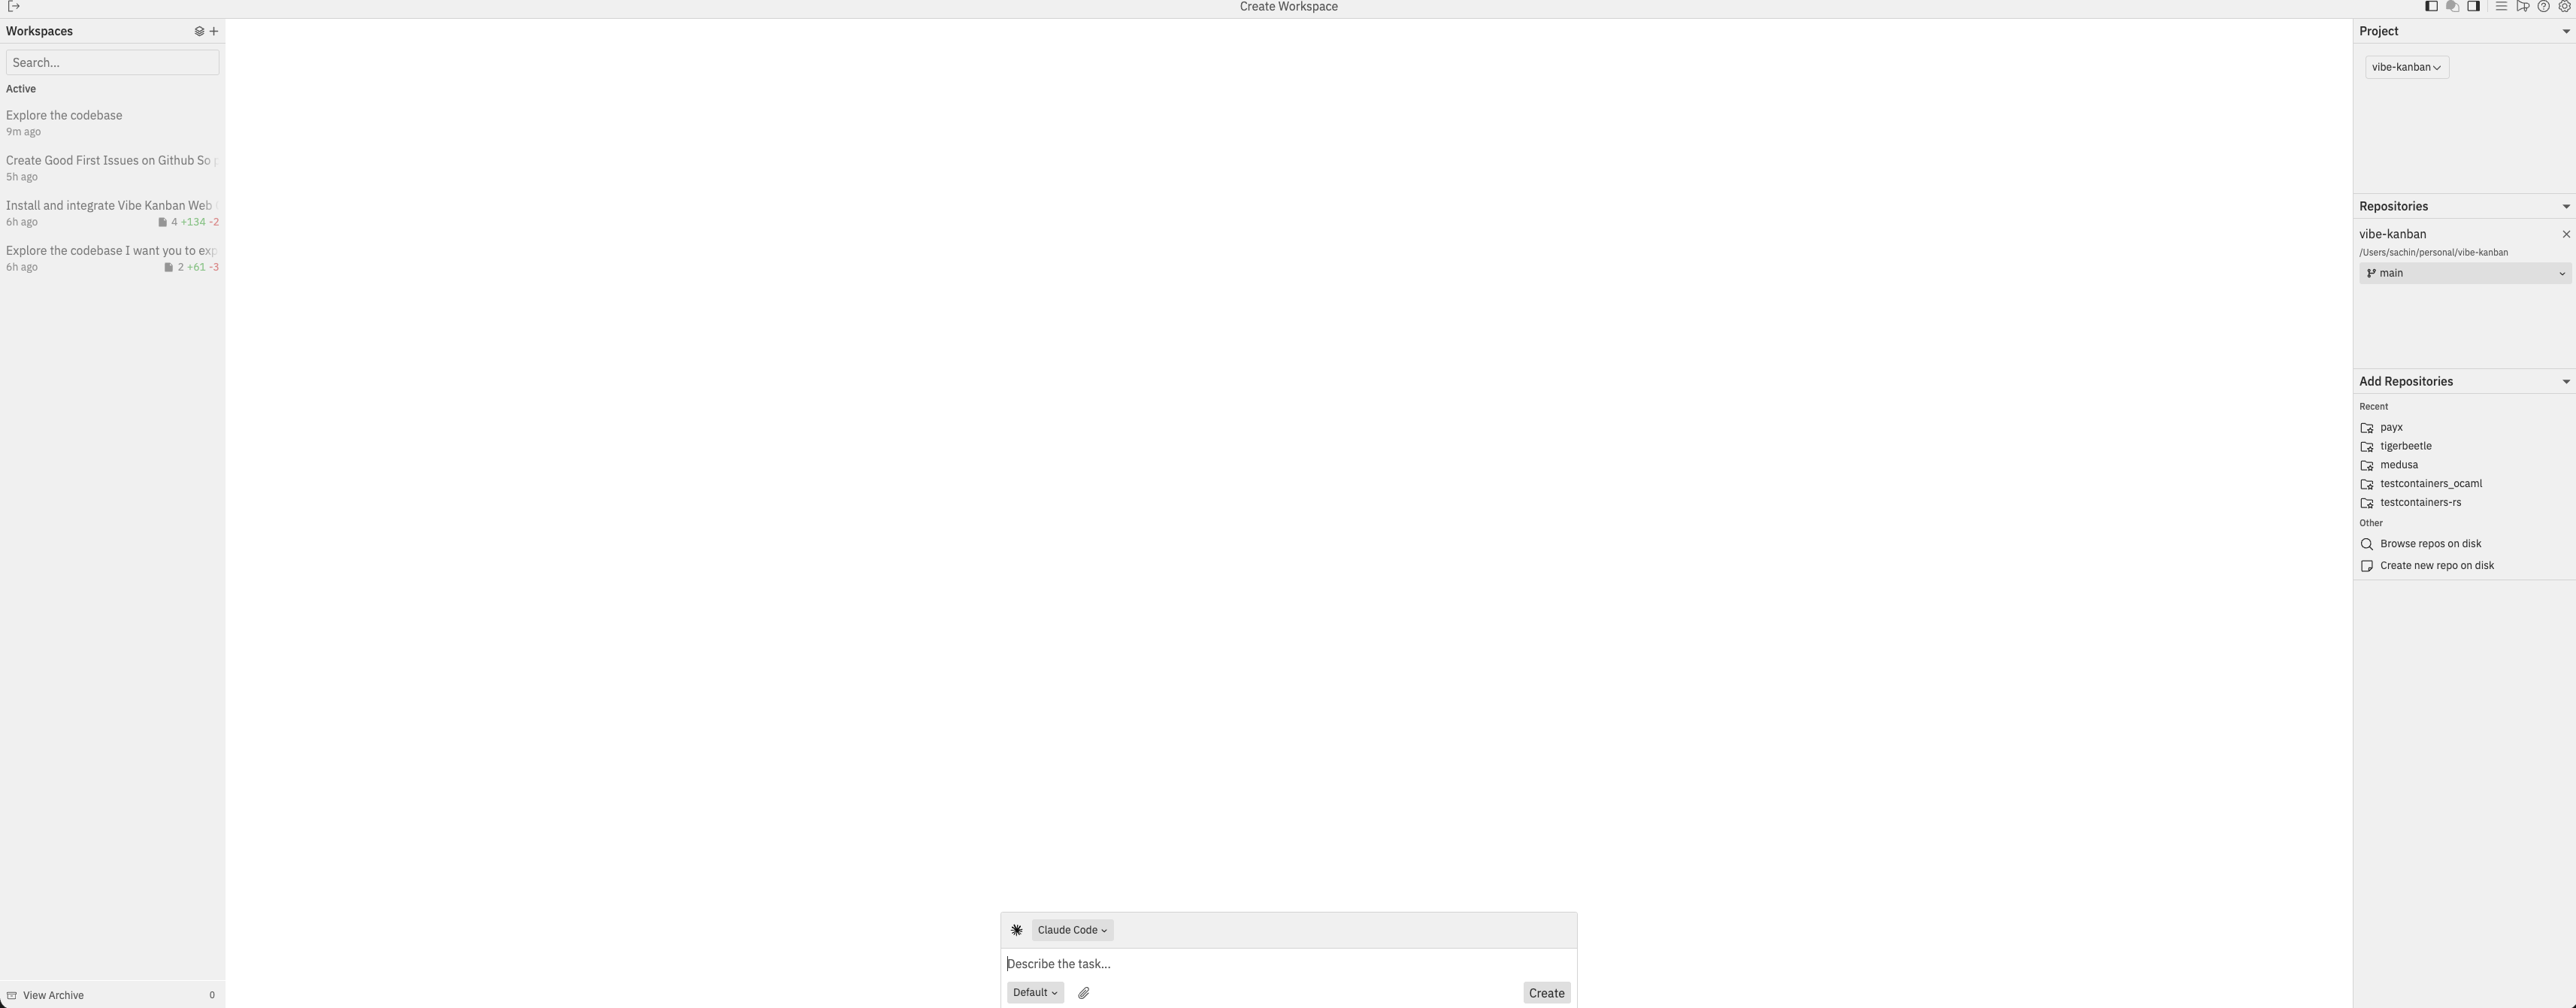 A workspace is your task execution environment where you work with coding agents. Each workspace can include one or more repositories and supports multiple conversation sessions.
## What Happens When You Create a Workspace
Understanding what happens behind the scenes helps you work more effectively:
Vibe Kanban creates a **git worktree** - a separate working directory with its own branch. This keeps your changes isolated from your main codebase. Your original repository remains untouched.
A new branch is created based on your target branch (e.g., `main`). The branch name is auto-generated based on your task (e.g., `vk/abc123-add-login-page`).
A coding agent is initialised and ready to receive your instructions. The agent can read files, make changes, and run commands within your workspace.
If your repository has setup scripts configured (e.g., `npm install`), they run automatically to prepare the environment.
**Where do workspaces live?** Worktrees are created in a `.vibe-kanban-workspaces` directory (configurable in Settings → General → Workspace Directory). Each workspace gets its own folder.
## Creating a New Workspace
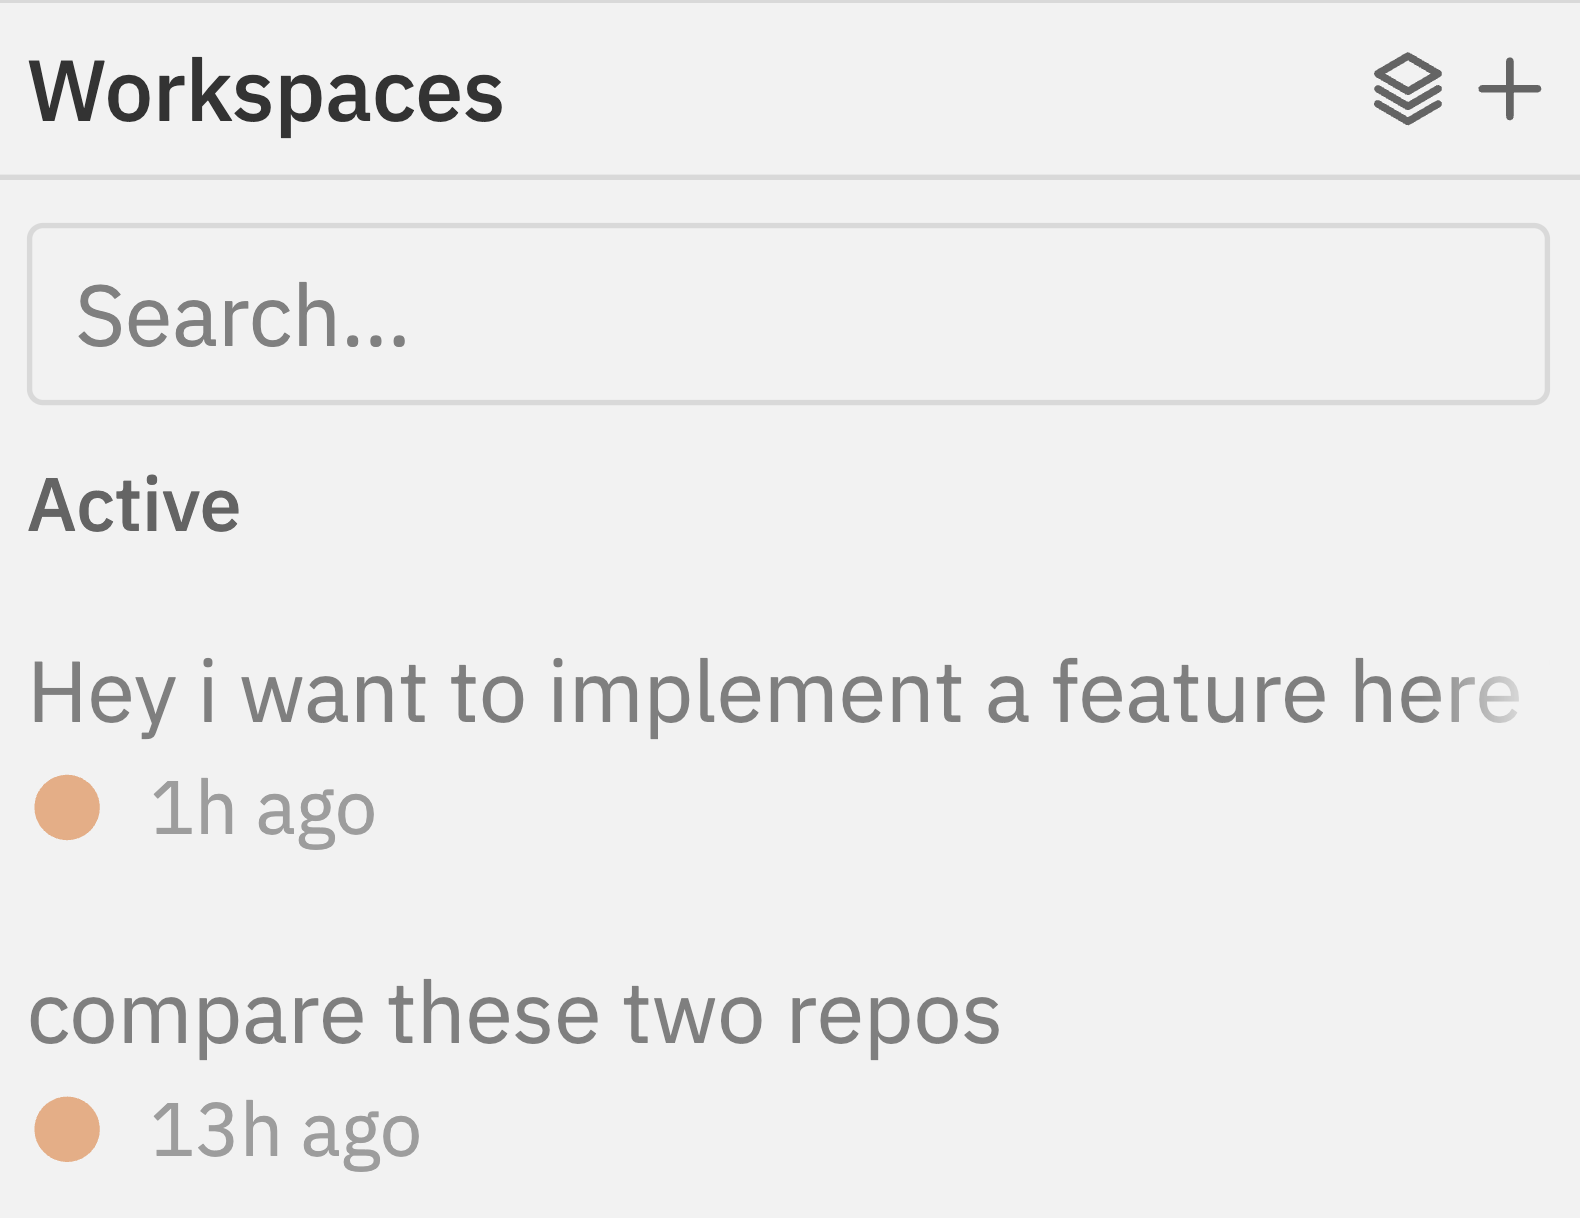
Click the **+** button at the top of the workspace sidebar, or use the command bar (`Cmd/Ctrl + K`) and select **New Workspace**.
A workspace is your task execution environment where you work with coding agents. Each workspace can include one or more repositories and supports multiple conversation sessions.
## What Happens When You Create a Workspace
Understanding what happens behind the scenes helps you work more effectively:
Vibe Kanban creates a **git worktree** - a separate working directory with its own branch. This keeps your changes isolated from your main codebase. Your original repository remains untouched.
A new branch is created based on your target branch (e.g., `main`). The branch name is auto-generated based on your task (e.g., `vk/abc123-add-login-page`).
A coding agent is initialised and ready to receive your instructions. The agent can read files, make changes, and run commands within your workspace.
If your repository has setup scripts configured (e.g., `npm install`), they run automatically to prepare the environment.
**Where do workspaces live?** Worktrees are created in a `.vibe-kanban-workspaces` directory (configurable in Settings → General → Workspace Directory). Each workspace gets its own folder.
## Creating a New Workspace
Click the **+** button at the top of the workspace sidebar, or use the command bar (`Cmd/Ctrl + K`) and select **New Workspace**.
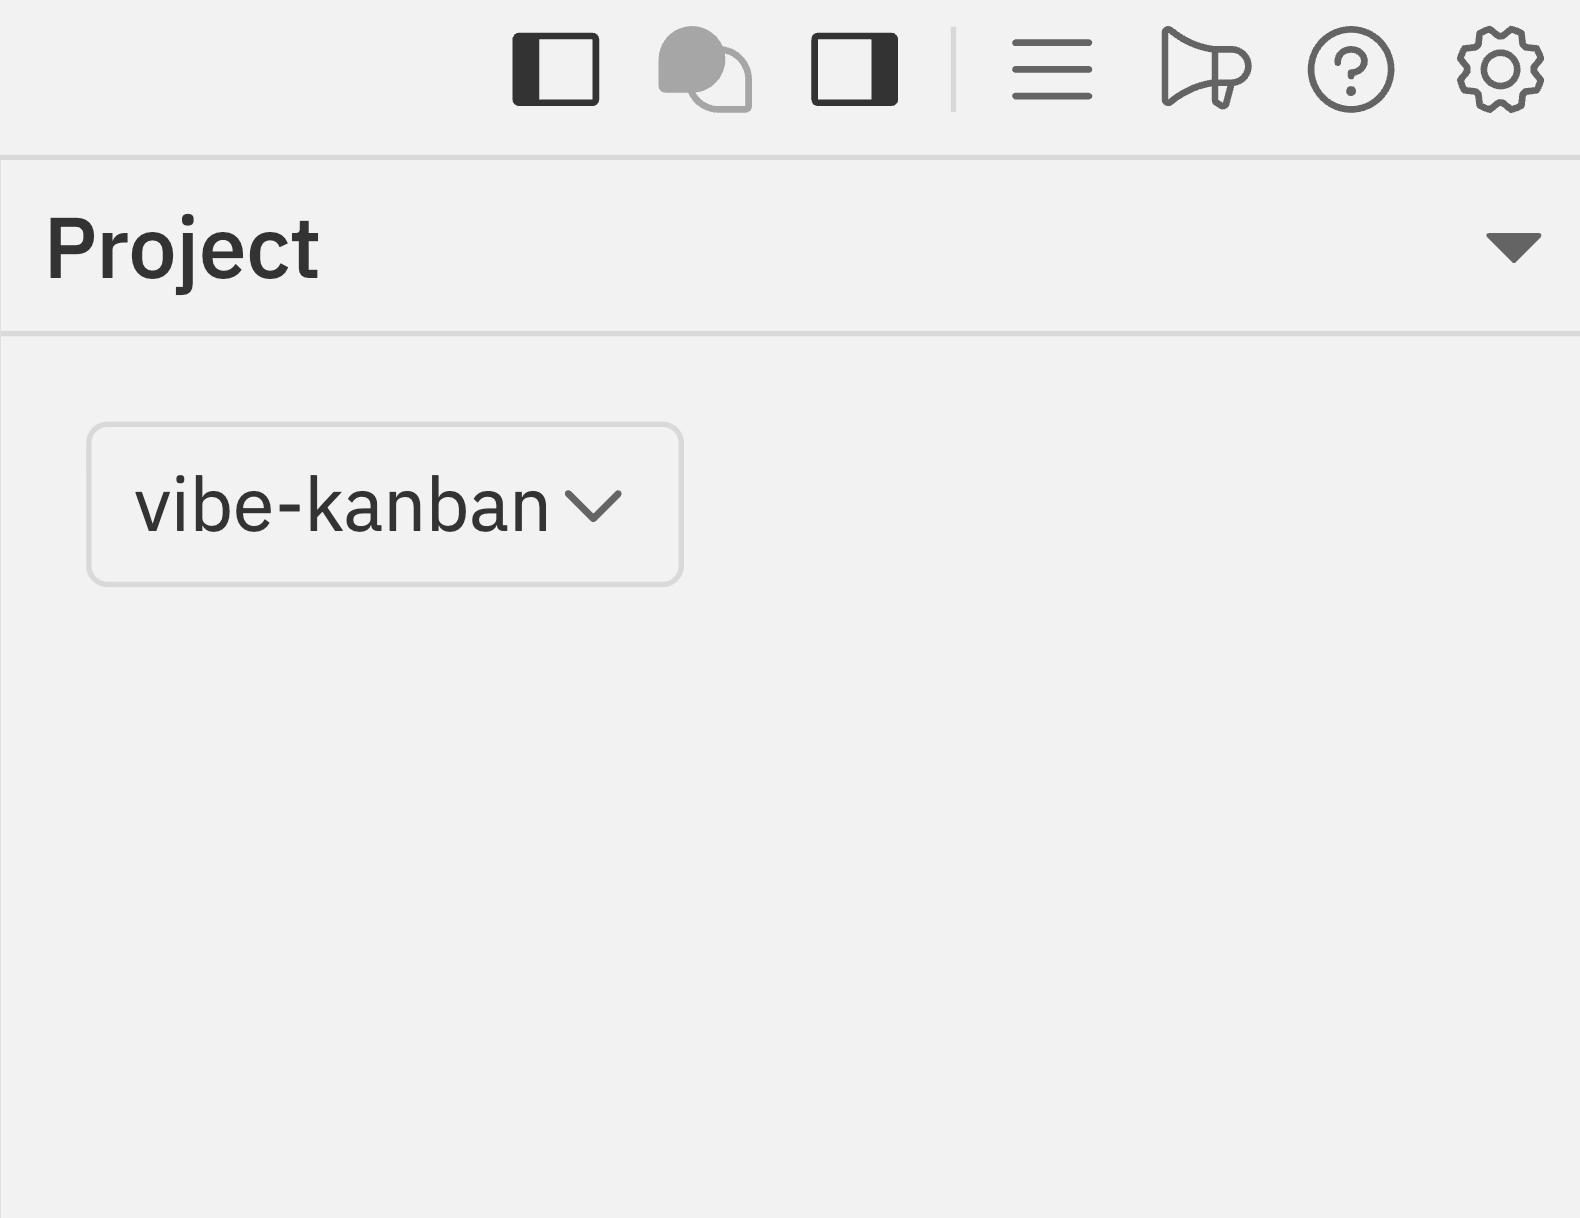
 Choose a project from the **Project** dropdown in the right panel. Projects group related repositories together.
 If you haven't created a project yet, see [Creating a New Project](#creating-a-new-project) below.
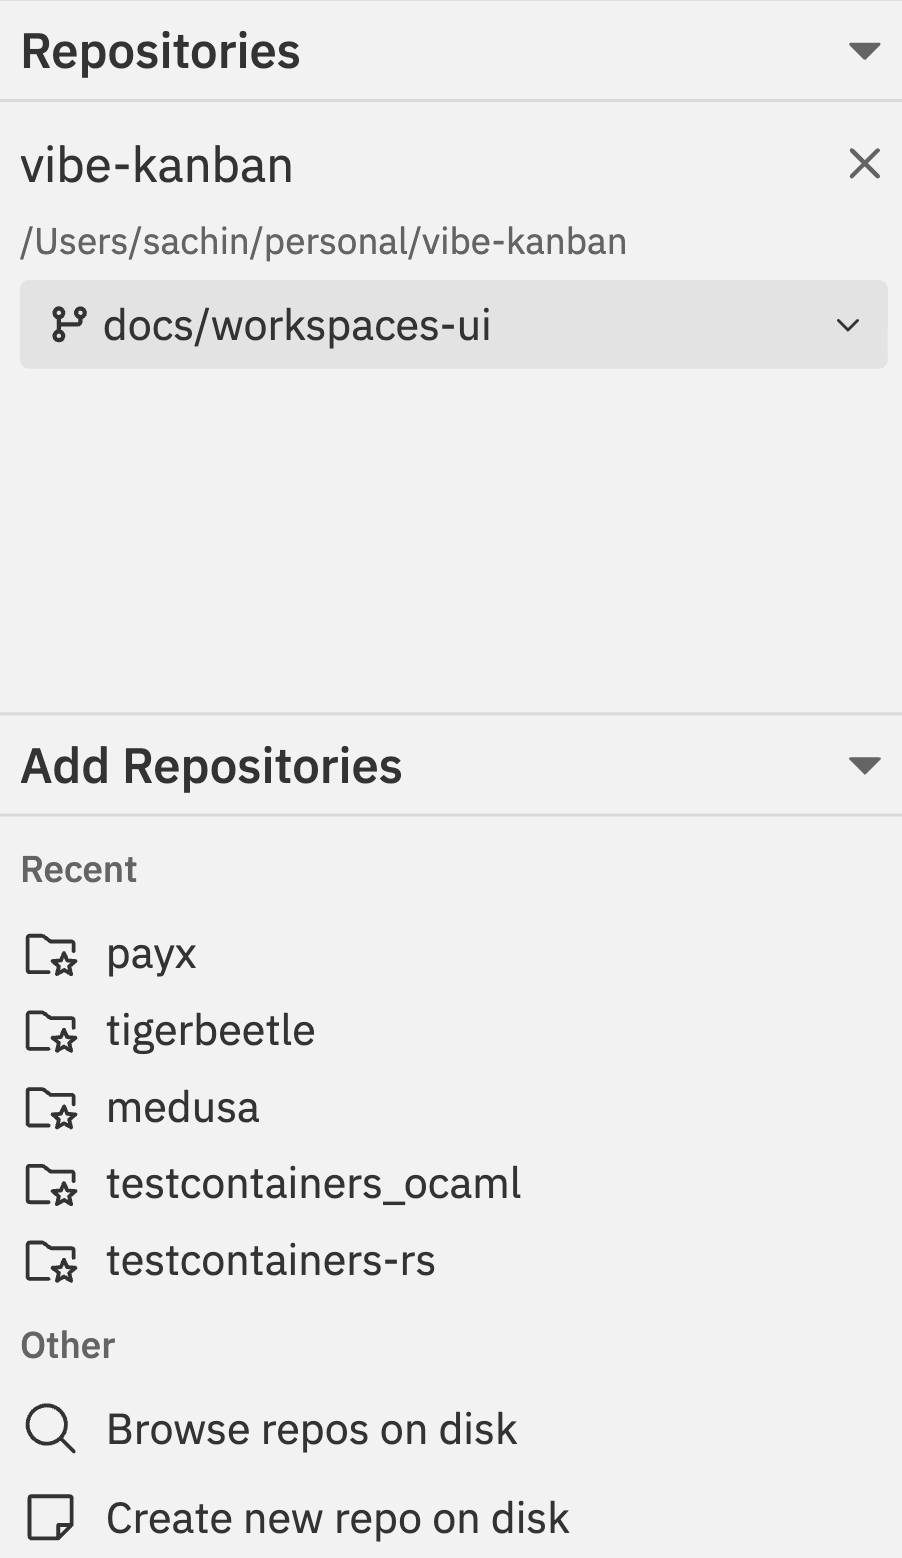 Select which repositories to include in your workspace:
* **Recent repositories** - Click any repo from the list to add it
* **Browse repos on disk** - Find repositories not in the recent list
* **Create new repo on disk** - Initialise a new git repository
You can add multiple repositories to a single workspace if your task spans multiple codebases. Each repository maintains independent git state.
For each selected repository, set the **target branch** - this is the branch your changes will eventually be merged into (e.g., `main` or `develop`).
Click the branch dropdown next to each repository to change the target branch.
**Target branch vs Working branch - what's the difference?**
* **Target branch** = Where your changes will eventually be merged (e.g., `main`). You set this.
* **Working branch** = Where your changes are made (e.g., `vk/abc123-task-name`). Auto-created from target.
Your changes are made on the working branch and don't affect the target until you create and merge a PR.
In the chat input at the bottom, describe what you want to accomplish. Be specific about:
* What feature or fix you need
* Any constraints or requirements
* Files or areas of the codebase to focus on
Clear, detailed task descriptions help the agent understand your requirements and produce better results.
Choose which coding agent to use from the **Agent** dropdown. Available agents depend on your configuration.
See [Agent Configurations](/settings/agent-configurations) for details on setting up different agents.
Click **Create** to start the workspace. The agent will begin working on your task immediately.
## Creating a New Project
If you need to create a new project before setting up your workspace:
In the create workspace view, click the **Project** dropdown.
Select which repositories to include in your workspace:
* **Recent repositories** - Click any repo from the list to add it
* **Browse repos on disk** - Find repositories not in the recent list
* **Create new repo on disk** - Initialise a new git repository
You can add multiple repositories to a single workspace if your task spans multiple codebases. Each repository maintains independent git state.
For each selected repository, set the **target branch** - this is the branch your changes will eventually be merged into (e.g., `main` or `develop`).
Click the branch dropdown next to each repository to change the target branch.
**Target branch vs Working branch - what's the difference?**
* **Target branch** = Where your changes will eventually be merged (e.g., `main`). You set this.
* **Working branch** = Where your changes are made (e.g., `vk/abc123-task-name`). Auto-created from target.
Your changes are made on the working branch and don't affect the target until you create and merge a PR.
In the chat input at the bottom, describe what you want to accomplish. Be specific about:
* What feature or fix you need
* Any constraints or requirements
* Files or areas of the codebase to focus on
Clear, detailed task descriptions help the agent understand your requirements and produce better results.
Choose which coding agent to use from the **Agent** dropdown. Available agents depend on your configuration.
See [Agent Configurations](/settings/agent-configurations) for details on setting up different agents.
Click **Create** to start the workspace. The agent will begin working on your task immediately.
## Creating a New Project
If you need to create a new project before setting up your workspace:
In the create workspace view, click the **Project** dropdown.
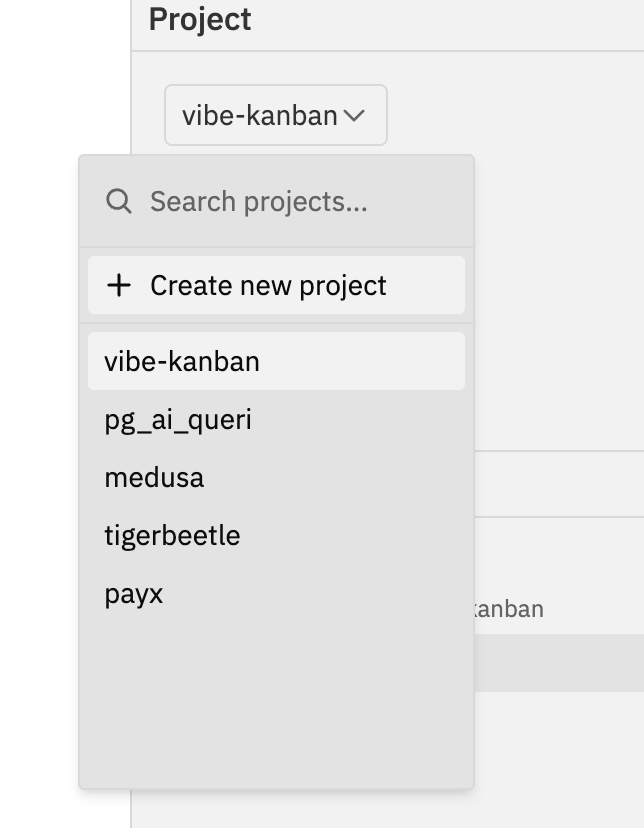 Click **+ Create new project** at the top of the dropdown list.
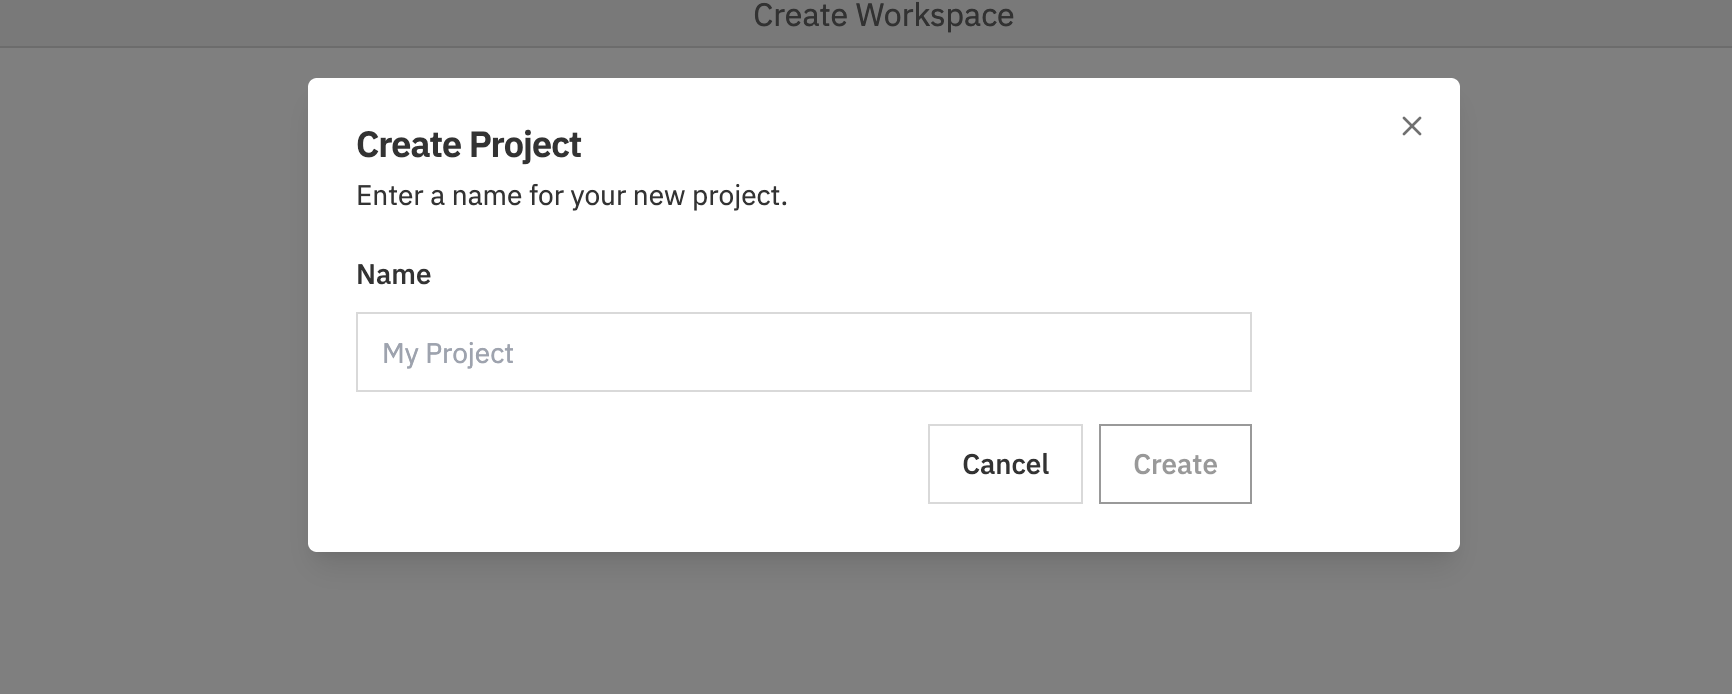 Enter a name for your project and click **Create**.
Your new project is automatically selected. Continue adding repositories and configuring your workspace.
After creating a project, you can configure additional settings like setup scripts, dev server scripts, and cleanup scripts in the project settings. See [Projects & Repositories](/settings/projects-repositories) for more details.
## Workspace Settings
Once a workspace is created, you can configure additional settings:
### Working Branch
The workspace automatically creates a working branch for your changes. You can view and change this in the **Git** section of the details sidebar.
### Dev Server
If your project has a dev server script configured, you can start it using:
* The **Play** icon () in the context bar
* The command bar: `Cmd/Ctrl + K` → **Start Dev Server**
Configure dev server scripts in your project settings. See [Projects & Repositories](/settings/projects-repositories) for setup instructions.
### Workspace Notes
Use the **Notes** section in the details sidebar to document important information about the workspace - requirements, decisions, or anything you want to remember.
## Duplicating a Workspace
To create a copy of an existing workspace:
1. Open the command bar (`Cmd/Ctrl + K`)
2. Go to **Workspace Actions**
3. Select **Duplicate Workspace**
The duplicate includes the same repositories and branch configuration but starts with a fresh conversation.
## Archiving Workspaces
When you're done with a workspace, archive it to keep your workspace list clean:
**From the navbar:**
* Click the **Archive** button () in the top left of the navbar
**From the command bar:**
1. Press `Cmd/Ctrl + K`
2. Go to **Workspace Actions** → **Archive**
Archived workspaces can be viewed by clicking **View Archive** at the bottom of the sidebar.
Use the **Pin** feature to keep important active workspaces at the top of your list.
## Troubleshooting
**Possible causes:**
* The repository hasn't been added to a project yet
* The folder isn't a git repository (no `.git` folder)
* The path isn't accessible
**Solutions:**
1. Click **Browse repos on disk** to manually locate the repository
2. Ensure the folder contains a `.git` directory
3. Check that Vibe Kanban has permission to access the folder
**Possible causes:**
* Git worktree creation failed (usually due to uncommitted changes in the original repo)
* Branch name conflict
* Disk space issues
**Solutions:**
1. Commit or stash any uncommitted changes in your original repository
2. Try a different target branch
3. Check available disk space (worktrees require space for a full copy of tracked files)
**Possible causes:**
* Agent isn't installed or configured
* API key issues
* Network connectivity problems
**Solutions:**
1. Check that your agent (e.g., Claude Code) is installed: run the CLI command manually in terminal
2. Verify API keys are configured in Settings → Agents
3. Check your internet connection
**Possible causes:**
* Script has errors
* Missing dependencies
* Wrong working directory
**Solutions:**
1. Test the script manually in terminal first
2. Check the Logs panel for error messages
3. Ensure paths in the script are relative to the repository root
## Related Documentation
* [Interface Guide](/workspaces/interface) - Learn about the workspace layout and panels
* [Multi-Repo & Sessions](/workspaces/multi-repo-sessions) - Working with multiple repositories
* [Sessions](/workspaces/sessions) - Creating and managing conversation sessions
* [Command Bar](/workspaces/command-bar) - Quick actions and keyboard shortcuts
Enter a name for your project and click **Create**.
Your new project is automatically selected. Continue adding repositories and configuring your workspace.
After creating a project, you can configure additional settings like setup scripts, dev server scripts, and cleanup scripts in the project settings. See [Projects & Repositories](/settings/projects-repositories) for more details.
## Workspace Settings
Once a workspace is created, you can configure additional settings:
### Working Branch
The workspace automatically creates a working branch for your changes. You can view and change this in the **Git** section of the details sidebar.
### Dev Server
If your project has a dev server script configured, you can start it using:
* The **Play** icon () in the context bar
* The command bar: `Cmd/Ctrl + K` → **Start Dev Server**
Configure dev server scripts in your project settings. See [Projects & Repositories](/settings/projects-repositories) for setup instructions.
### Workspace Notes
Use the **Notes** section in the details sidebar to document important information about the workspace - requirements, decisions, or anything you want to remember.
## Duplicating a Workspace
To create a copy of an existing workspace:
1. Open the command bar (`Cmd/Ctrl + K`)
2. Go to **Workspace Actions**
3. Select **Duplicate Workspace**
The duplicate includes the same repositories and branch configuration but starts with a fresh conversation.
## Archiving Workspaces
When you're done with a workspace, archive it to keep your workspace list clean:
**From the navbar:**
* Click the **Archive** button () in the top left of the navbar
**From the command bar:**
1. Press `Cmd/Ctrl + K`
2. Go to **Workspace Actions** → **Archive**
Archived workspaces can be viewed by clicking **View Archive** at the bottom of the sidebar.
Use the **Pin** feature to keep important active workspaces at the top of your list.
## Troubleshooting
**Possible causes:**
* The repository hasn't been added to a project yet
* The folder isn't a git repository (no `.git` folder)
* The path isn't accessible
**Solutions:**
1. Click **Browse repos on disk** to manually locate the repository
2. Ensure the folder contains a `.git` directory
3. Check that Vibe Kanban has permission to access the folder
**Possible causes:**
* Git worktree creation failed (usually due to uncommitted changes in the original repo)
* Branch name conflict
* Disk space issues
**Solutions:**
1. Commit or stash any uncommitted changes in your original repository
2. Try a different target branch
3. Check available disk space (worktrees require space for a full copy of tracked files)
**Possible causes:**
* Agent isn't installed or configured
* API key issues
* Network connectivity problems
**Solutions:**
1. Check that your agent (e.g., Claude Code) is installed: run the CLI command manually in terminal
2. Verify API keys are configured in Settings → Agents
3. Check your internet connection
**Possible causes:**
* Script has errors
* Missing dependencies
* Wrong working directory
**Solutions:**
1. Test the script manually in terminal first
2. Check the Logs panel for error messages
3. Ensure paths in the script are relative to the repository root
## Related Documentation
* [Interface Guide](/workspaces/interface) - Learn about the workspace layout and panels
* [Multi-Repo & Sessions](/workspaces/multi-repo-sessions) - Working with multiple repositories
* [Sessions](/workspaces/sessions) - Creating and managing conversation sessions
* [Command Bar](/workspaces/command-bar) - Quick actions and keyboard shortcuts