> ## Documentation Index
> Fetch the complete documentation index at: https://vibekanban.com/docs/llms.txt
> Use this file to discover all available pages before exploring further.
# Multi-Repo & Sessions
> Work with multiple repositories and agent sessions in a single workspace
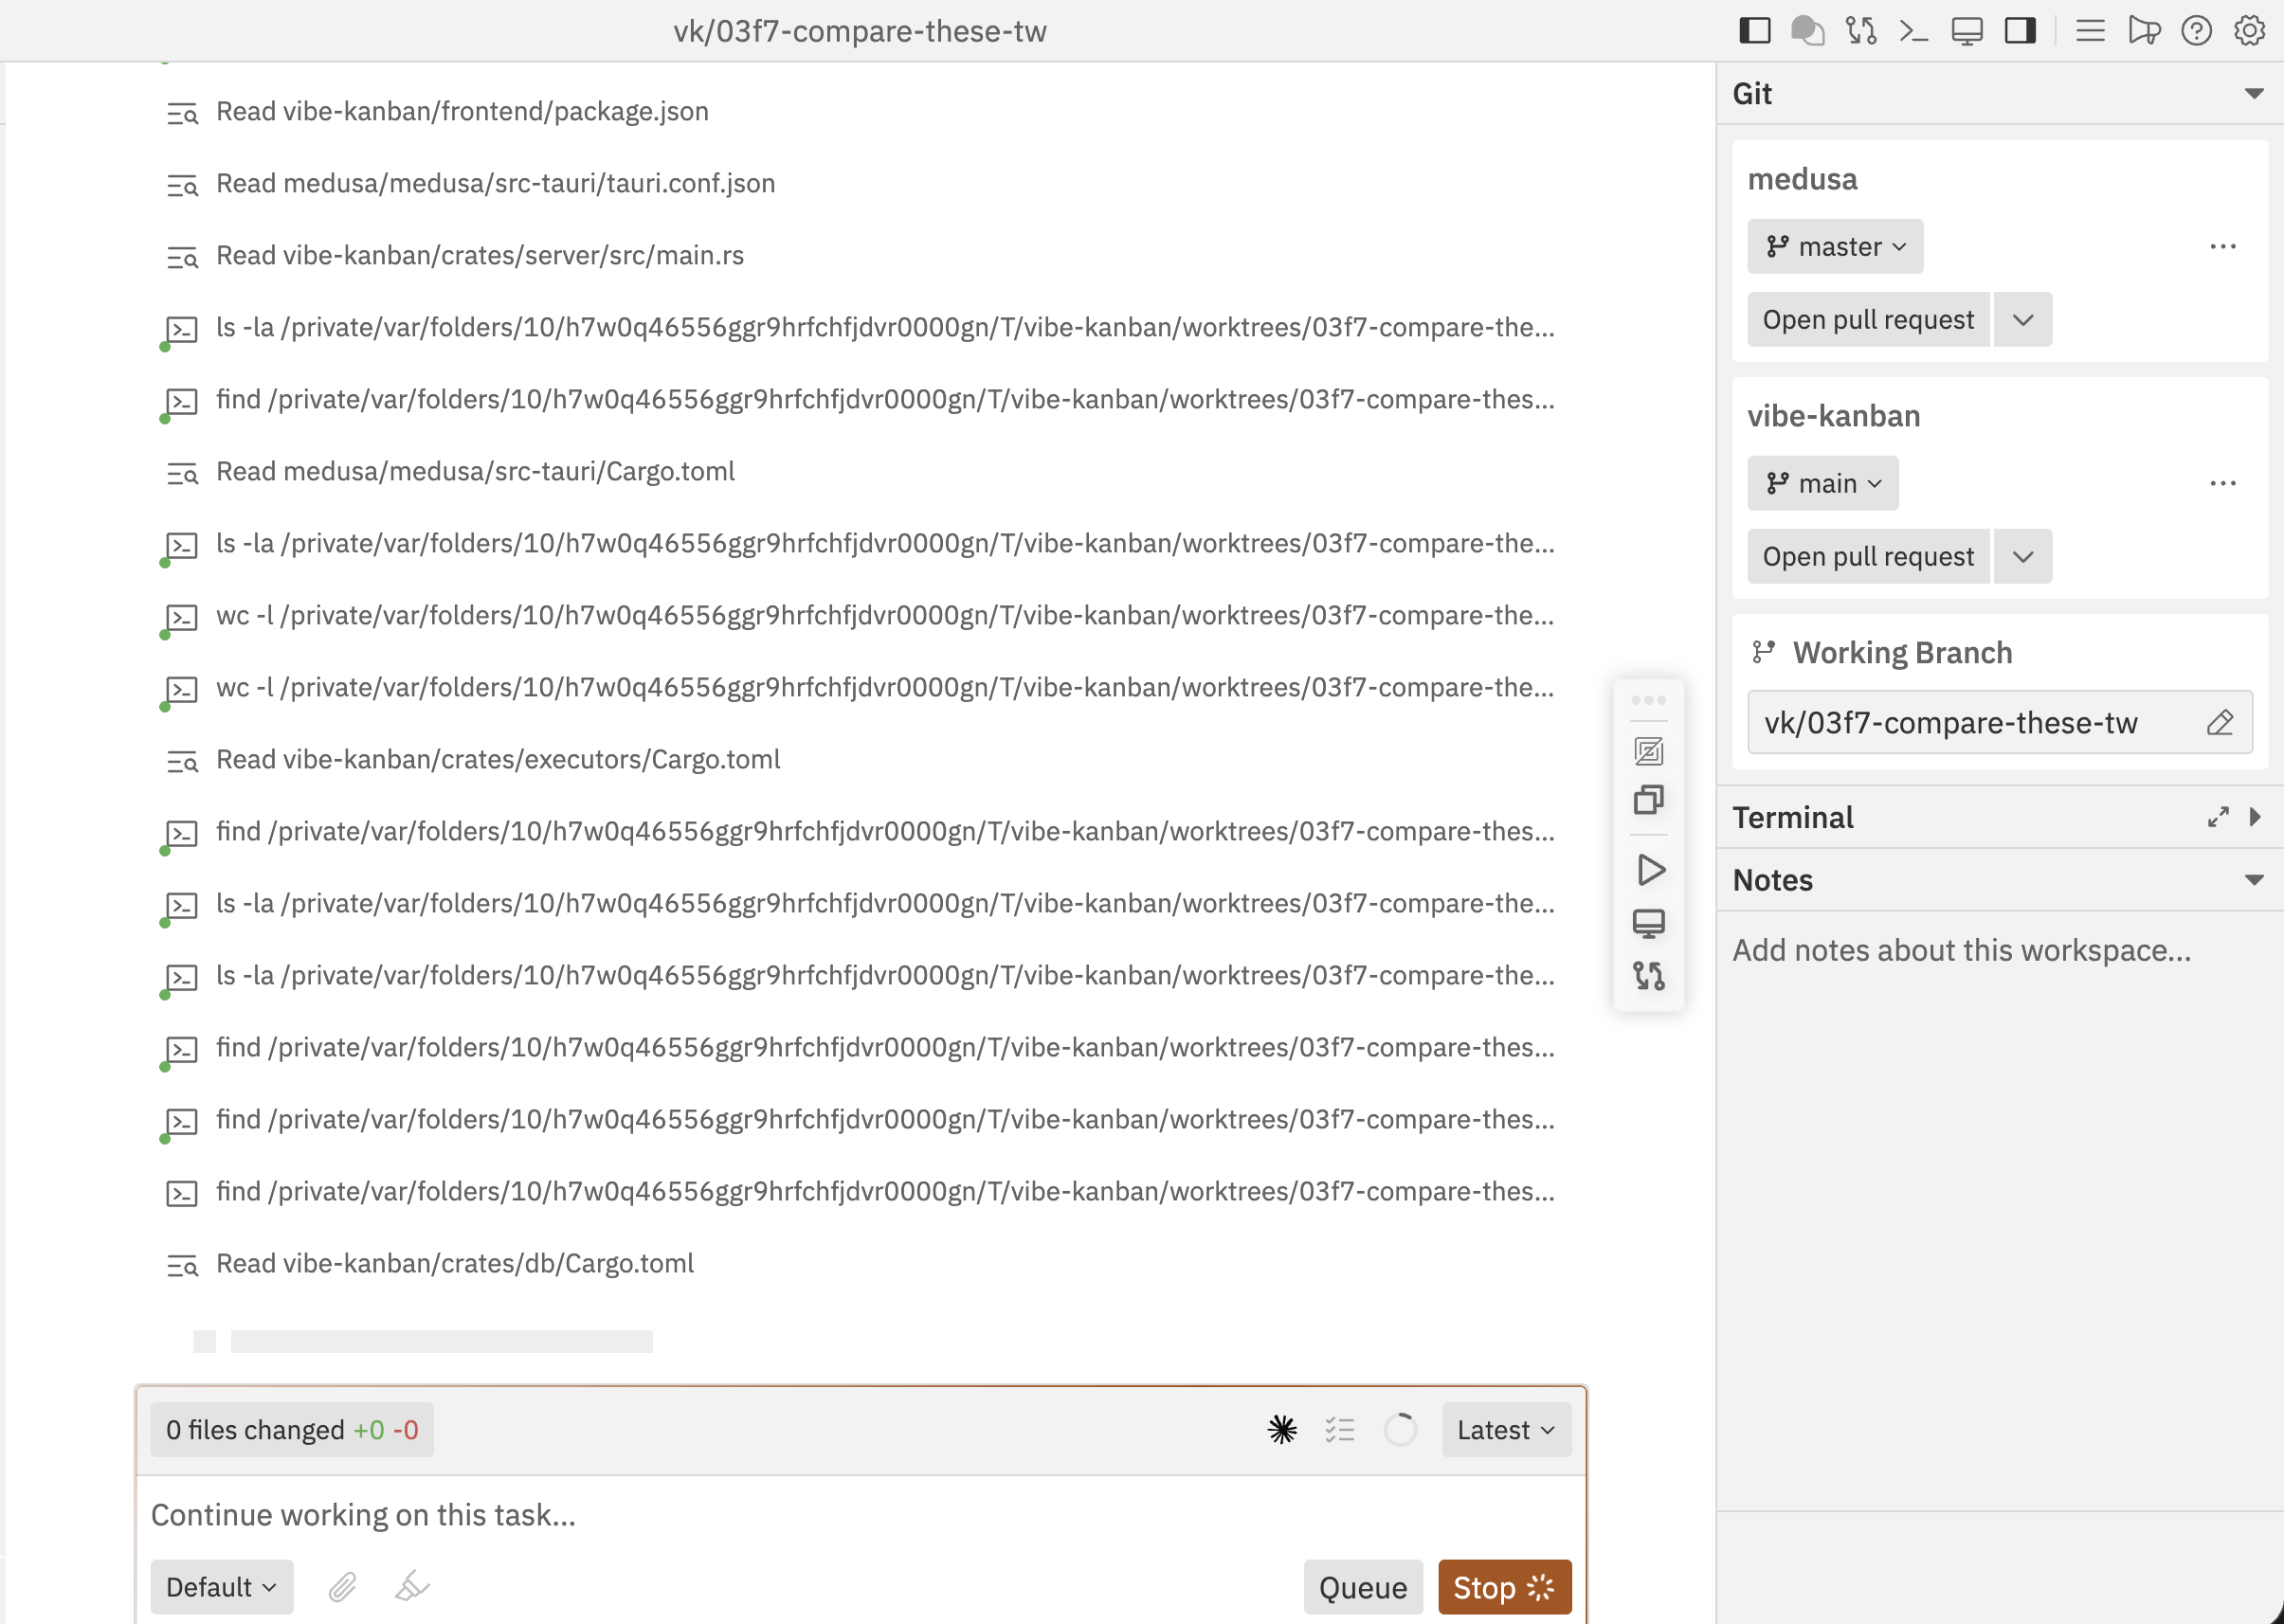 Workspaces support working across multiple repositories and running multiple agent sessions simultaneously.
## Multi-Repository Support
Add multiple repositories to a single workspace to work on cross-repo tasks.
### Adding Repositories
Workspaces support working across multiple repositories and running multiple agent sessions simultaneously.
## Multi-Repository Support
Add multiple repositories to a single workspace to work on cross-repo tasks.
### Adding Repositories
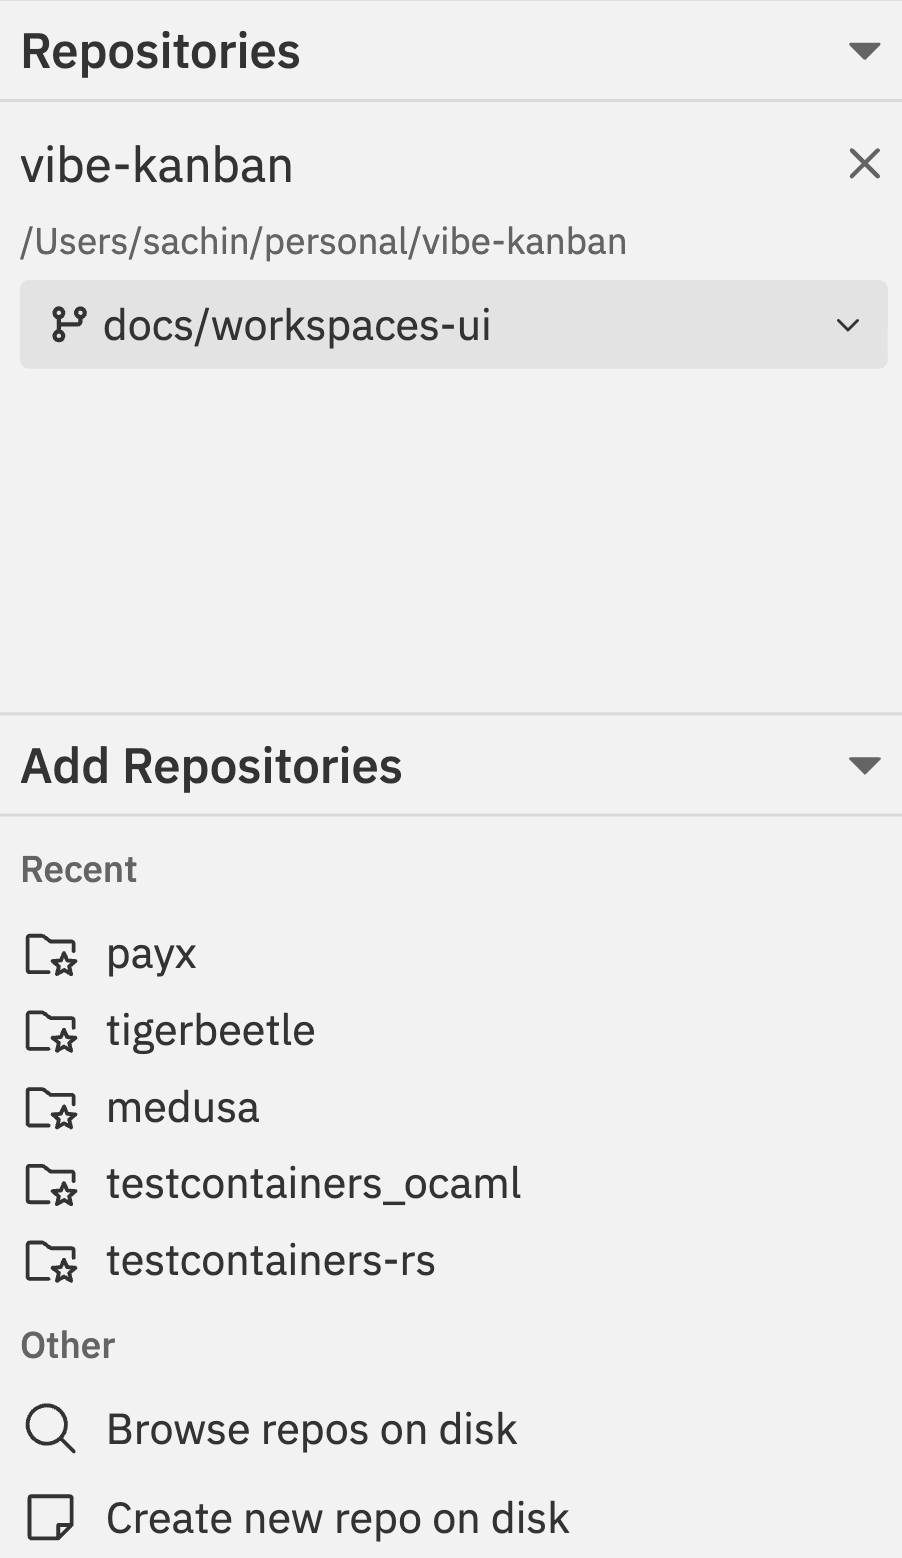 When creating a new workspace, add multiple repositories from the create view:
1. Click the **+** button in the workspace sidebar
2. Select your **project** from the dropdown
3. Click repositories from the **Add Repositories** list to include them
4. Set the **target branch** for each selected repository
5. Each repo maintains independent git state
### Working Across Repos
With multiple repositories in a workspace:
* **Reference code** from one repo while implementing changes in another
* **Implement coordinated changes** across multiple codebases
* **Manage git operations** independently per repository
* **View changes** from all repos in a unified diff view
### Repository Panel
Each repository in the workspace shows:
| Information | Description |
| -------------------- | ------------------------- |
| Repository name | With status indicator |
| Current branch | The working branch |
| Target branch | Branch to merge into |
| Changes count | Uncommitted modifications |
| Commits ahead/behind | Relative to target branch |
### Per-Repository Actions
Access repository-specific actions via the [command bar](/workspaces/command-bar):
* **Open Repo in IDE** - Open just this repository
* **Copy Repo Path** - Copy the repository path
* **Repository Settings** - Configure repo options
* **Git Operations** - PR, merge, rebase per repo
Use the command bar's Repo Actions page to quickly switch between repositories when performing git operations.
## Multiple Sessions
When creating a new workspace, add multiple repositories from the create view:
1. Click the **+** button in the workspace sidebar
2. Select your **project** from the dropdown
3. Click repositories from the **Add Repositories** list to include them
4. Set the **target branch** for each selected repository
5. Each repo maintains independent git state
### Working Across Repos
With multiple repositories in a workspace:
* **Reference code** from one repo while implementing changes in another
* **Implement coordinated changes** across multiple codebases
* **Manage git operations** independently per repository
* **View changes** from all repos in a unified diff view
### Repository Panel
Each repository in the workspace shows:
| Information | Description |
| -------------------- | ------------------------- |
| Repository name | With status indicator |
| Current branch | The working branch |
| Target branch | Branch to merge into |
| Changes count | Uncommitted modifications |
| Commits ahead/behind | Relative to target branch |
### Per-Repository Actions
Access repository-specific actions via the [command bar](/workspaces/command-bar):
* **Open Repo in IDE** - Open just this repository
* **Copy Repo Path** - Copy the repository path
* **Repository Settings** - Configure repo options
* **Git Operations** - PR, merge, rebase per repo
Use the command bar's Repo Actions page to quickly switch between repositories when performing git operations.
## Multiple Sessions
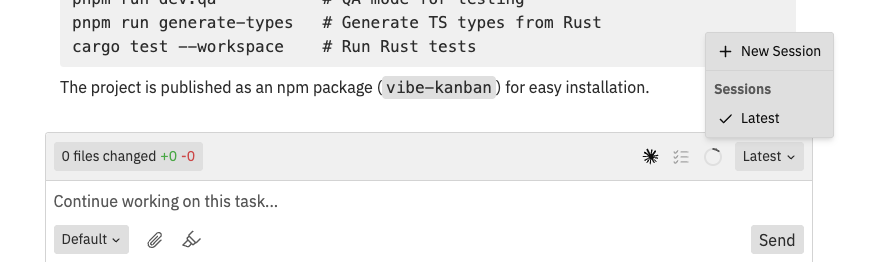 Create multiple agent conversation sessions within a single workspace.
### Why Use Multiple Sessions?
* **Token limits**: Start fresh sessions when conversations get long
* **Parallel work**: Run different tasks or agents simultaneously
* **Code review**: Start a dedicated review session
* **Experimentation**: Try different approaches in separate sessions
### Creating a New Session
1. Click the session dropdown in the chat box toolbar
2. Select **New Session** from the dropdown
3. Select the agent to use for the new session
4. Start your conversation
### Switching Between Sessions
The session dropdown in the chat box toolbar shows all sessions:
* **Latest** - the most recent session
* Older sessions show their creation timestamp
* Click any session to switch to it
* Each session maintains its own conversation history
### Session Indicators
| Indicator | Meaning |
| -------------- | ----------------------------- |
| **Running** | Agent is actively processing |
| **Idle** | Session waiting for input |
| **Agent icon** | Shows which agent is assigned |
### Running Multiple Agents
Different sessions can use different coding agents:
1. Create a new session
2. Select a different agent (Claude Code, Gemini CLI, etc.)
3. Both sessions can run in parallel
4. Switch between them to monitor progress
Each session operates independently. Changes made by one agent are visible to other sessions through the shared workspace files.
## Example: Full-Stack Feature
Here's a practical workflow for implementing a feature across frontend and backend repositories:
Create a new workspace, select your project, and add both `frontend` and `backend` repositories. Set target branches to `main` for both.
In your initial message, describe the complete feature:
```
Add a user profile page:
- Backend: Create GET /api/users/:id endpoint returning user data
- Frontend: Add /profile/:id route with a UserProfile component
- The frontend should fetch from the backend endpoint
```
The agent reads code from both repositories and makes coordinated changes. It understands the relationship between frontend and backend.
Start the dev server (if configured for one repo, you may need to start the other manually via terminal). Test that the frontend correctly calls the backend.
Create a PR for each repository:
1. Open command bar (`Cmd/Ctrl + K`)
2. Go to **Repo Actions**
3. Select **Create PR** for the backend repo
4. Repeat for the frontend repo
5. In PR descriptions, reference the related PR
Merge backend first (since frontend depends on it), then merge frontend.
## Best Practices
### Multi-Repo Workflows
* **Start with a plan**: Describe the cross-repo changes needed upfront
* **Coordinate commits**: Ensure related changes are committed together
* **Test integration**: Use the preview to verify repos work together
* **Create linked PRs**: Reference related PRs across repositories (e.g., "Related to frontend#123")
### Session Management
* **One focus per session**: Keep each session focused on a specific goal
* **Document in notes**: Use workspace notes to track which session does what
* **Limit concurrent sessions**: Too many active sessions can be confusing
* **Review before switching**: Check the changes panel when switching sessions
**File conflicts:** When multiple sessions modify the same files, the last write wins. Review the Changes panel carefully to ensure nothing was overwritten unexpectedly.
## Related Documentation
* [Interface Guide](/workspaces/interface) - Understanding the workspace layout
* [Git Operations](/workspaces/git-operations) - Managing git across repositories
* [Command Bar](/workspaces/command-bar) - Quick actions for repo management
Create multiple agent conversation sessions within a single workspace.
### Why Use Multiple Sessions?
* **Token limits**: Start fresh sessions when conversations get long
* **Parallel work**: Run different tasks or agents simultaneously
* **Code review**: Start a dedicated review session
* **Experimentation**: Try different approaches in separate sessions
### Creating a New Session
1. Click the session dropdown in the chat box toolbar
2. Select **New Session** from the dropdown
3. Select the agent to use for the new session
4. Start your conversation
### Switching Between Sessions
The session dropdown in the chat box toolbar shows all sessions:
* **Latest** - the most recent session
* Older sessions show their creation timestamp
* Click any session to switch to it
* Each session maintains its own conversation history
### Session Indicators
| Indicator | Meaning |
| -------------- | ----------------------------- |
| **Running** | Agent is actively processing |
| **Idle** | Session waiting for input |
| **Agent icon** | Shows which agent is assigned |
### Running Multiple Agents
Different sessions can use different coding agents:
1. Create a new session
2. Select a different agent (Claude Code, Gemini CLI, etc.)
3. Both sessions can run in parallel
4. Switch between them to monitor progress
Each session operates independently. Changes made by one agent are visible to other sessions through the shared workspace files.
## Example: Full-Stack Feature
Here's a practical workflow for implementing a feature across frontend and backend repositories:
Create a new workspace, select your project, and add both `frontend` and `backend` repositories. Set target branches to `main` for both.
In your initial message, describe the complete feature:
```
Add a user profile page:
- Backend: Create GET /api/users/:id endpoint returning user data
- Frontend: Add /profile/:id route with a UserProfile component
- The frontend should fetch from the backend endpoint
```
The agent reads code from both repositories and makes coordinated changes. It understands the relationship between frontend and backend.
Start the dev server (if configured for one repo, you may need to start the other manually via terminal). Test that the frontend correctly calls the backend.
Create a PR for each repository:
1. Open command bar (`Cmd/Ctrl + K`)
2. Go to **Repo Actions**
3. Select **Create PR** for the backend repo
4. Repeat for the frontend repo
5. In PR descriptions, reference the related PR
Merge backend first (since frontend depends on it), then merge frontend.
## Best Practices
### Multi-Repo Workflows
* **Start with a plan**: Describe the cross-repo changes needed upfront
* **Coordinate commits**: Ensure related changes are committed together
* **Test integration**: Use the preview to verify repos work together
* **Create linked PRs**: Reference related PRs across repositories (e.g., "Related to frontend#123")
### Session Management
* **One focus per session**: Keep each session focused on a specific goal
* **Document in notes**: Use workspace notes to track which session does what
* **Limit concurrent sessions**: Too many active sessions can be confusing
* **Review before switching**: Check the changes panel when switching sessions
**File conflicts:** When multiple sessions modify the same files, the last write wins. Review the Changes panel carefully to ensure nothing was overwritten unexpectedly.
## Related Documentation
* [Interface Guide](/workspaces/interface) - Understanding the workspace layout
* [Git Operations](/workspaces/git-operations) - Managing git across repositories
* [Command Bar](/workspaces/command-bar) - Quick actions for repo management