1. Launch Vibe Kanban
Start the Vibe Kanban client and open the UI in your browser:2. Confirm your preferences
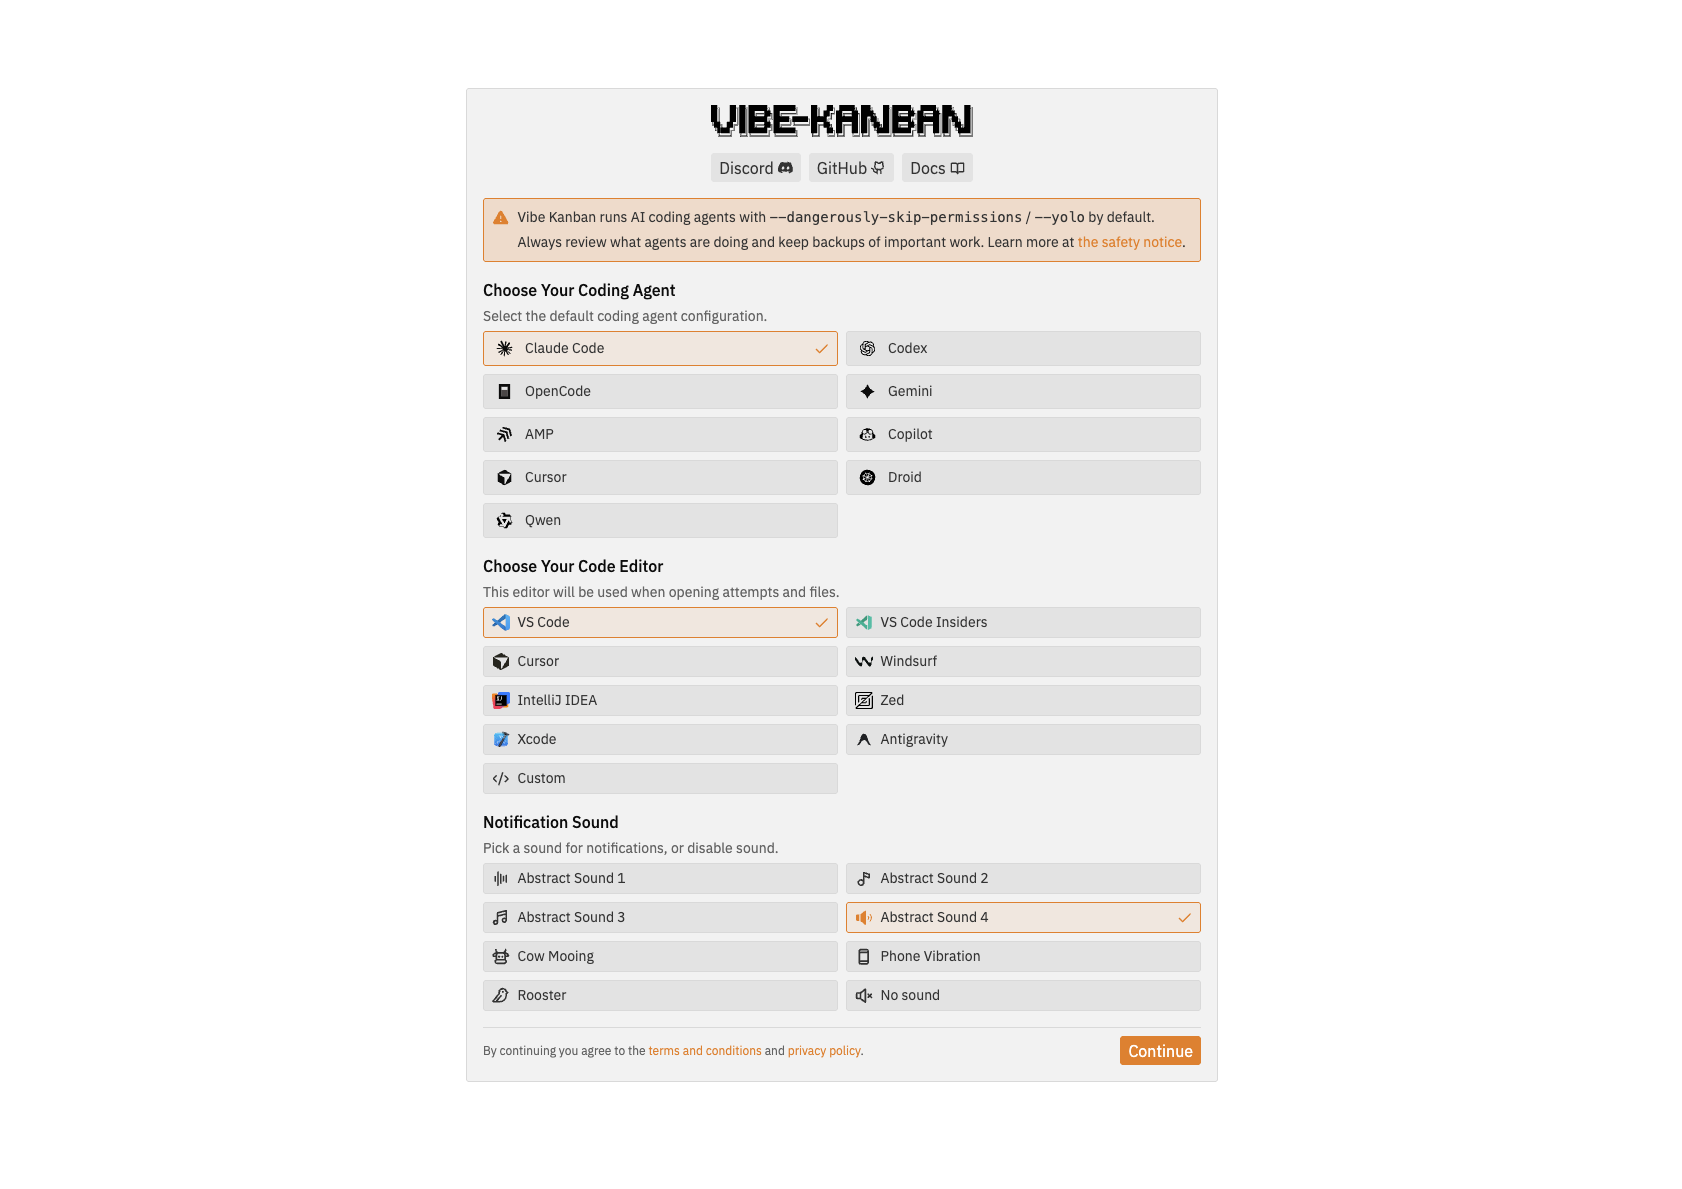
The first time you run Vibe Kanban, you’ll be asked to set your preferred:- Coding agent
- IDE
- Notification preferences
These preferences can be changed at any time from the settings dialog
3. Sign-in to Vibe Kanban
You can use a GitHub or Google account.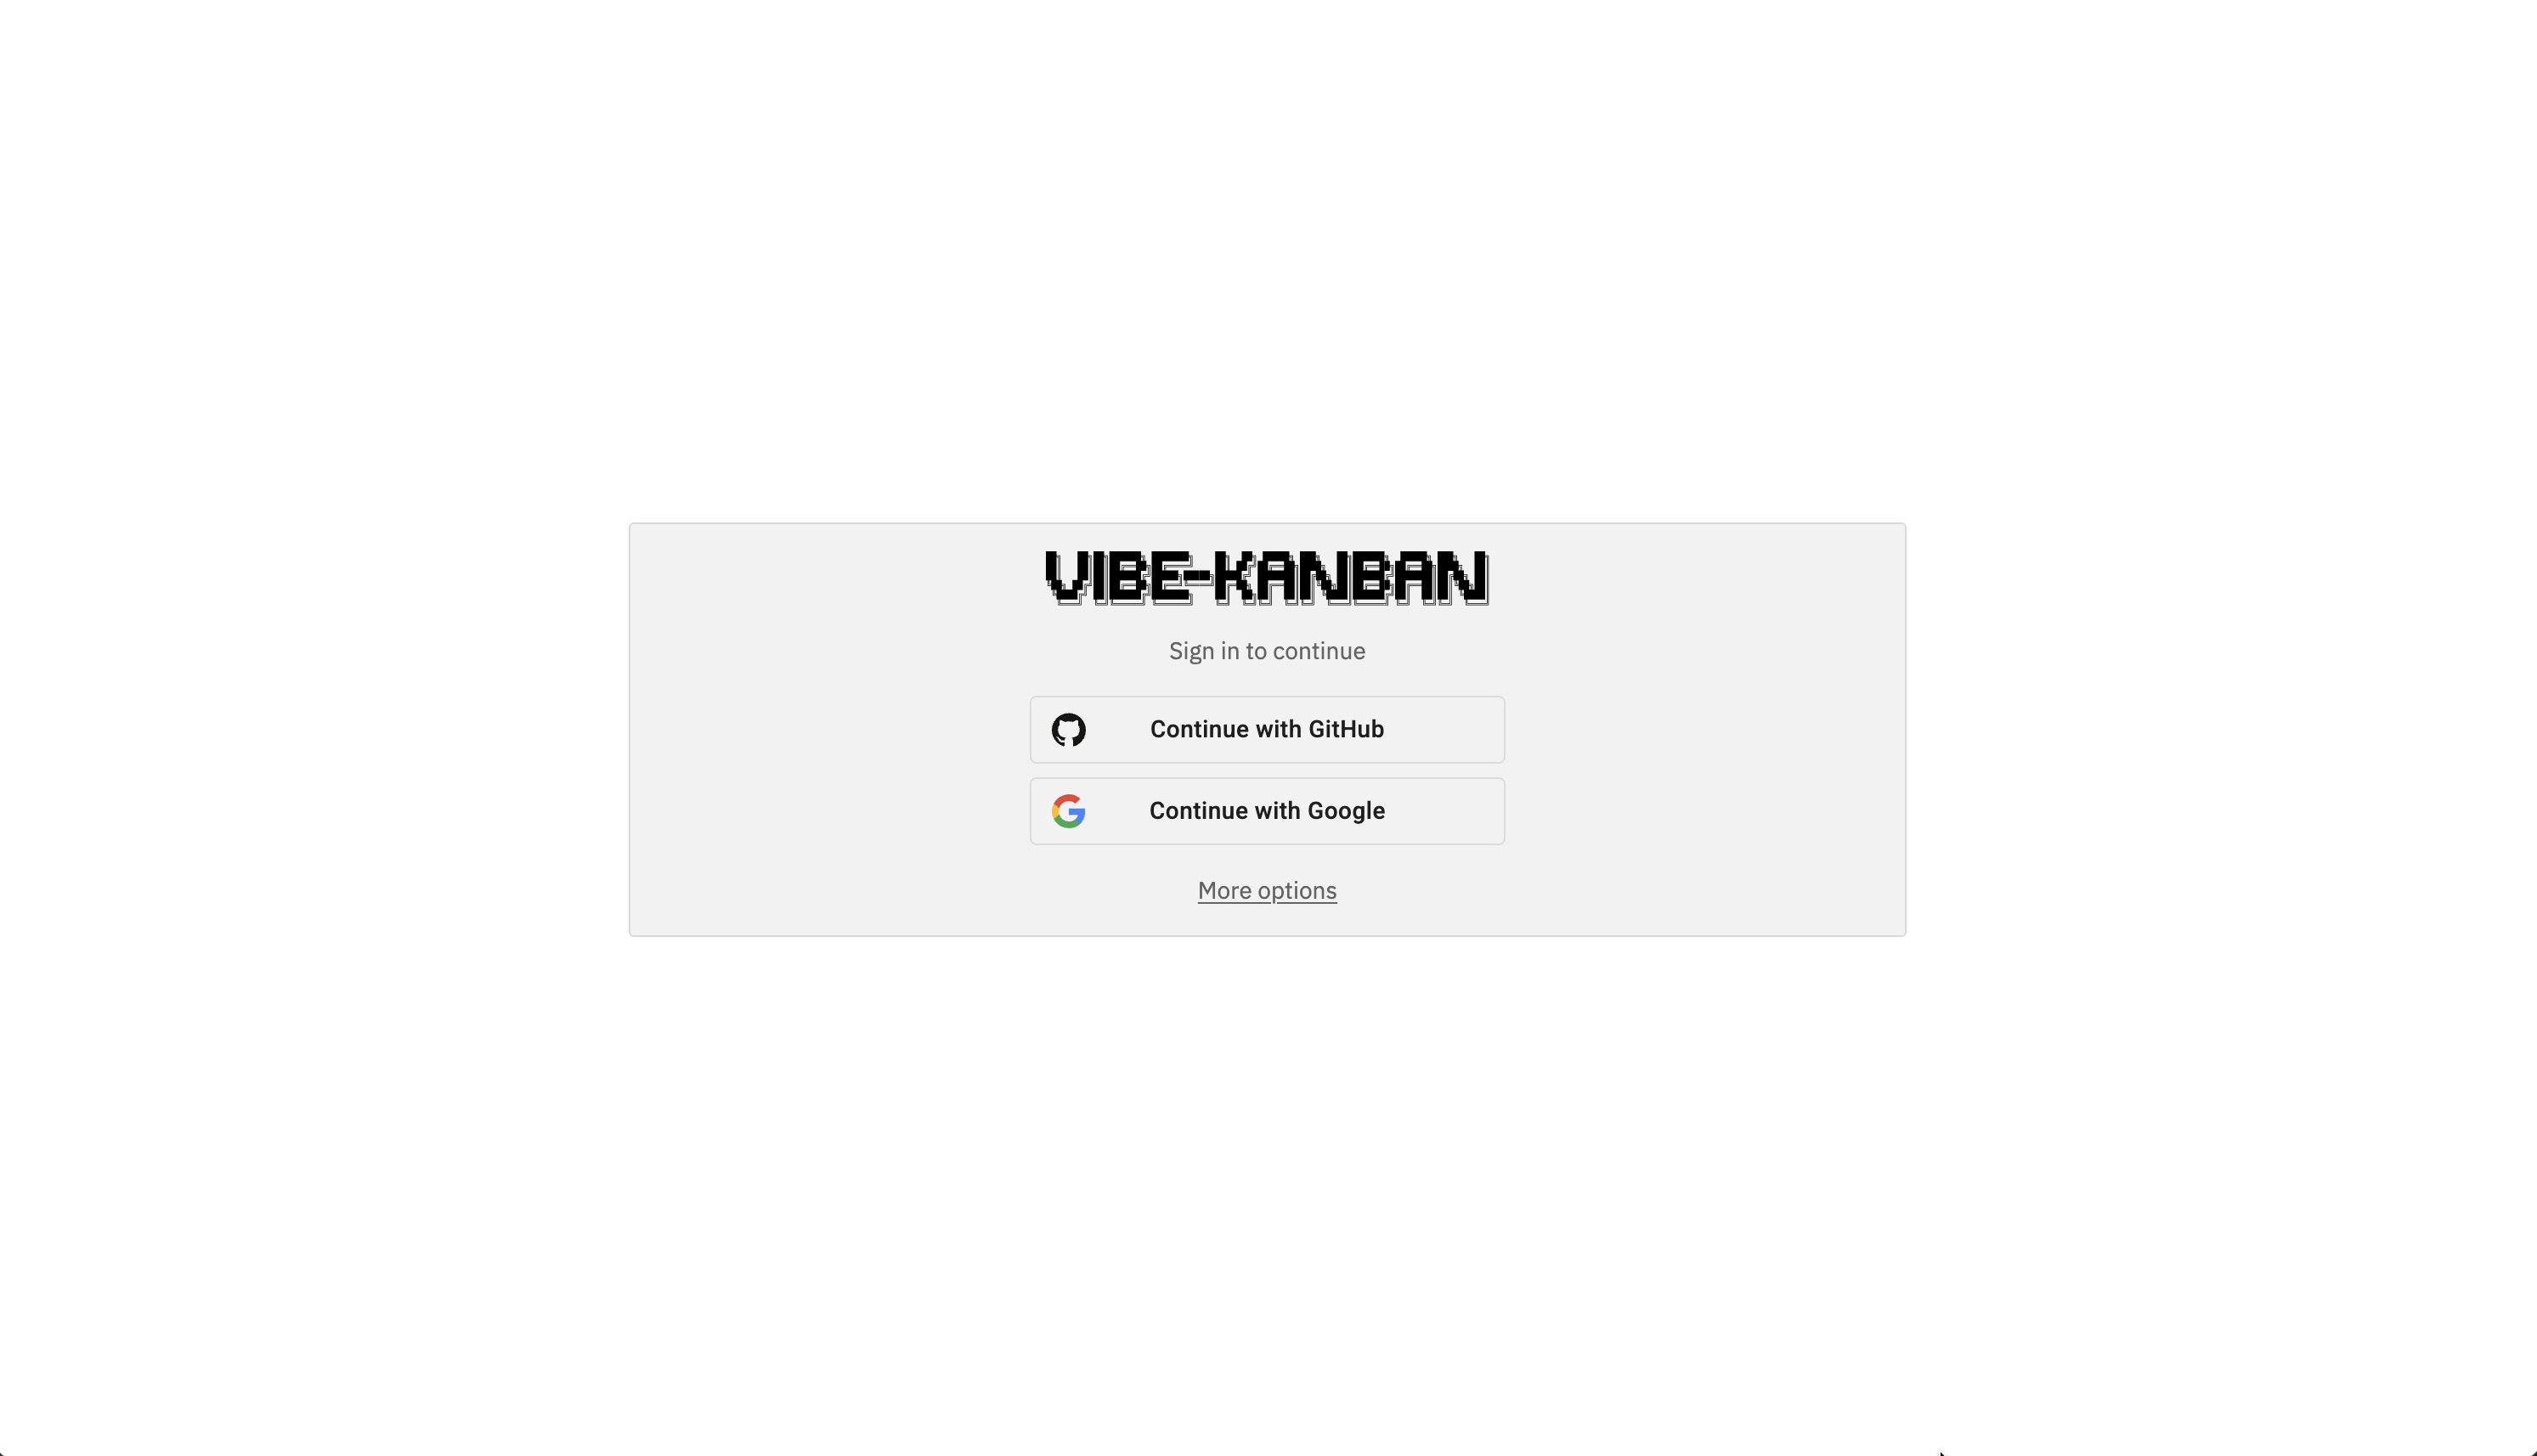
If you want to skip sign-in for now, click More options → I understand, continue without signing in. You’ll still be able to create workspaces, but the kanban board, issues, and team features will be unavailable.
4. Navigate the kanban board
After you sign in, we automatically create a personal organisation and an initial project for you, and take you straight there.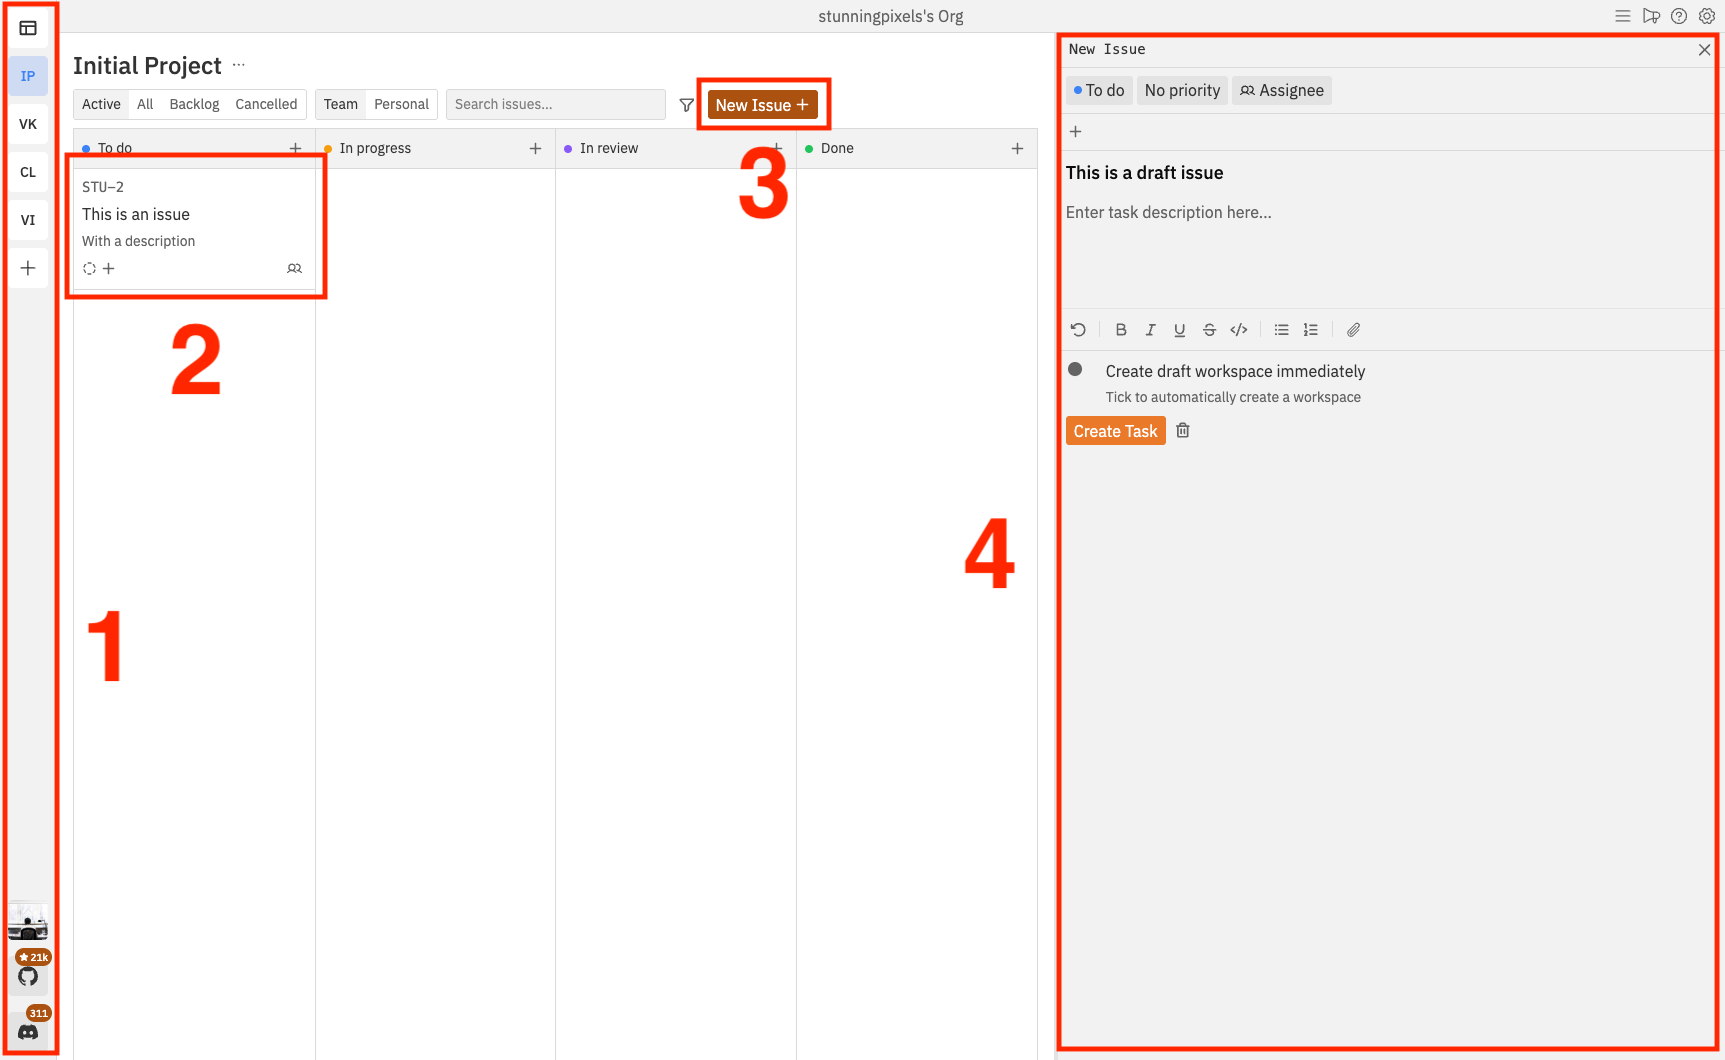
- The app bar, used for navigating between projects, the workspaces page (we’ll come onto this later) and user settings
- Issues appear as cards on the kanban board
- The ‘new issue’ button, for creating issues
- The right hand panel where details for the currently selected or draft issue is shown
5. Create an issue
Issues are a core concept of Vibe Kanban, they represent a bug, feature or piece of work to be done. At a minimum, issues consist of a title and description, but you can also add priorities, tags and even connect issues together with parent/child relationships.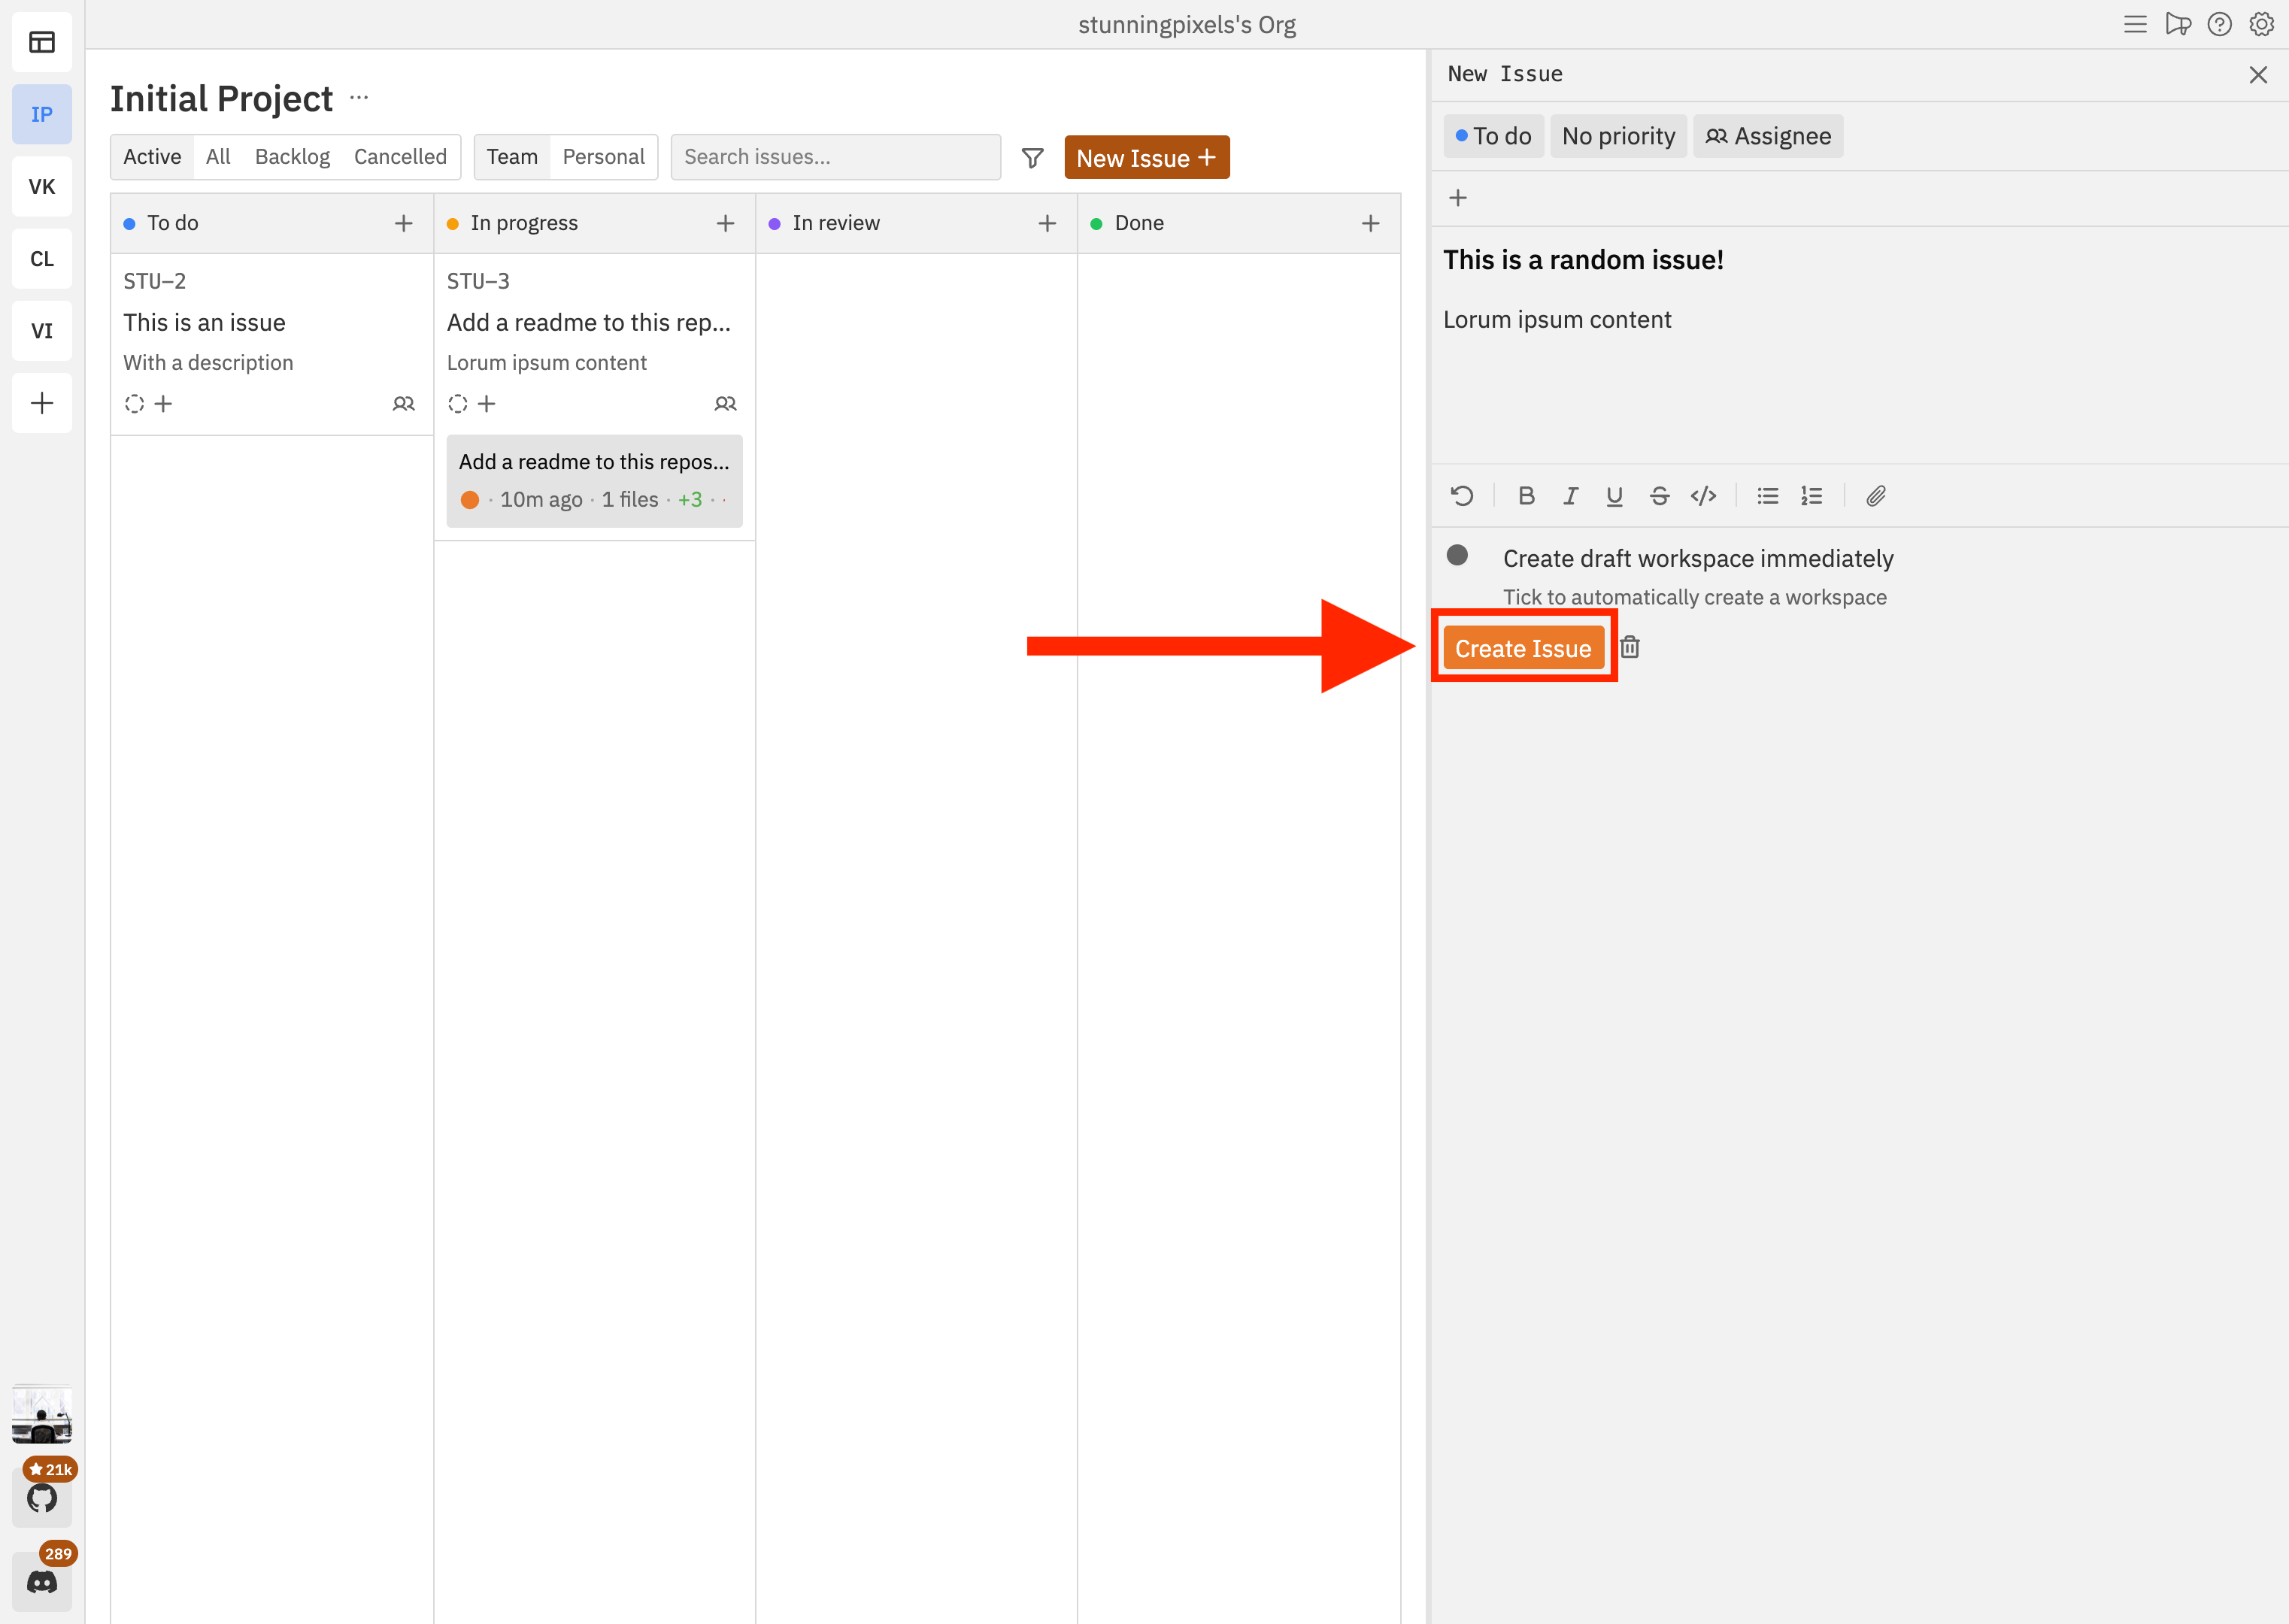
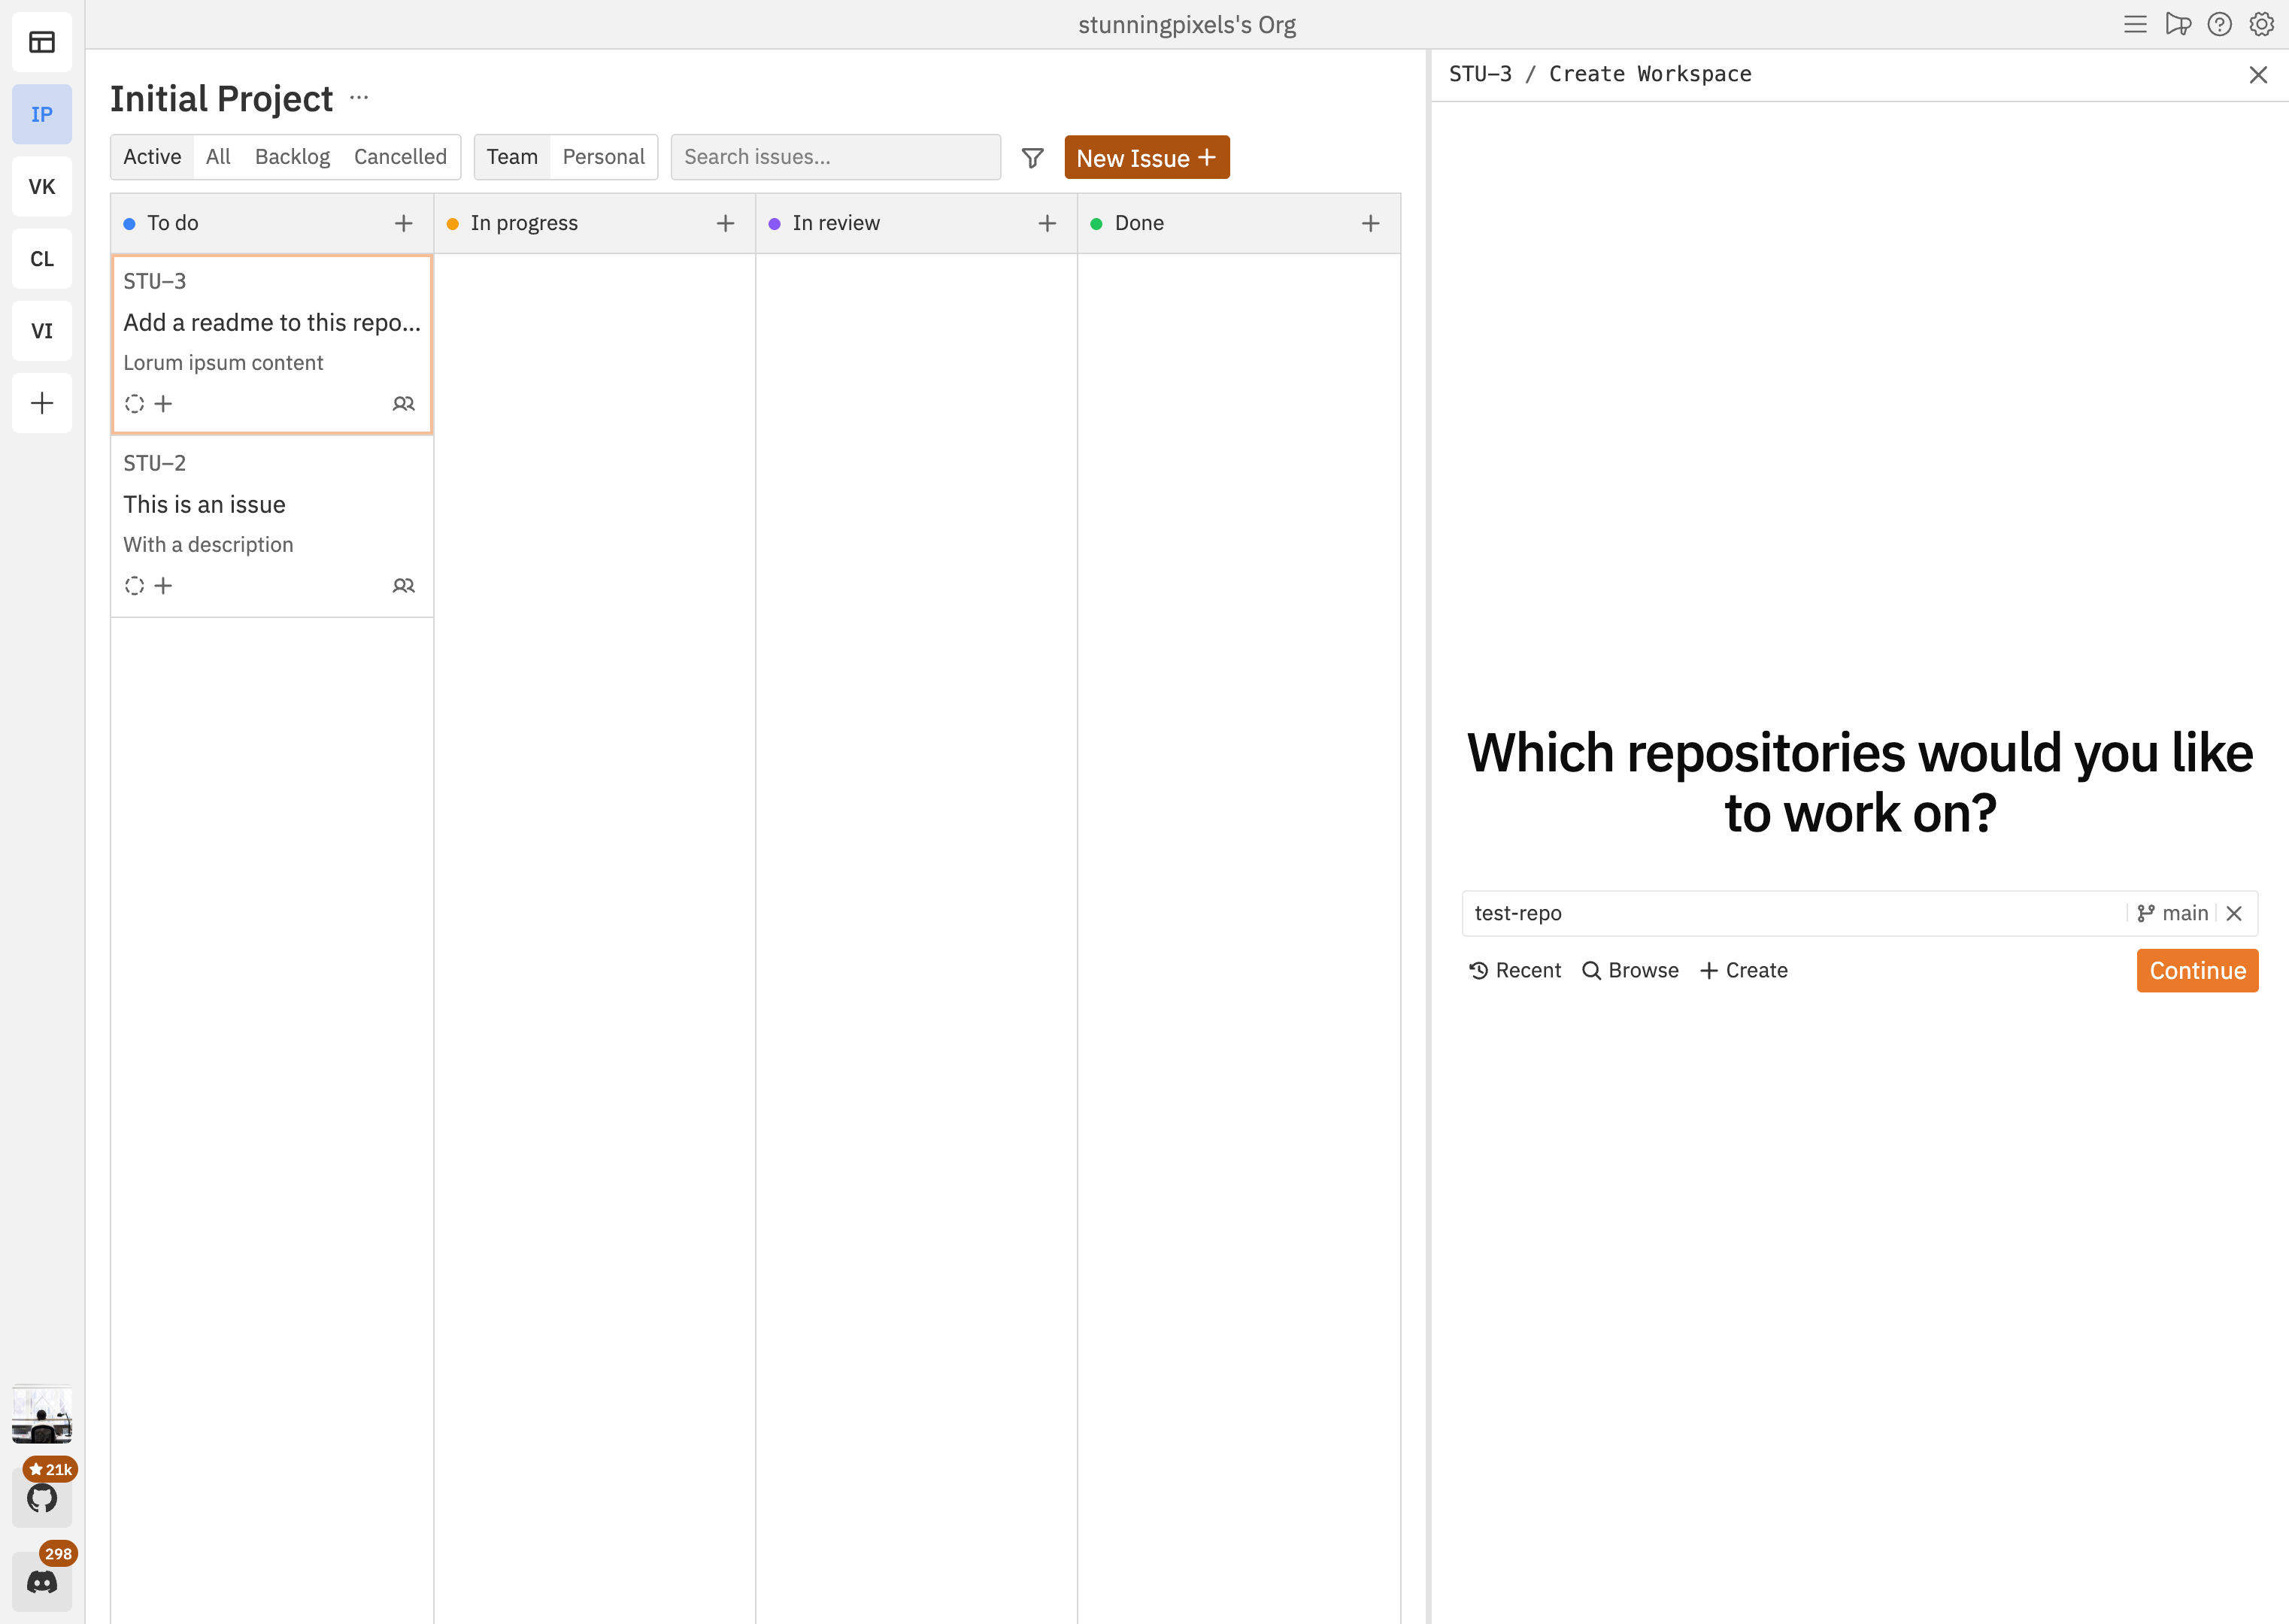
6. Create a workspace
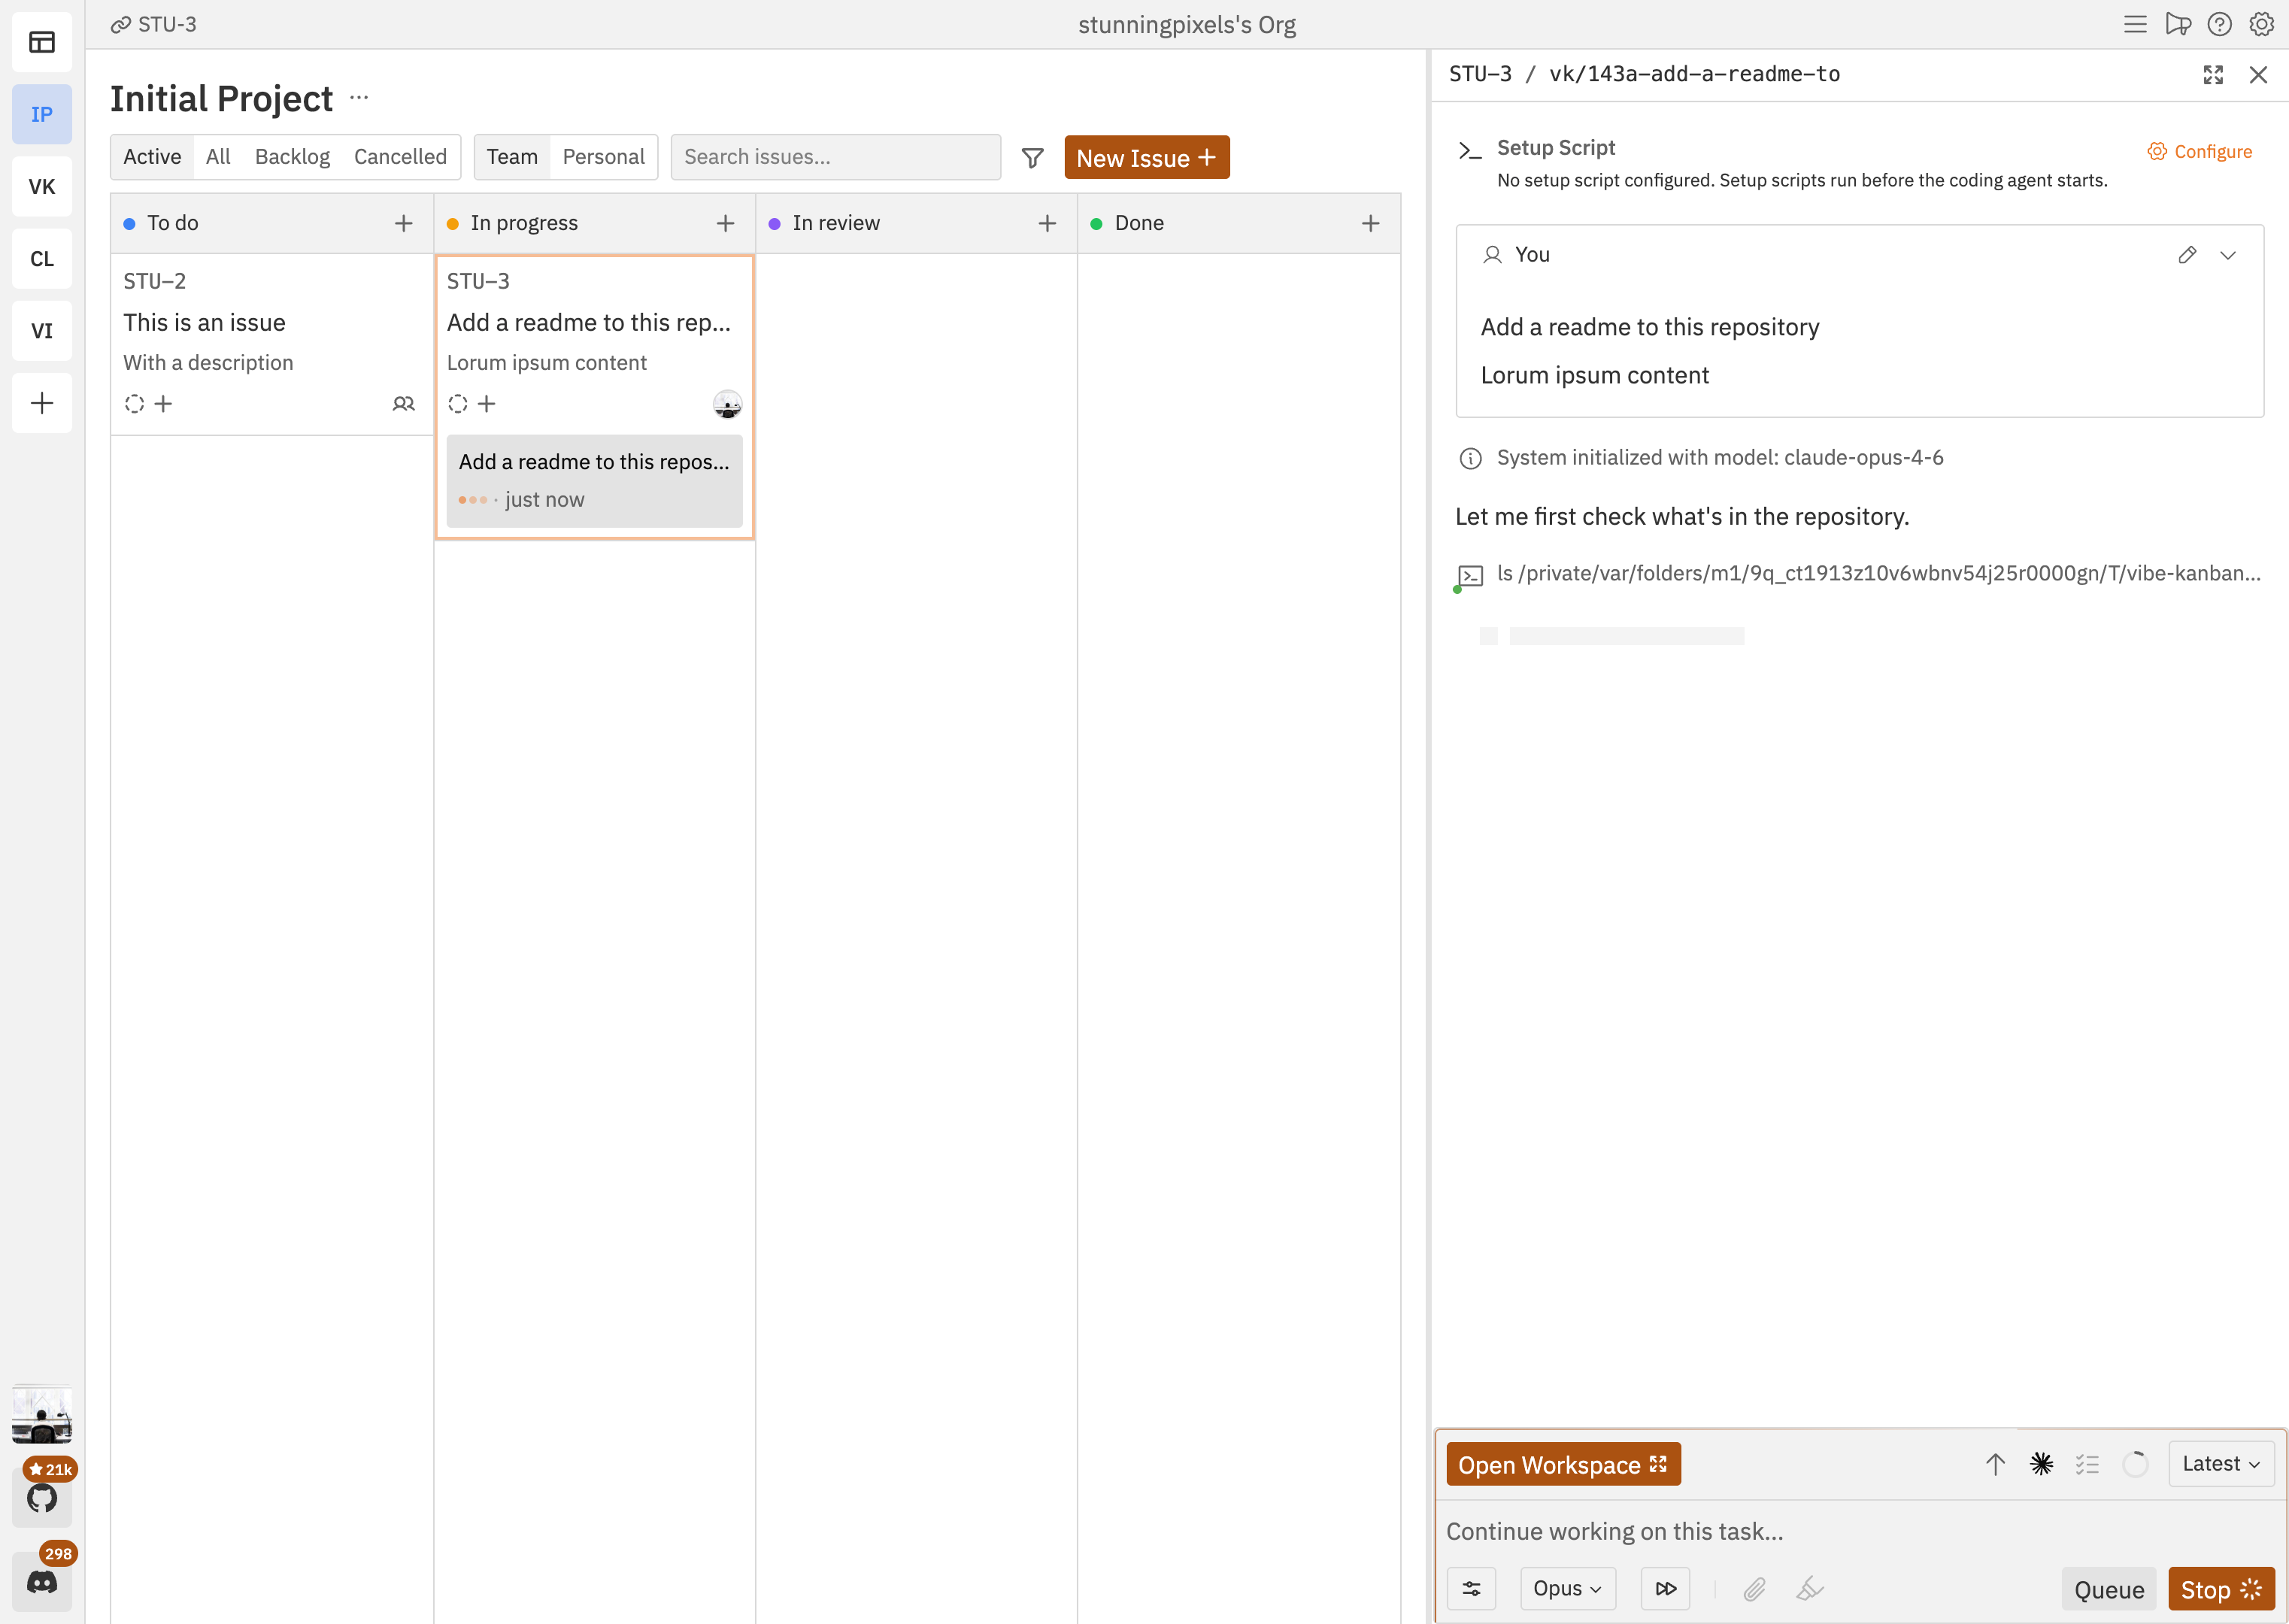
Workspaces are another core concept of Vibe Kanban, they represent a space to work on an issue with a coding agent. When you create a workspace, Vibe Kanban automatically creates git worktrees for your selected repositories, and launches your coding agent.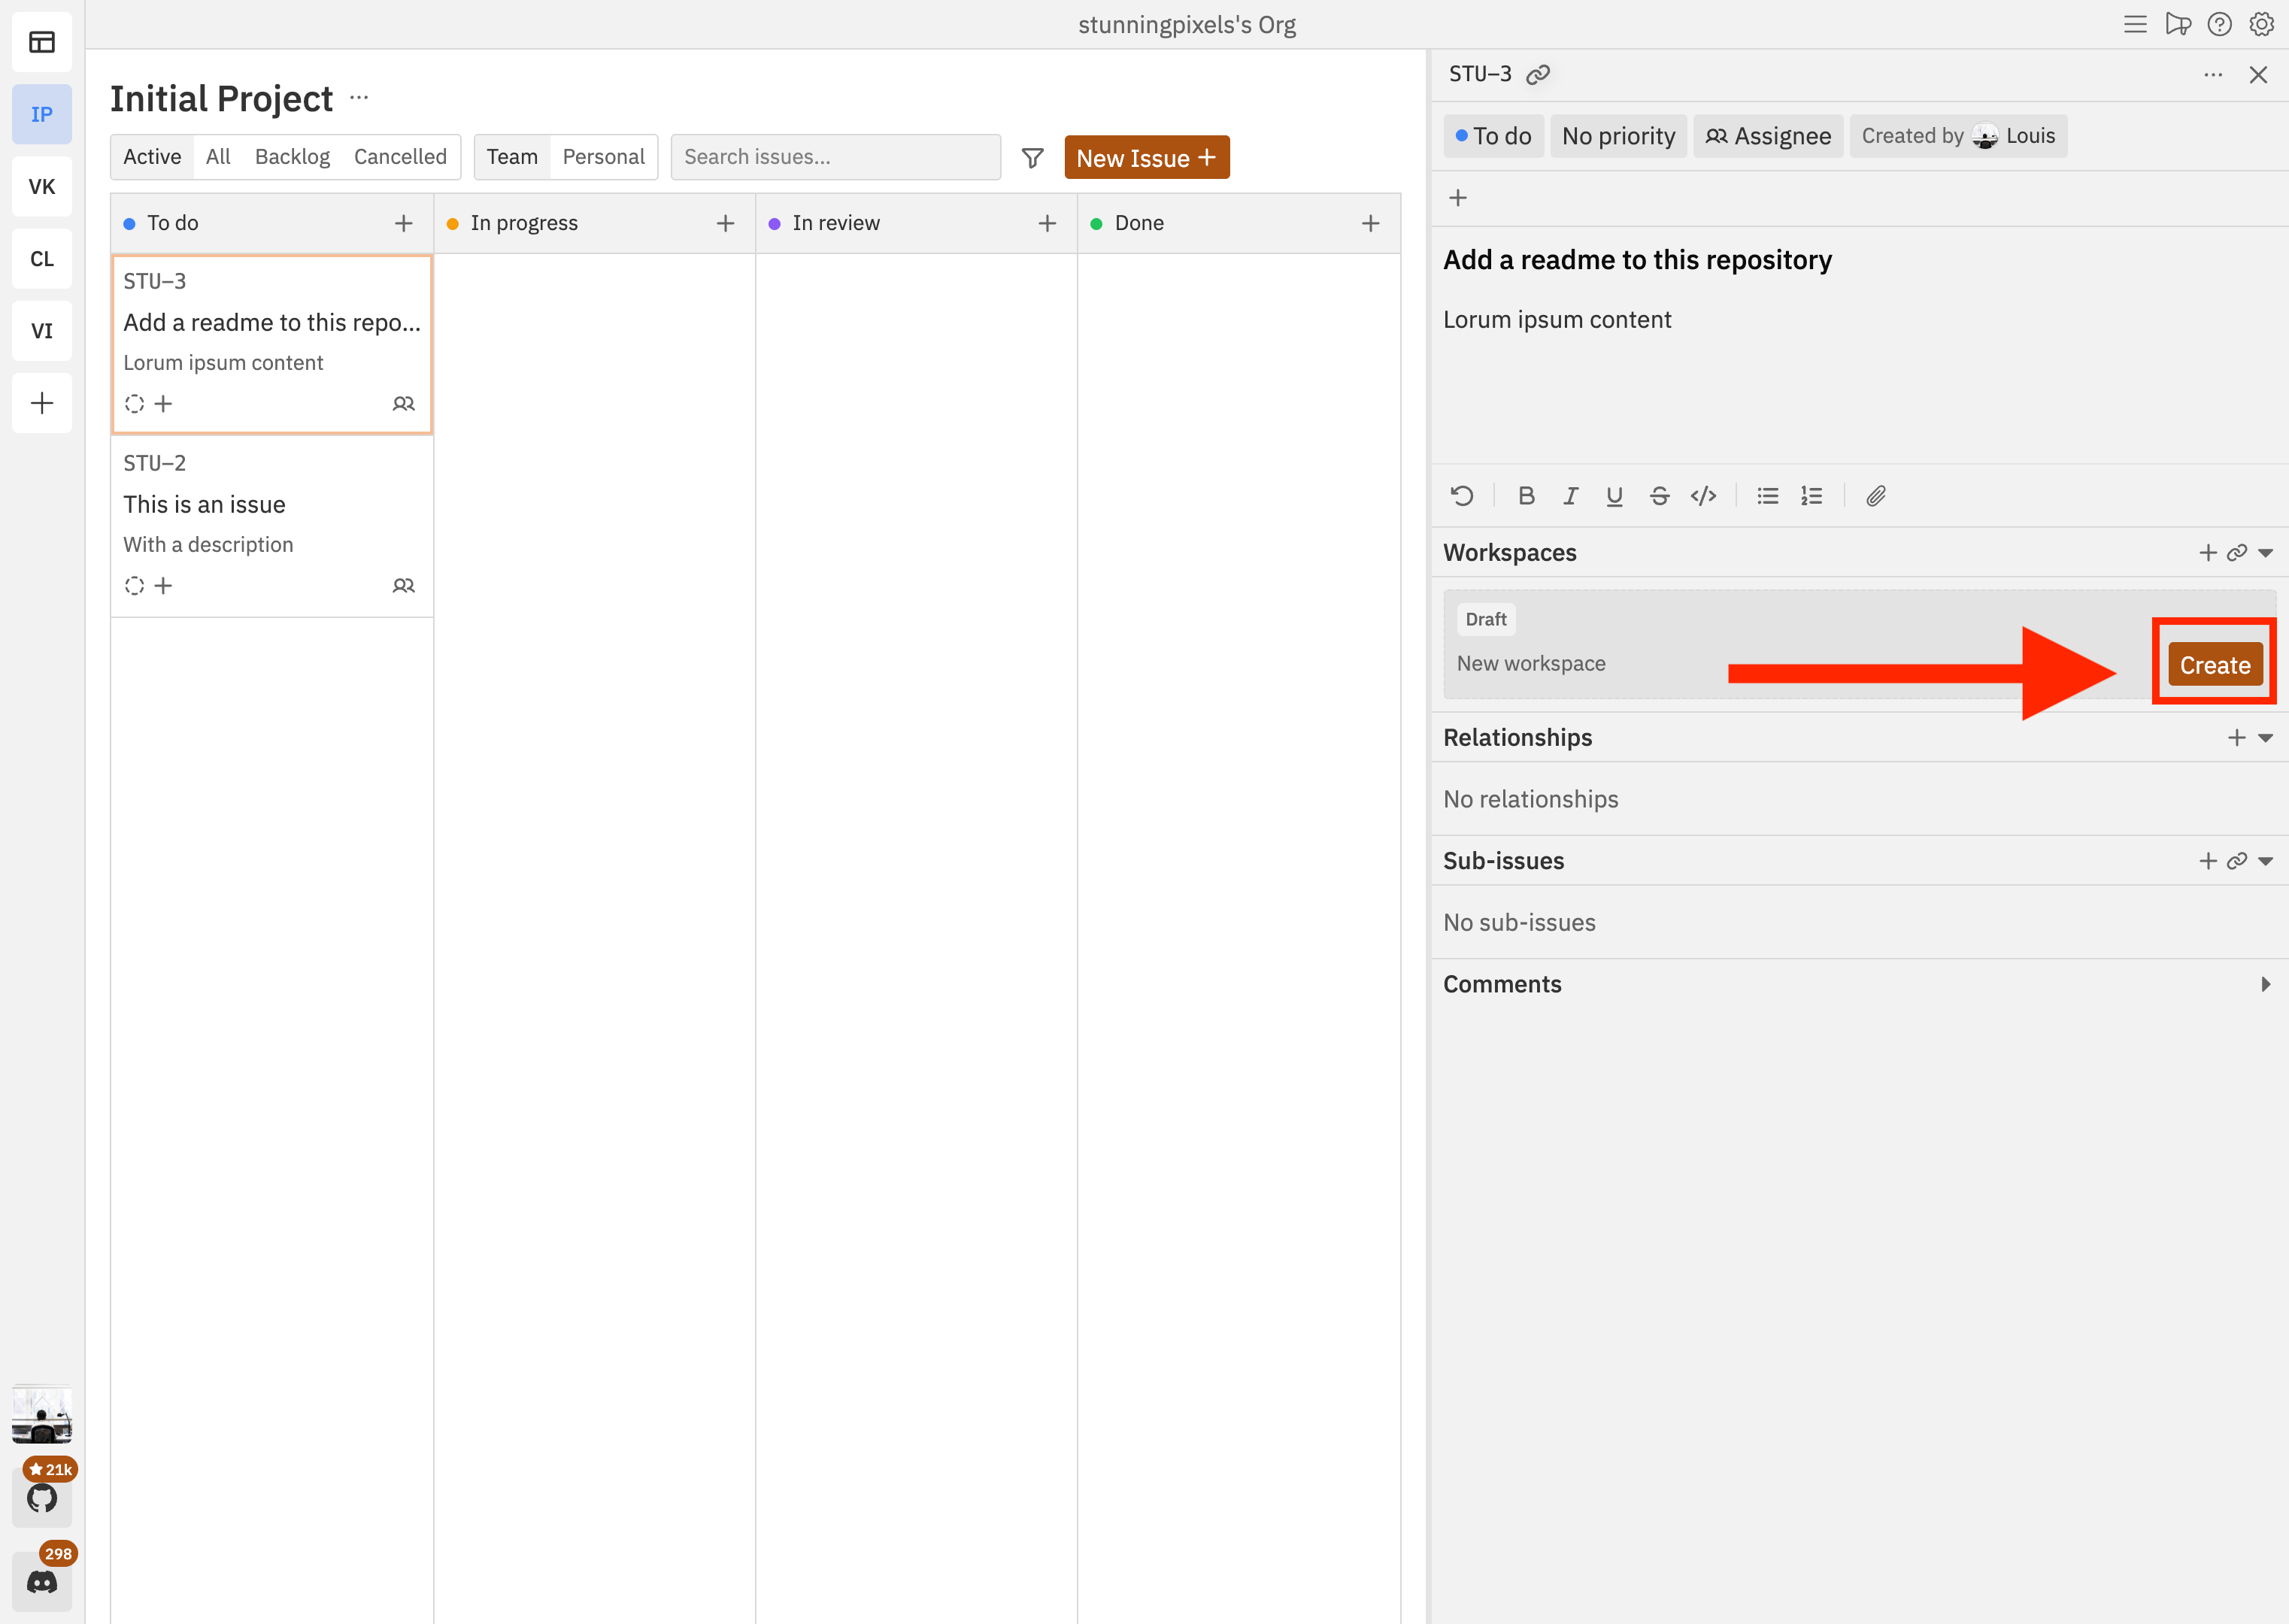
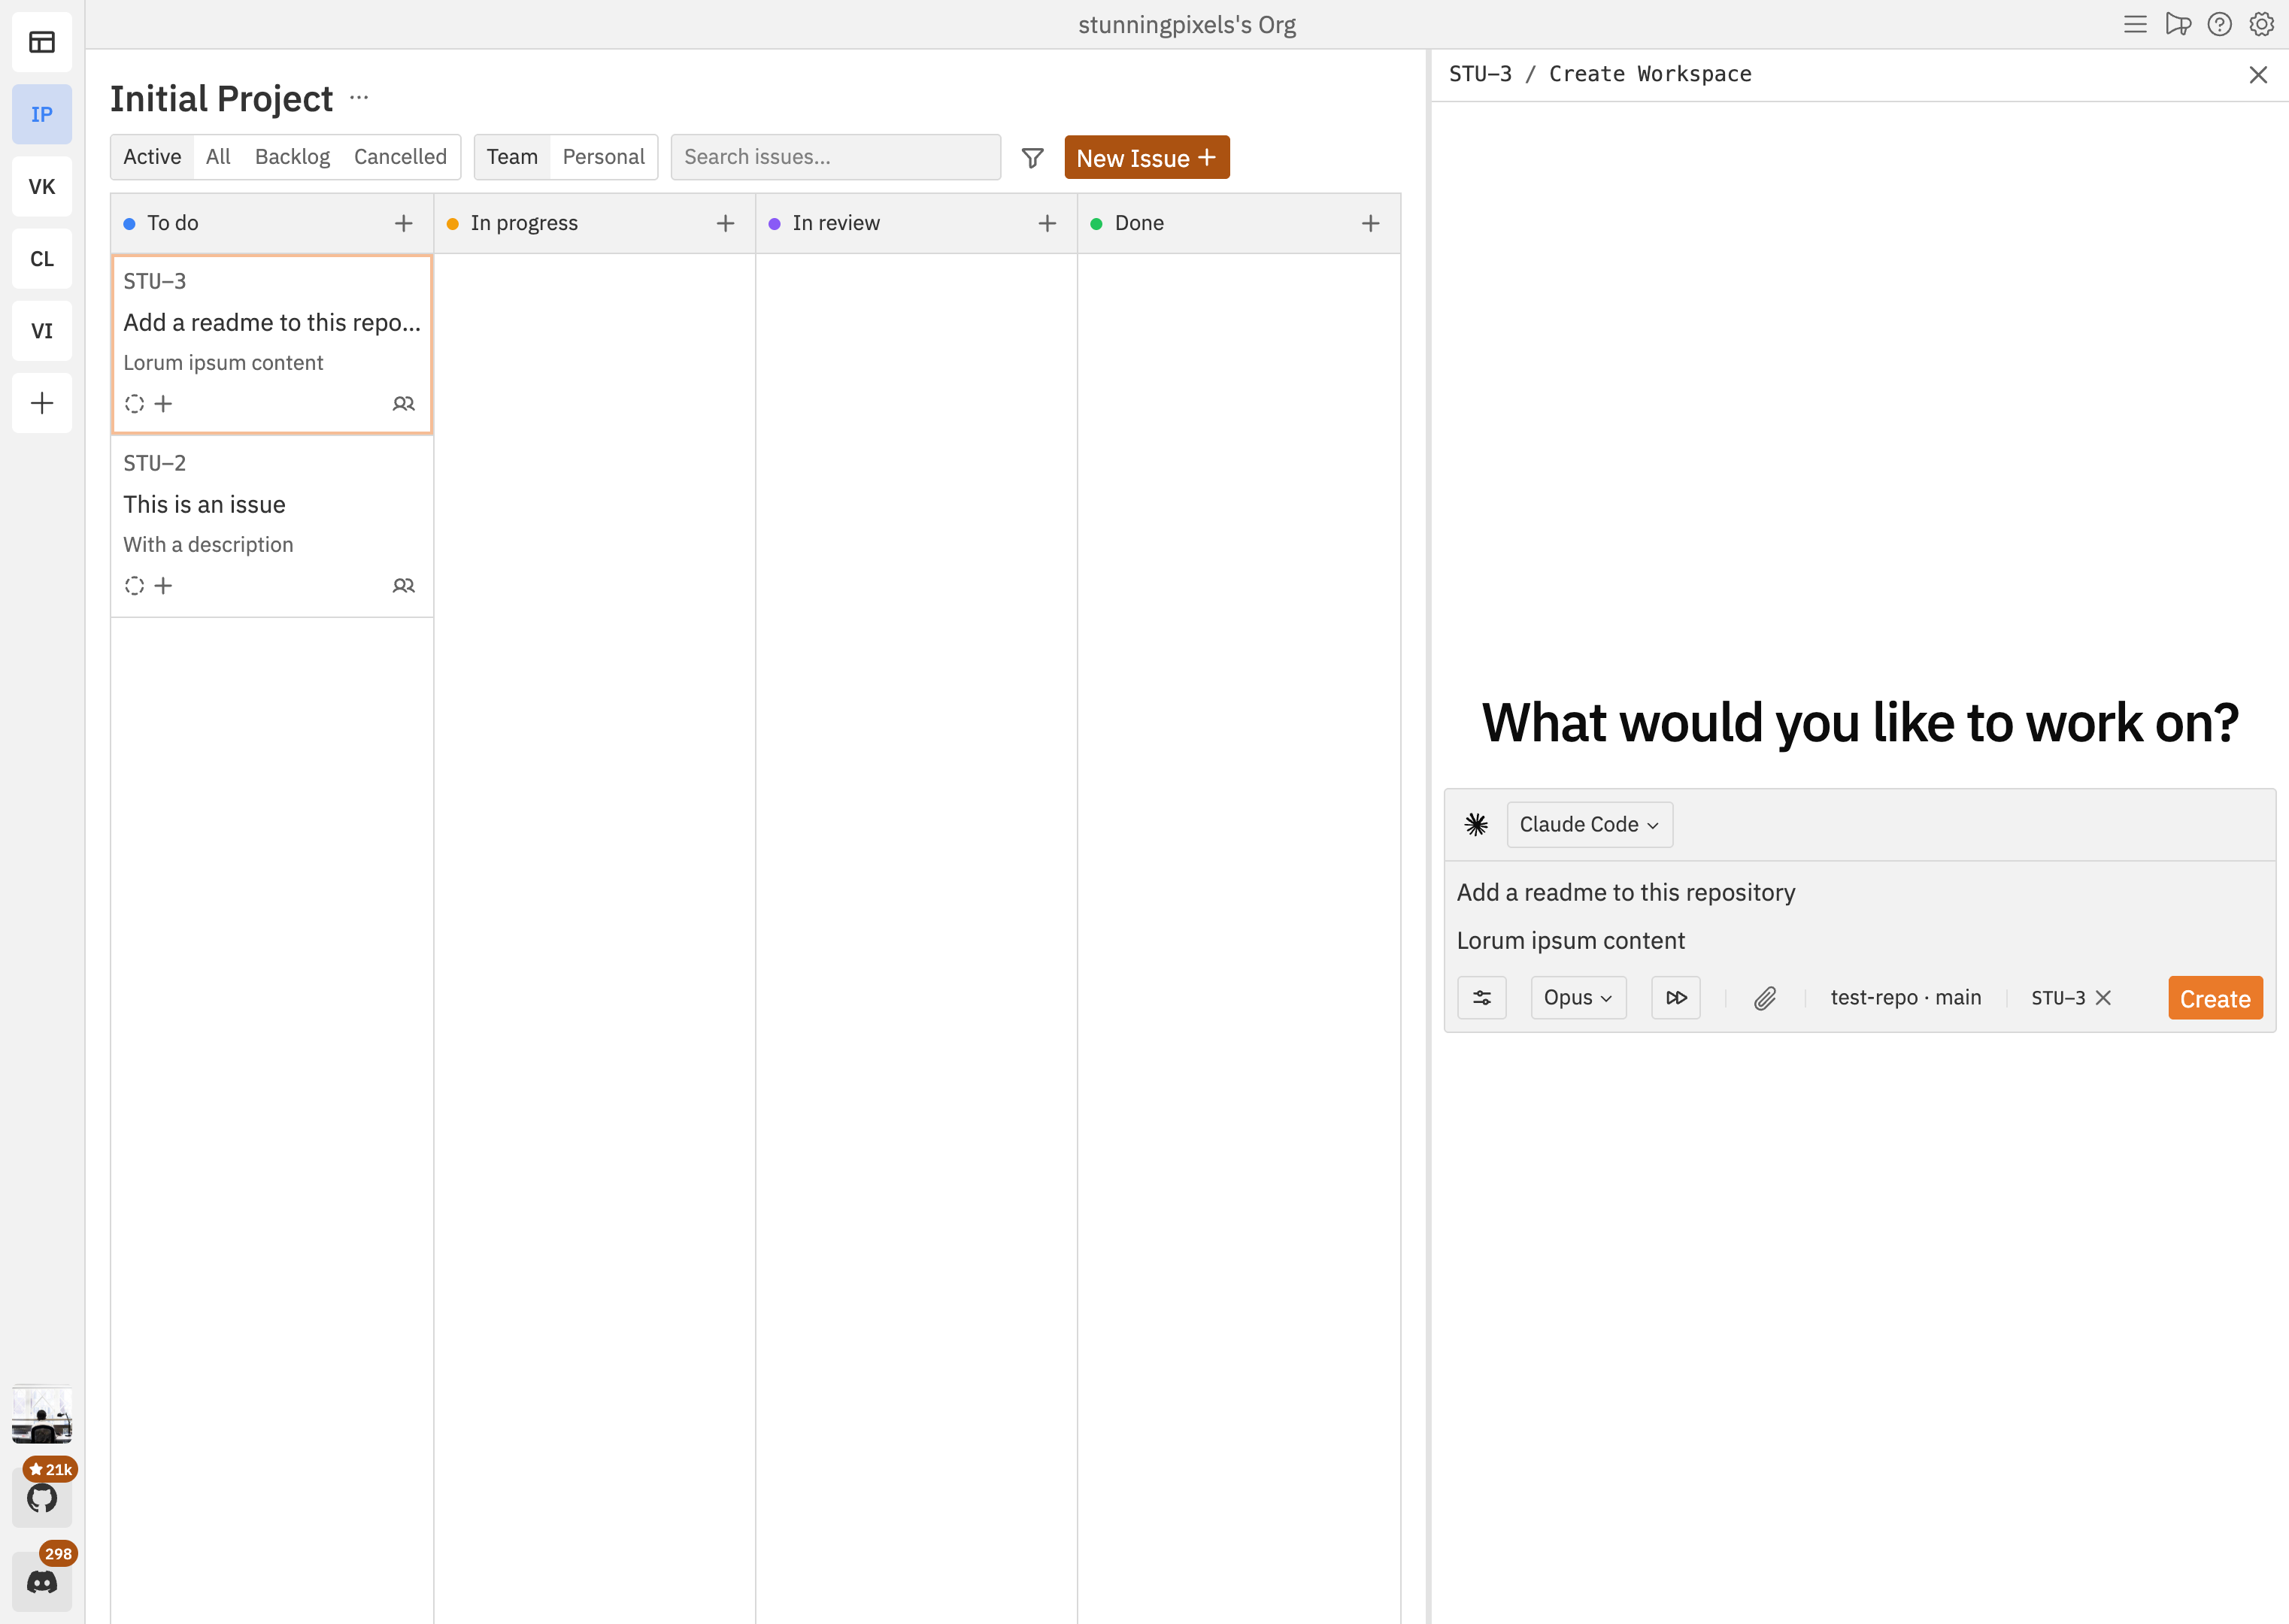
You can connect multiple workspaces to an issue, this is useful for working on larger features and allows you to run multiple coding agents in parallel.Workspaces don’t have to be connected to an issue, which is useful for quick actions like asking questions about a codebase.
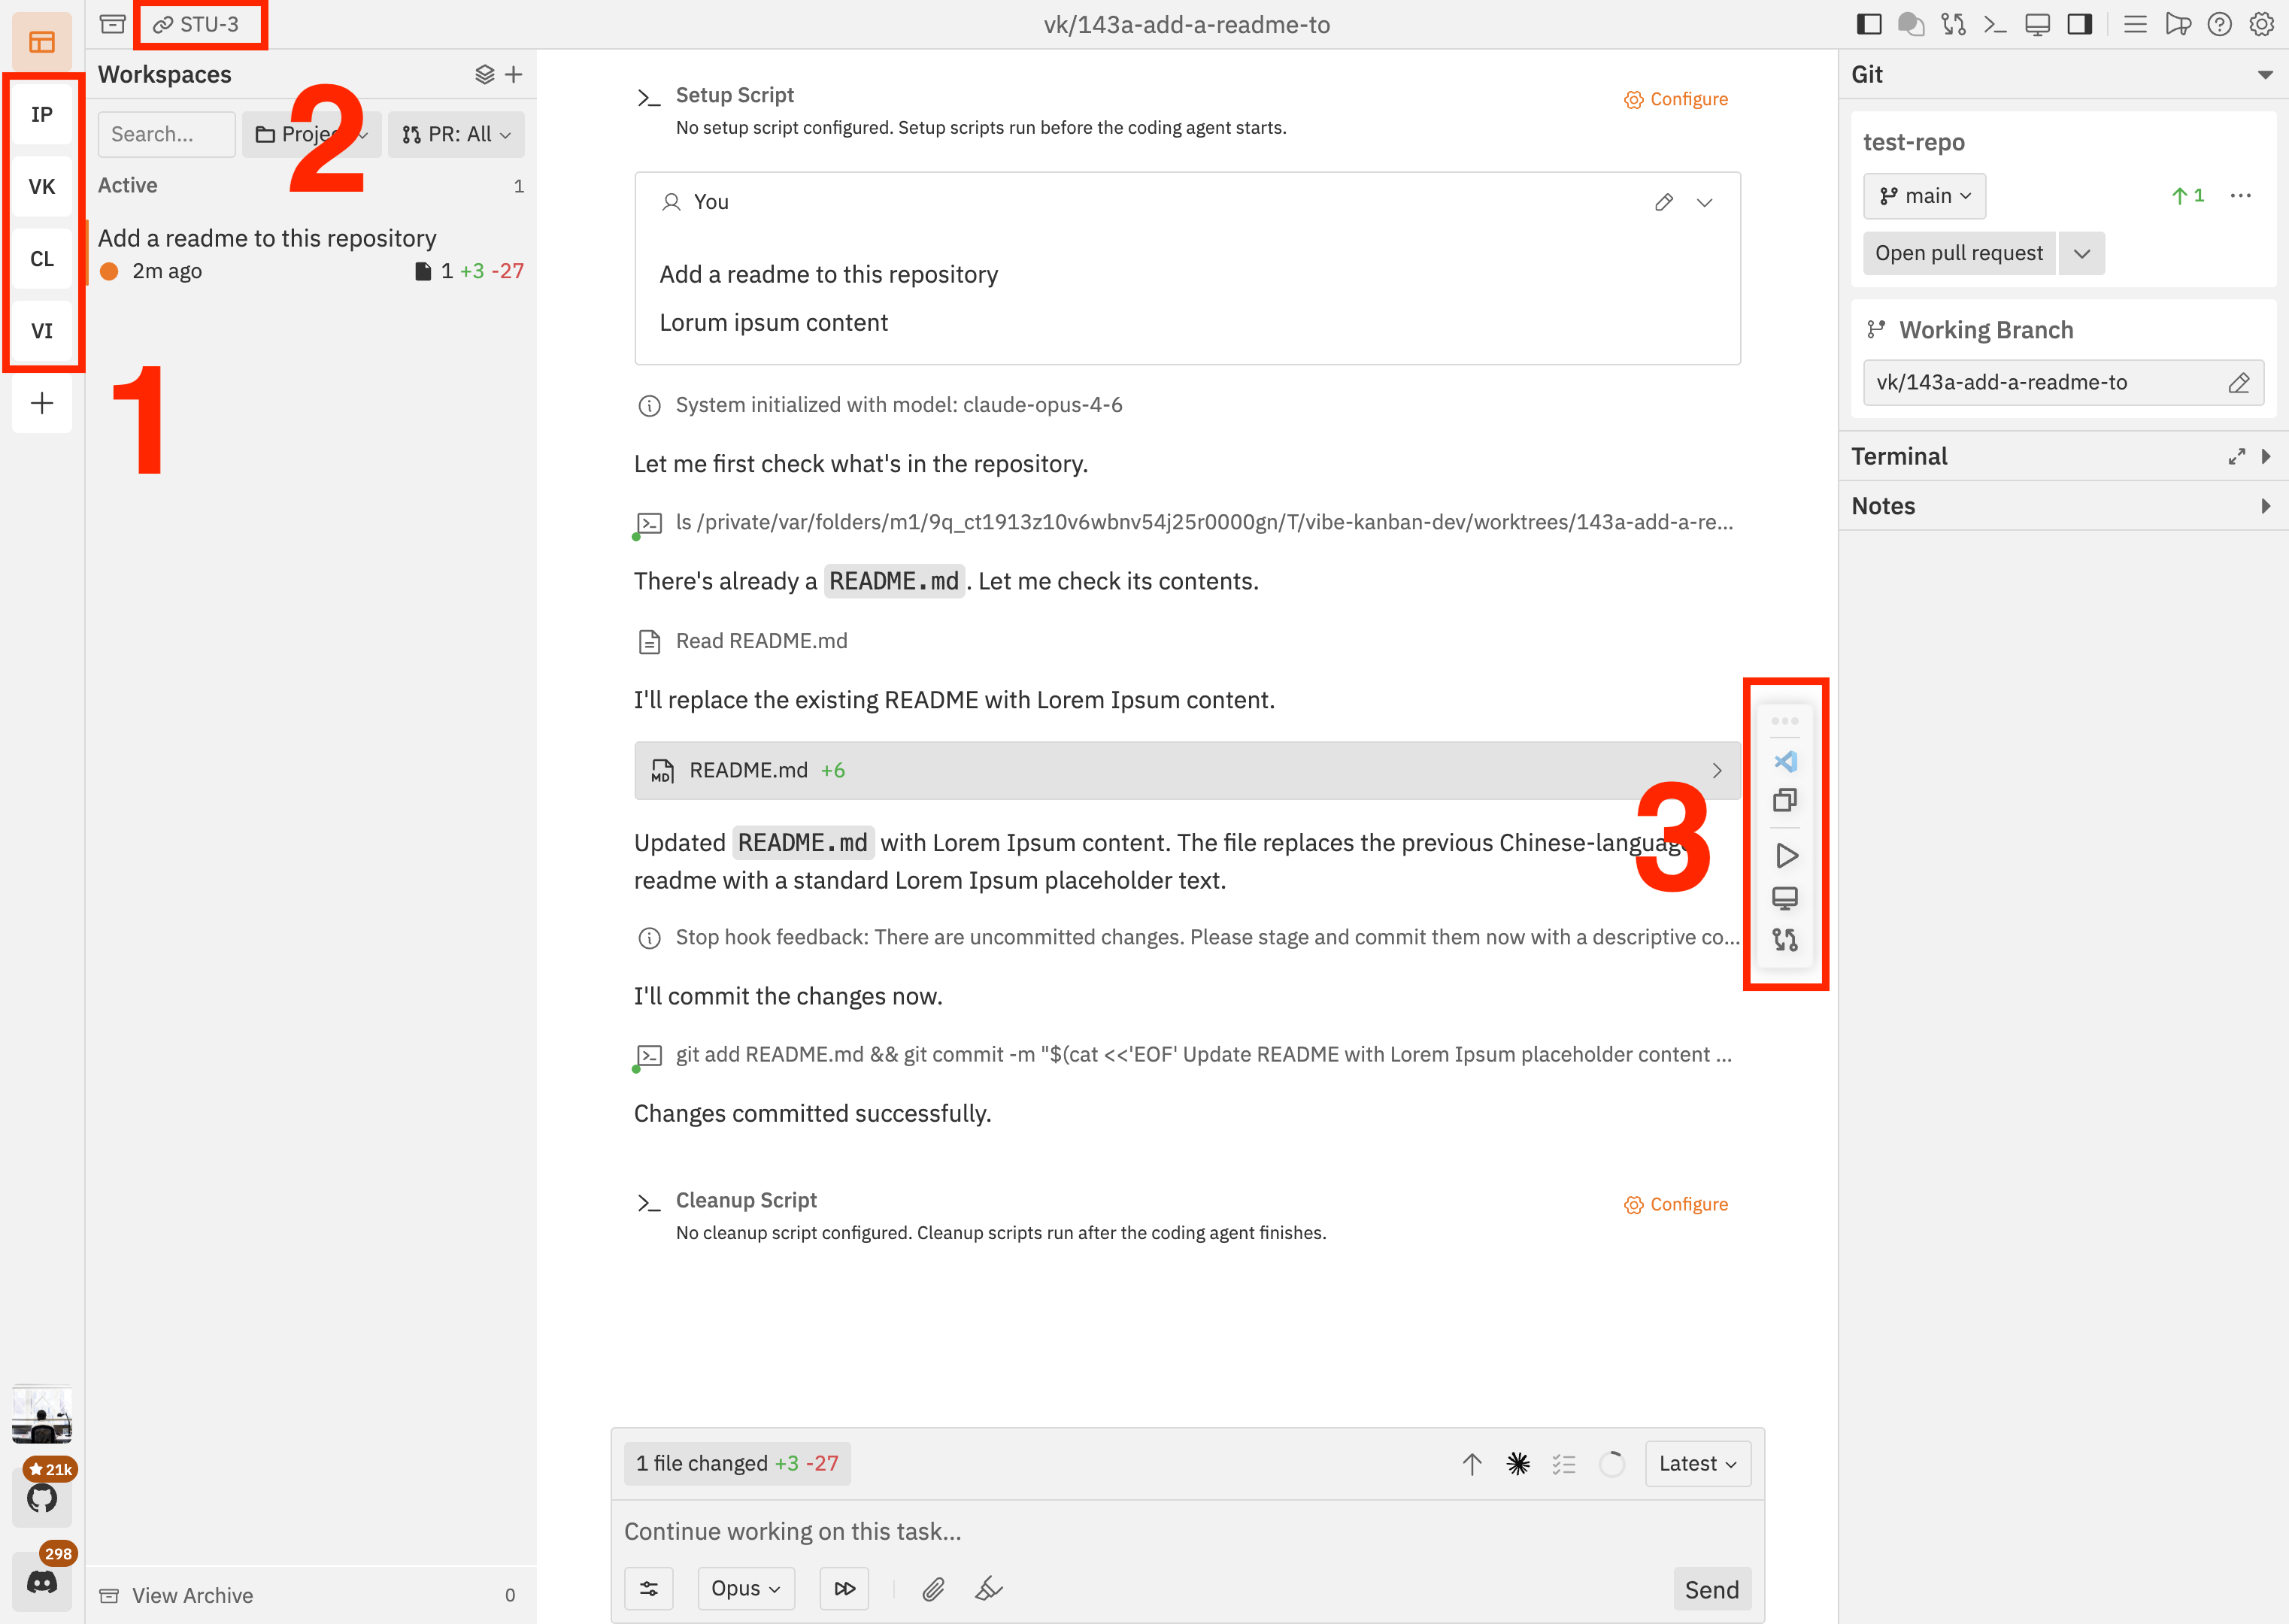
7. Reviewing a workspace
So far we’ve been viewing the workspace side-by-side with our kanban board. However, if we want more room to review the code changes or test them in a browser, we can open the workspace in the workspaces view.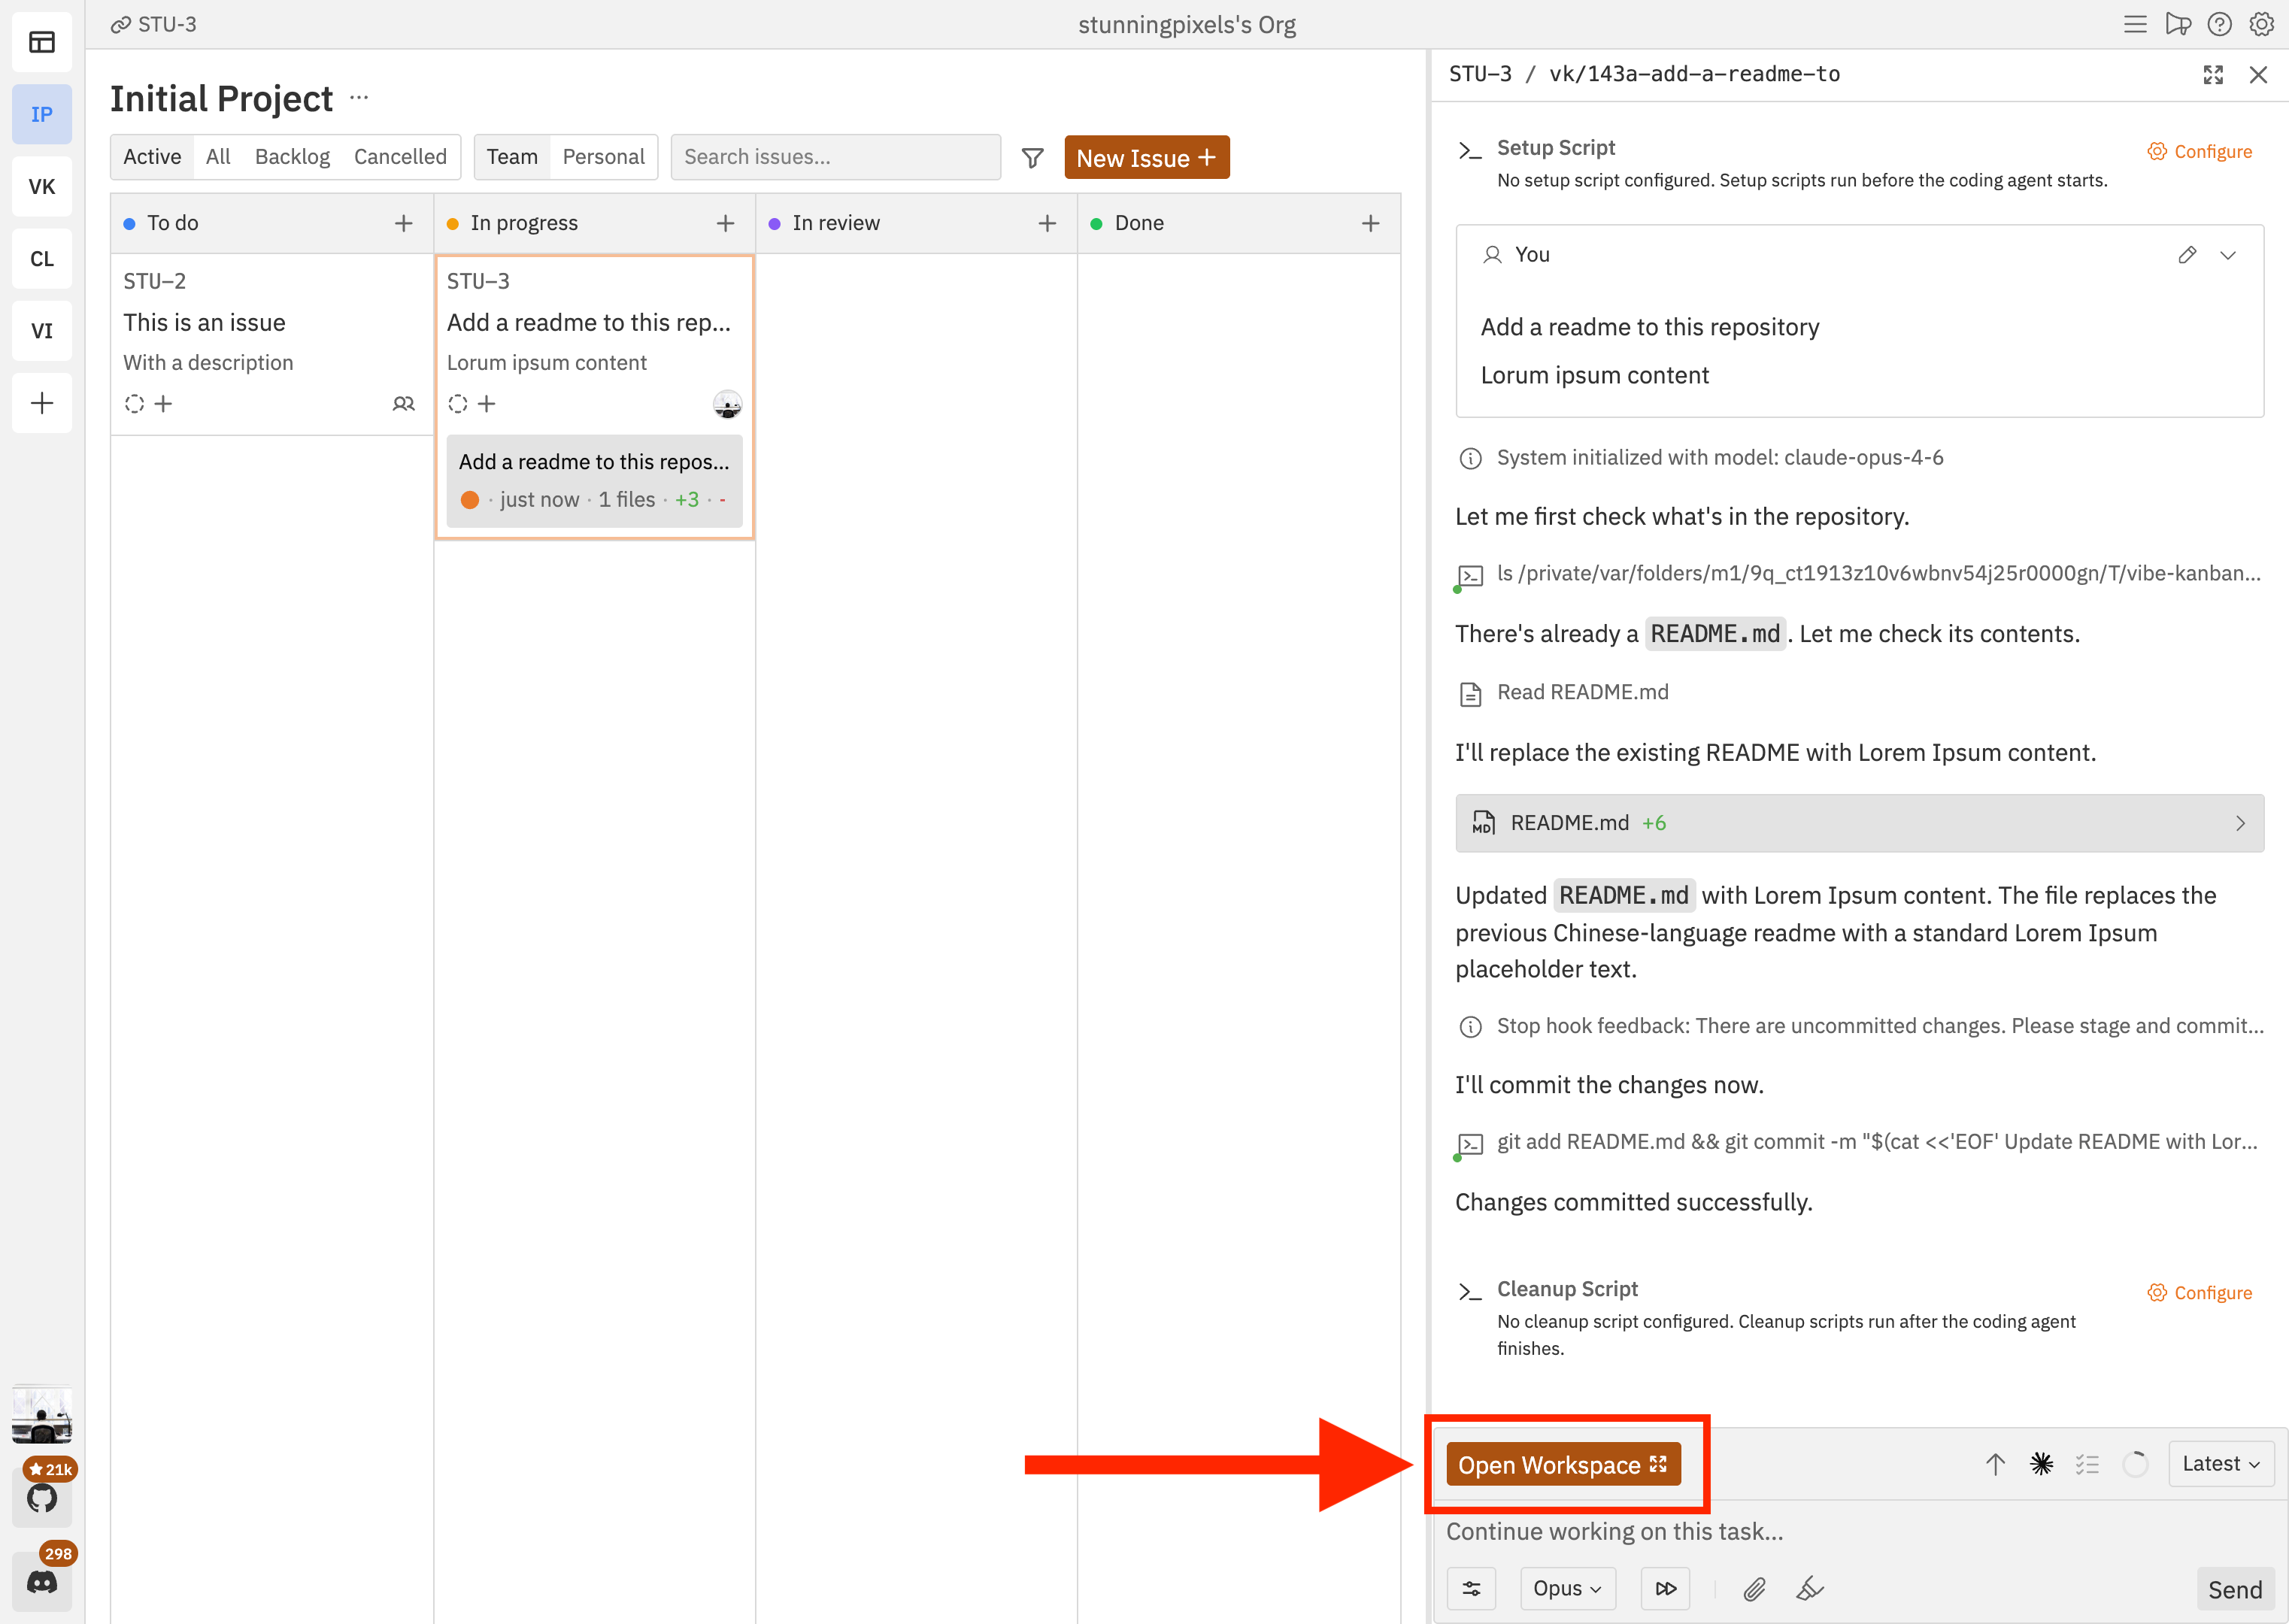
8. Merging a workspace
When you’re ready to merge the changes in a workspace, you can either open a GitHub pull request or merge the workspace branch locally.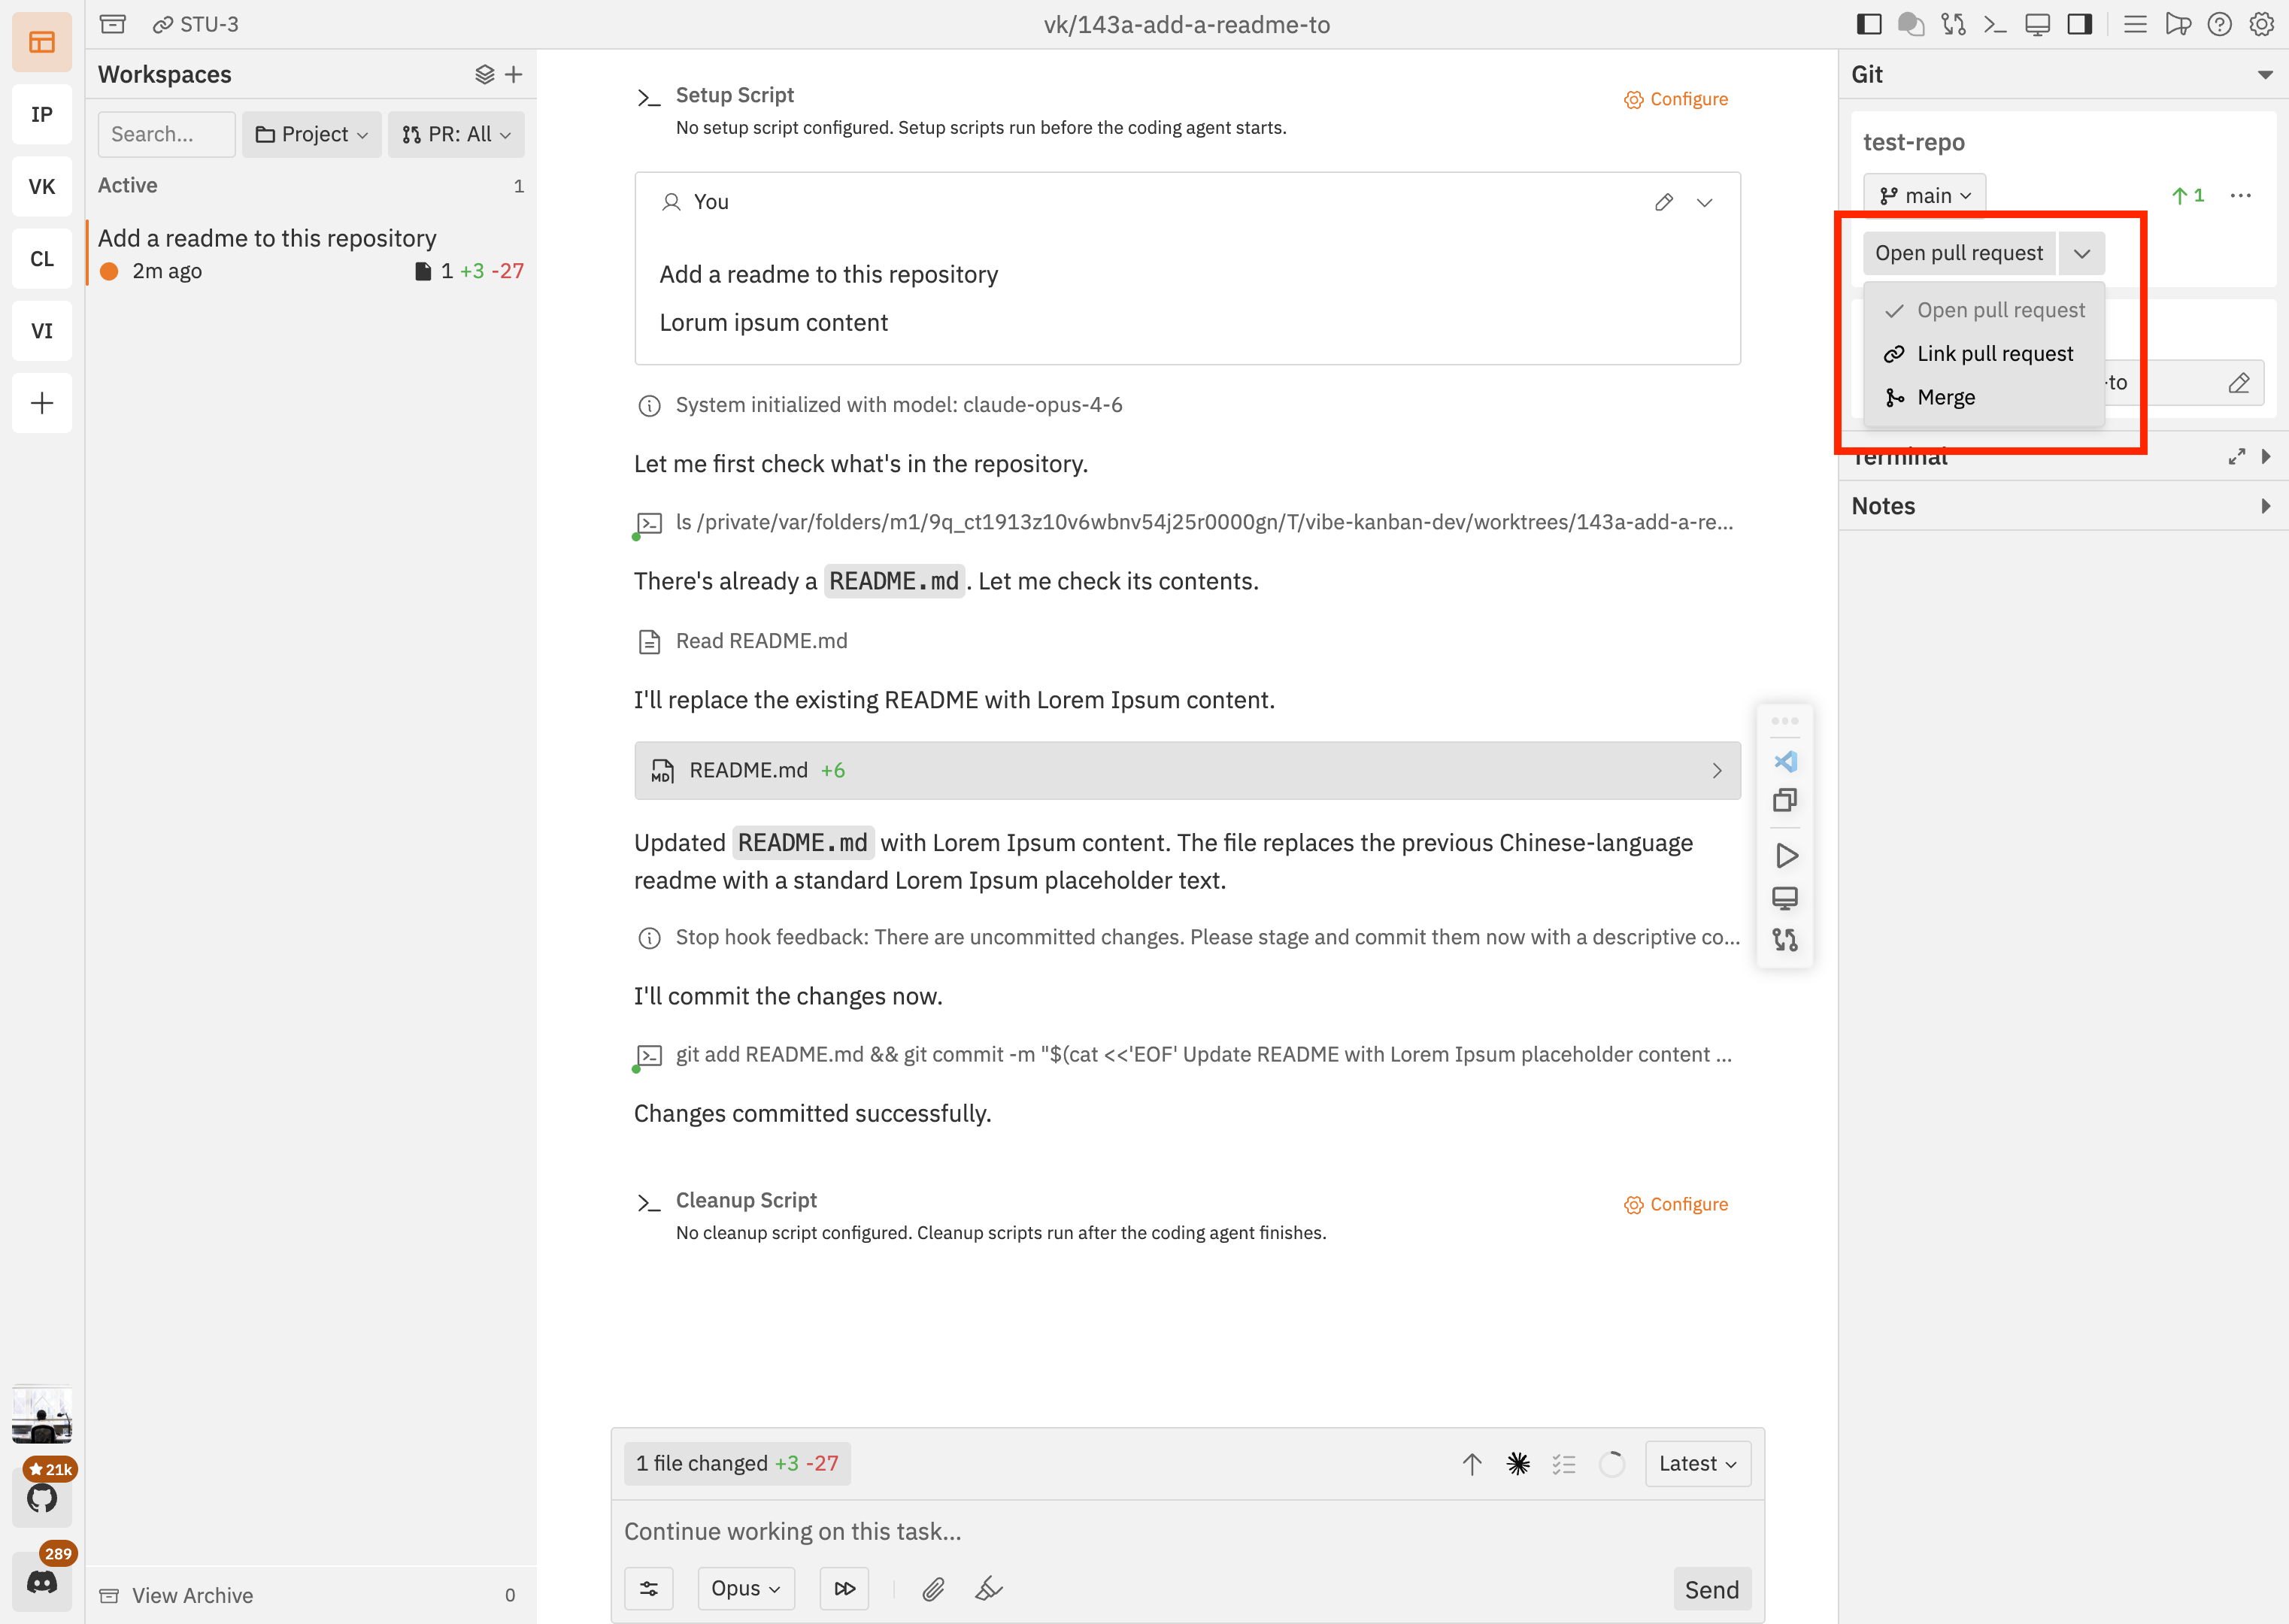
Next steps
Previewing changes
Set up a dev server, preview your app, and click-to-component to jump straight to source
Setup and cleanup scripts
Automate dependency installs, builds, and teardown so every workspace starts clean
Reviewing code changes
Review diffs, prompt the agent with feedback, and iterate before merging
Working with sub-issues
Break large features into smaller pieces and track progress across sub-issues