Git Basics for Workspaces
If you’re not familiar with git, here’s what you need to know:What is a branch?
What is a branch?
A branch is a separate line of development. Think of it as a copy of your code where you can make changes without affecting the original.In Workspaces:
- Target branch (e.g.,
main) - The “original” you’ll eventually merge back into - Working branch (e.g.,
vk/abc123-task) - Your copy where changes happen
What is a commit?
What is a commit?
A commit is a saved snapshot of your changes. It’s like a save point in a video game - you can always go back to it.In Workspaces, commits happen automatically as the agent works, or you can commit manually through the terminal.
What is a pull request (PR)?
What is a pull request (PR)?
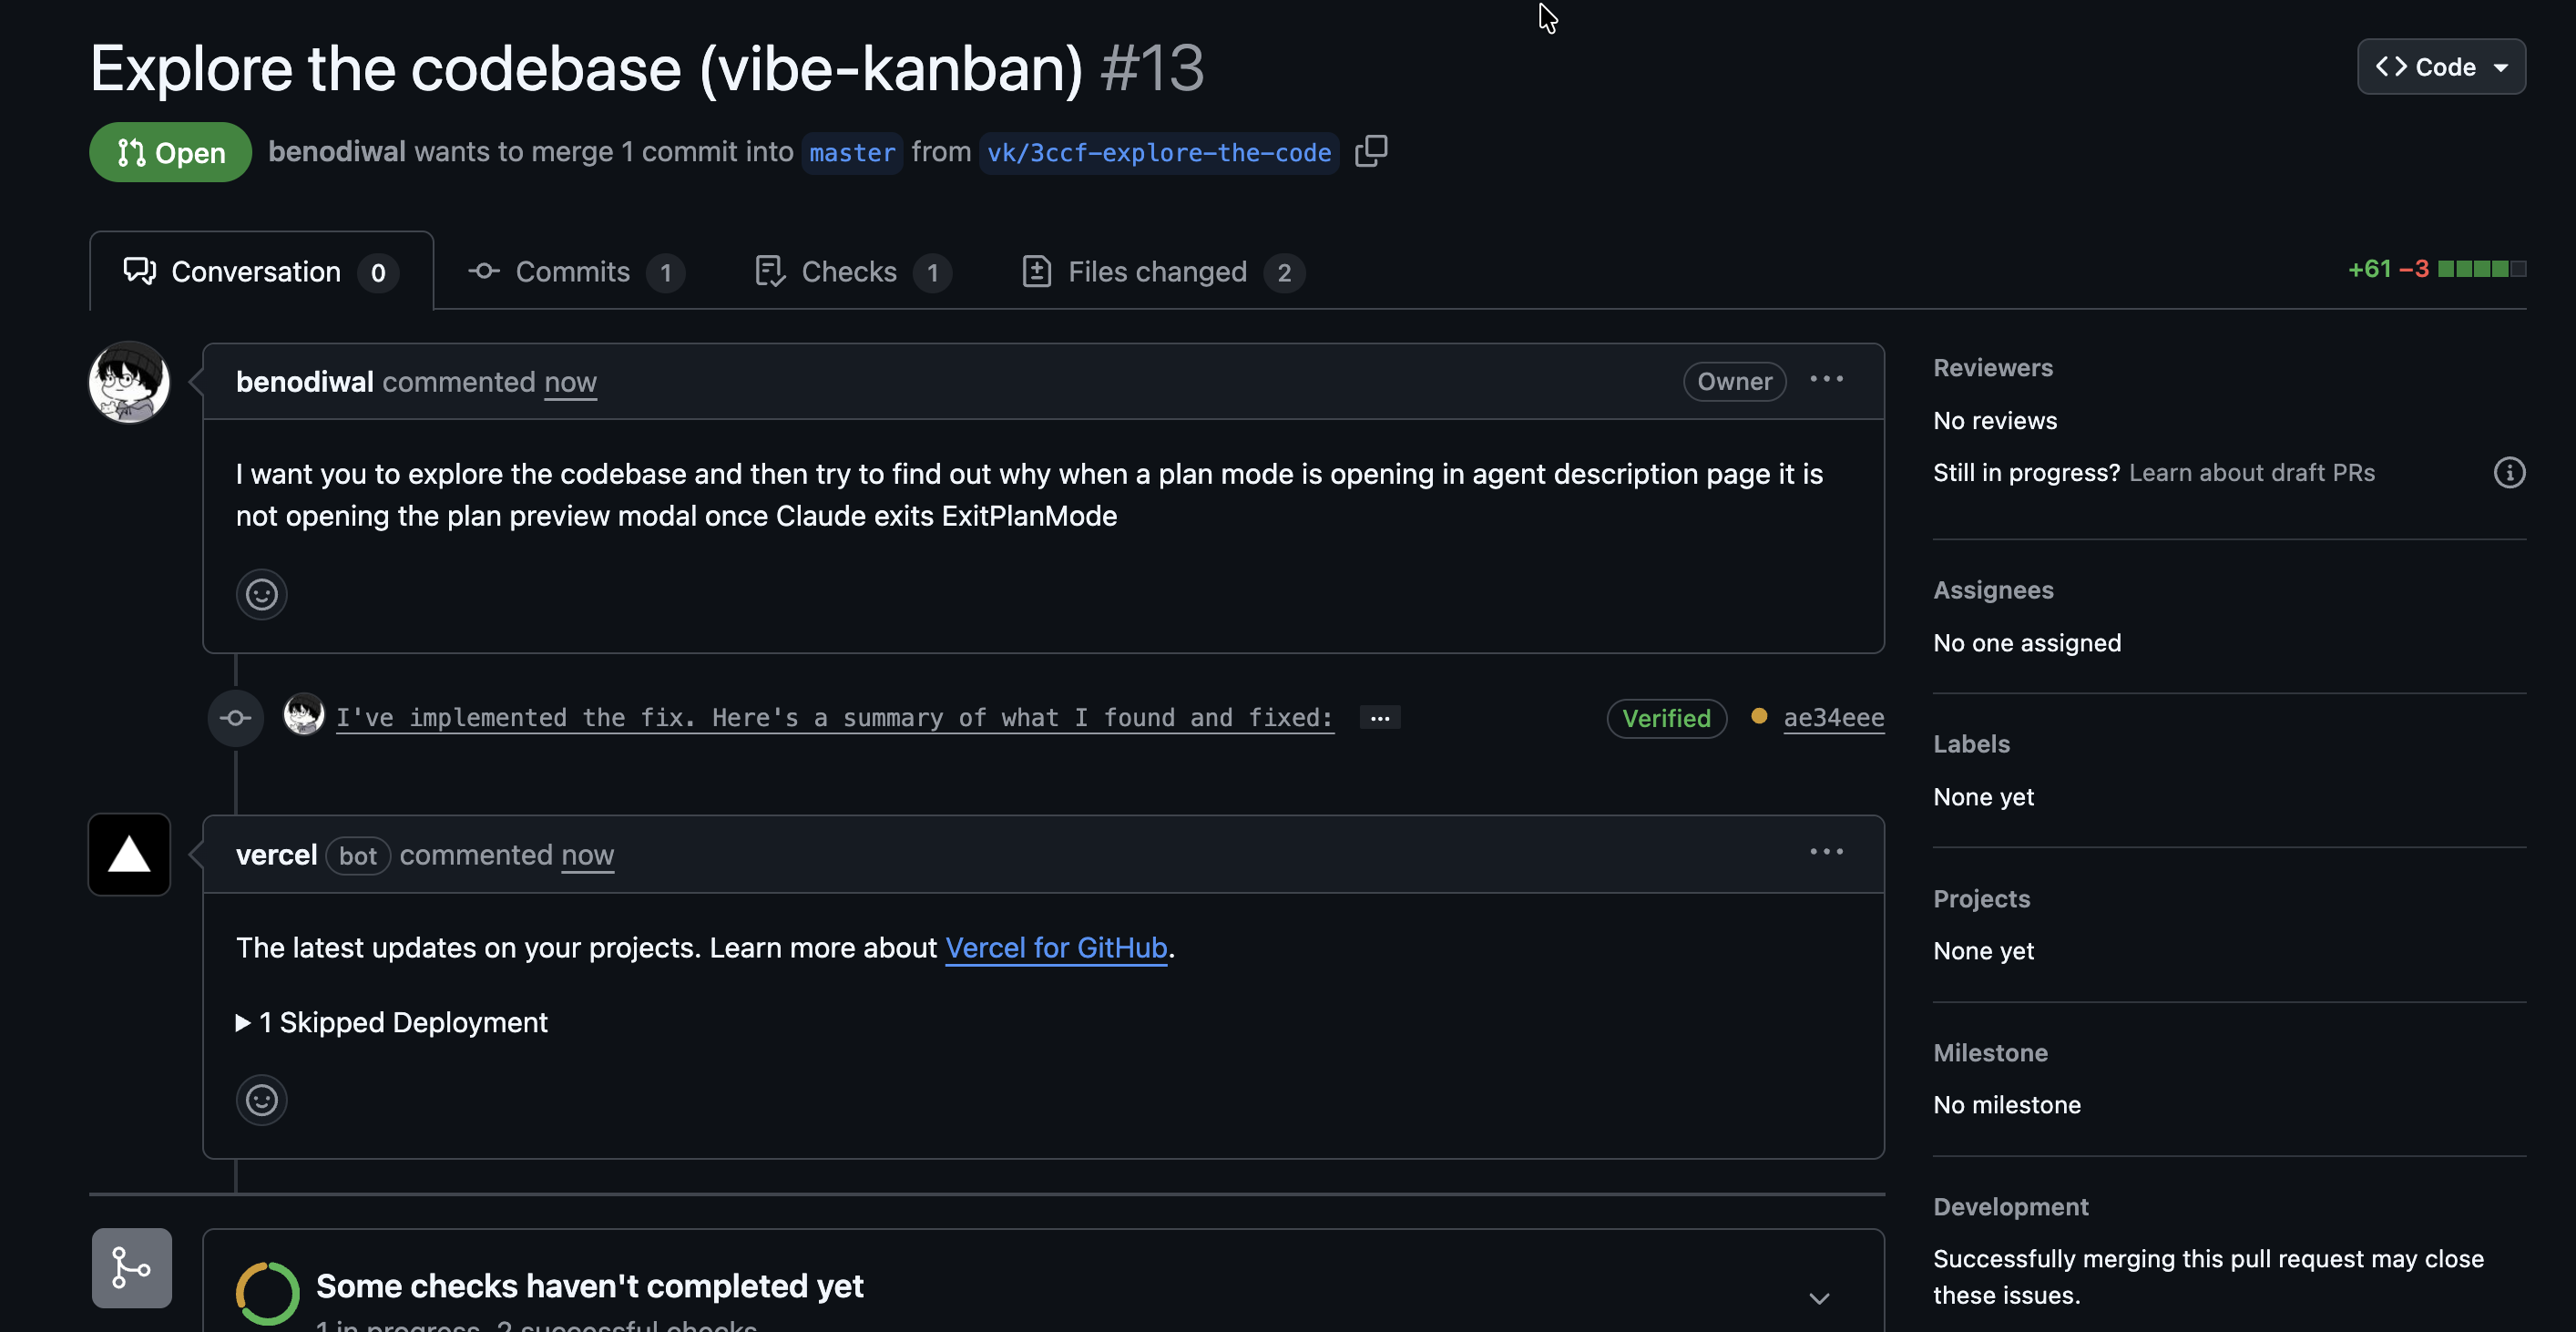
A pull request is a request to merge your changes from your working branch into the target branch. It:
- Shows all your changes in one place
- Lets teammates review your code
- Runs automated tests (CI)
- Provides a history of what was changed and why
What is rebasing?
What is rebasing?
Rebasing updates your working branch with the latest changes from the target branch. It’s like saying “pretend I started my work from the current state of main, not the old state.”When to rebase:
- Before creating a PR (to avoid conflicts)
- When the target branch has new commits
- When prompted by Vibe Kanban
What is merging?
What is merging?
Merging combines your changes with the target branch. In Workspaces, this typically happens through a PR on GitHub after code review.The “Merge” action in Workspaces pulls the target branch INTO your working branch (the opposite direction of a PR merge).
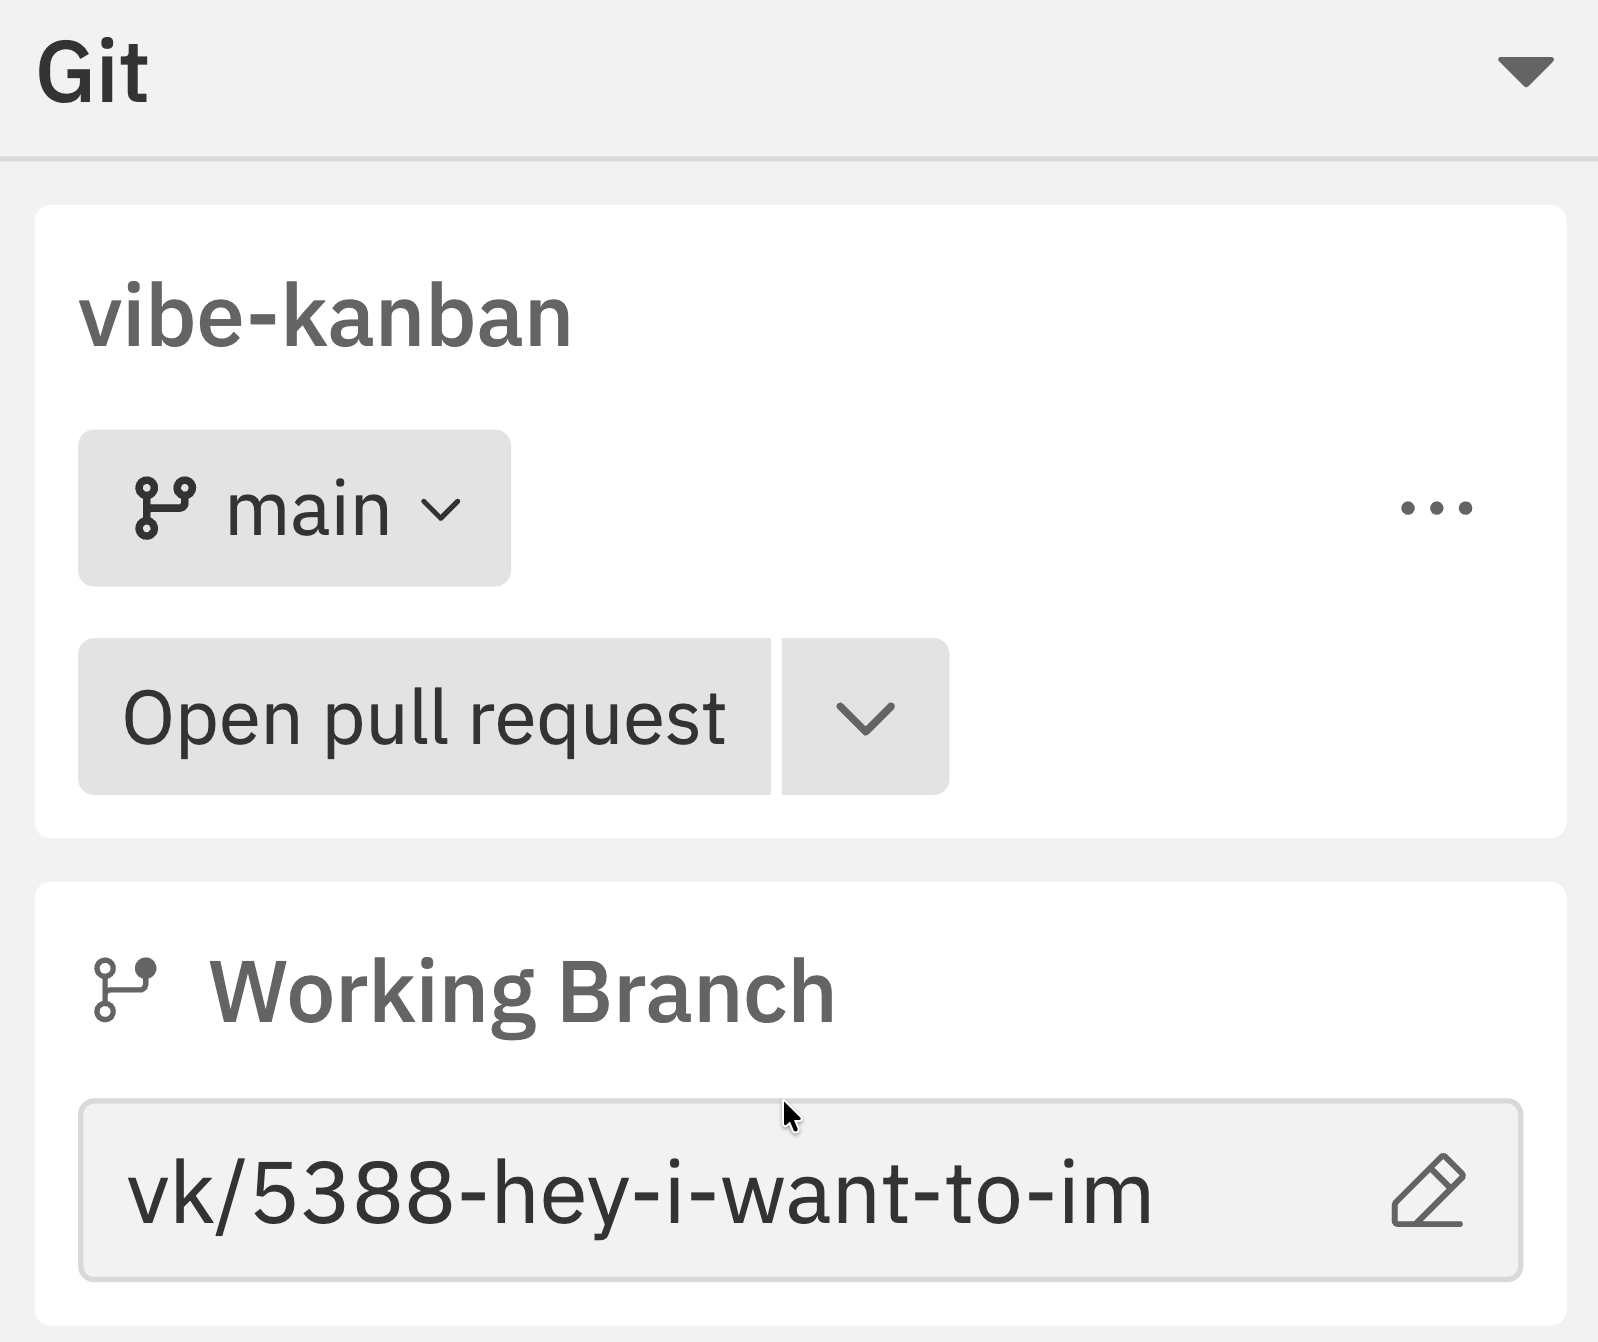
Repository Status
The Git section in the right sidebar shows:Creating Pull Requests
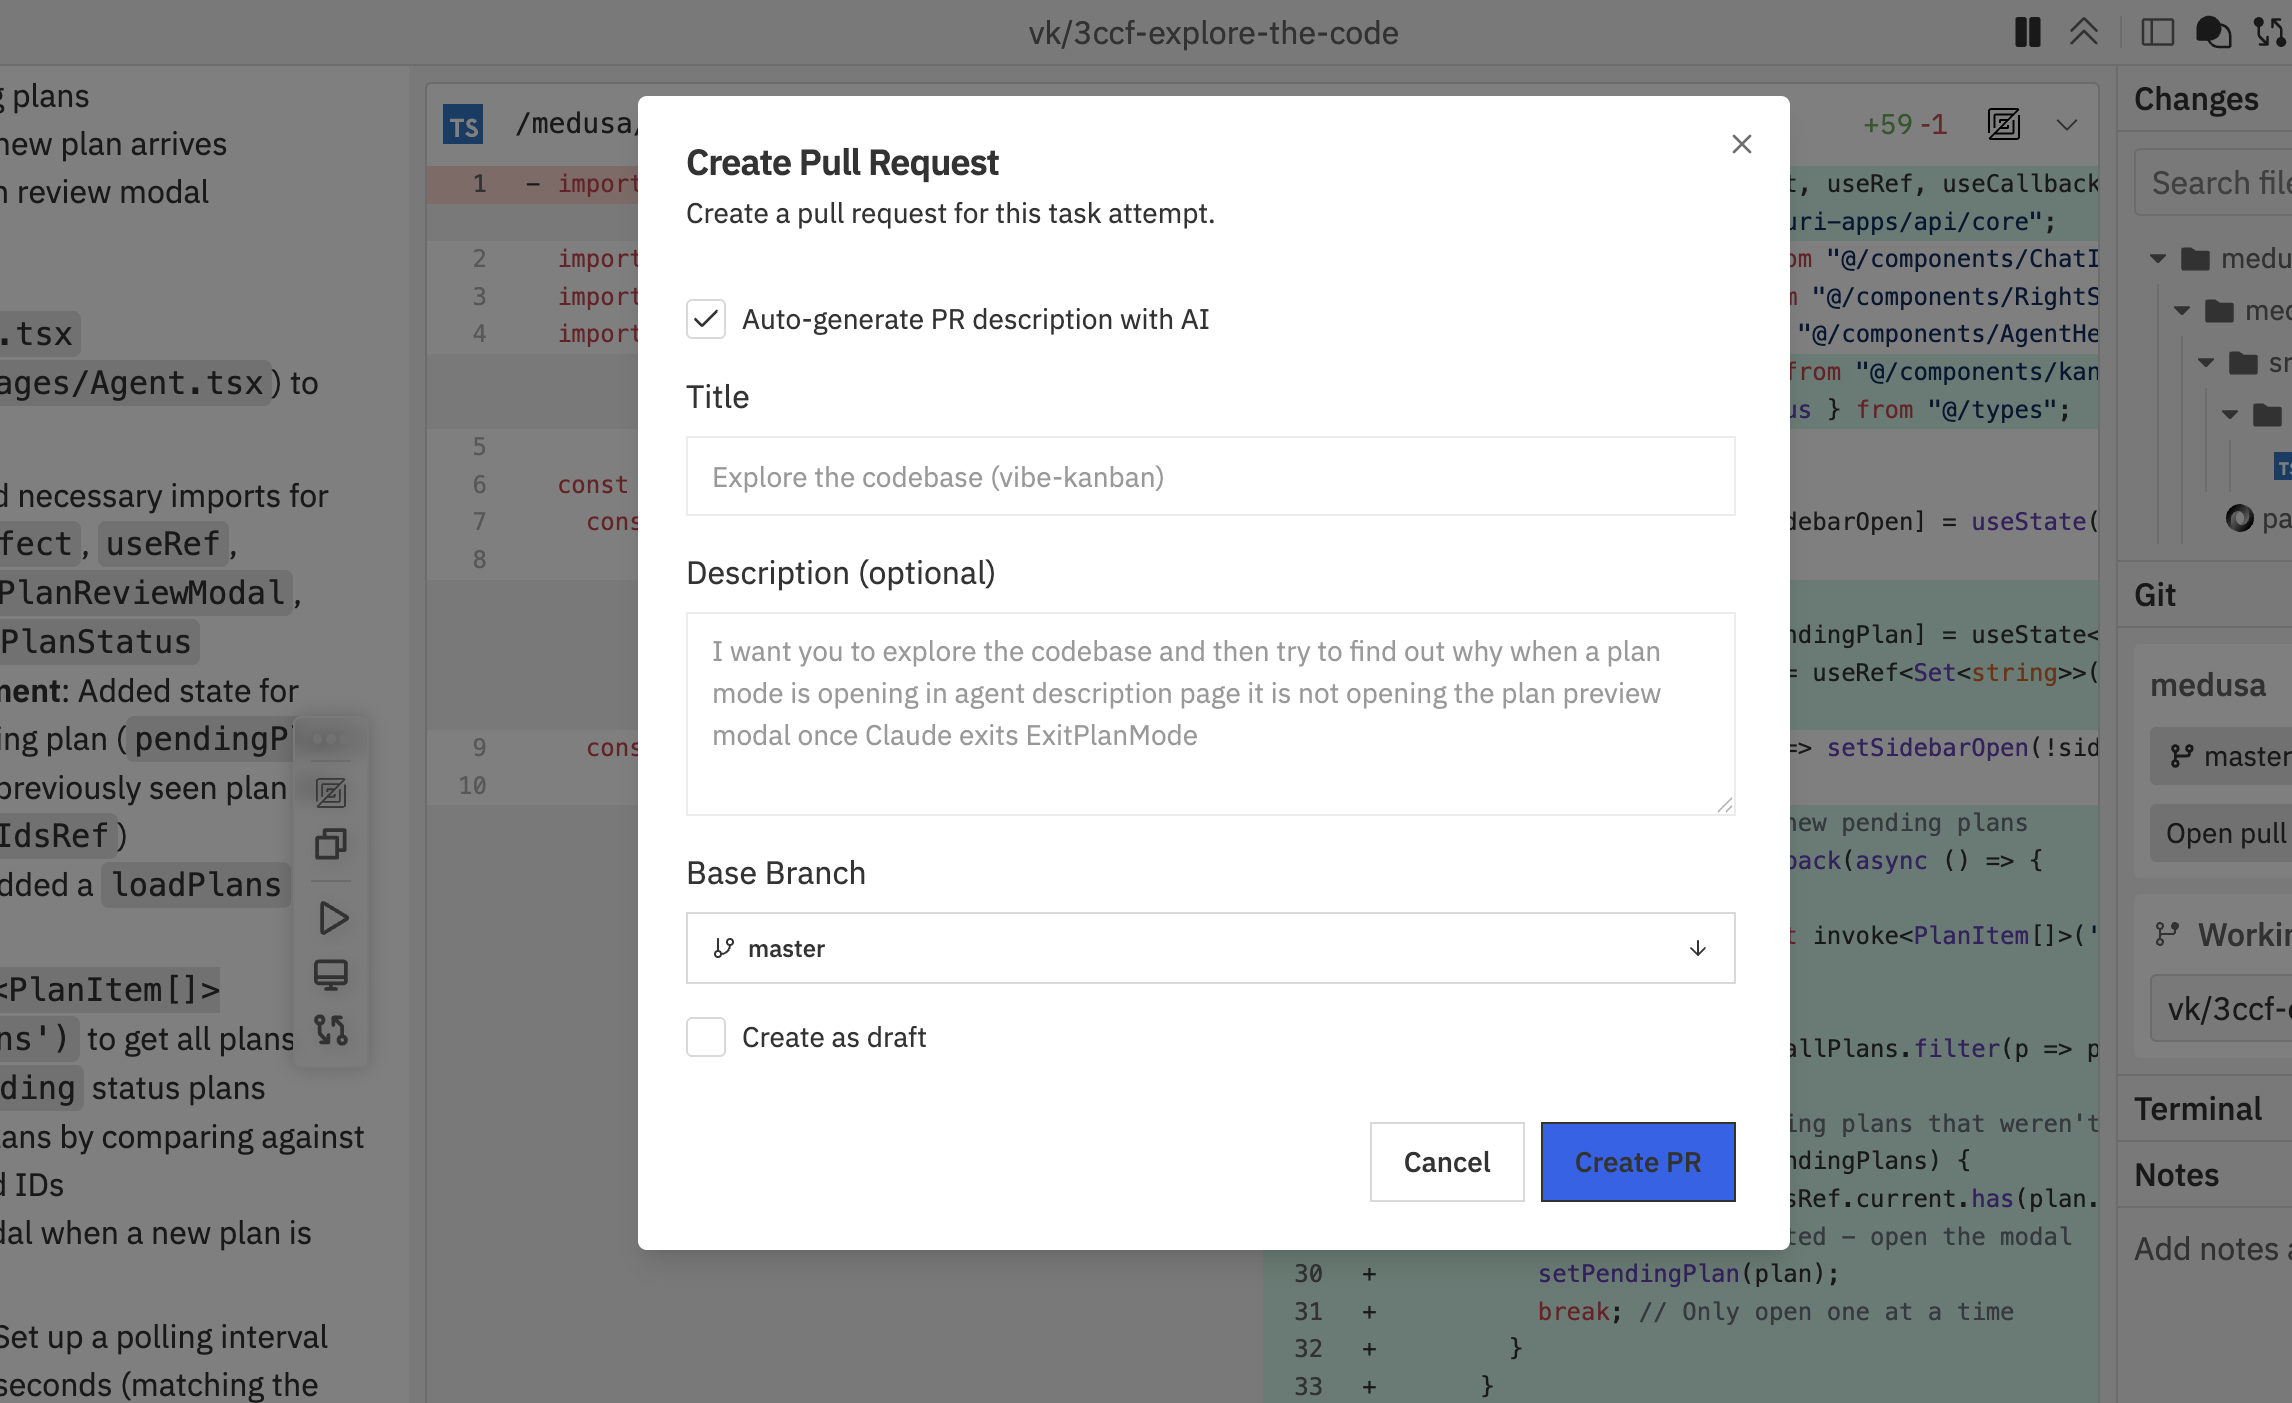
Creating a PR
From the Git panel:- Click Open pull request in the Git section of the right sidebar
- Fill in the PR details
- Press
Cmd/Ctrl + K - Select Create Pull Request
- Auto-generate PR description with AI - Let AI write the description based on your changes
- Title - PR title (auto-filled from task name)
- Description - Optional details about the changes
- Base Branch - The branch to merge into
- Create as draft - Mark as draft PR
- Click Create PR
Draft PRs
Enable Draft mode when:- Work is still in progress
- You want early feedback before completion
- CI checks should run but reviewers shouldn’t merge yet
Multi-Repo PRs
For workspaces with multiple repositories:- Create PRs for each repo separately
- Use the Repo Actions in the command bar
- Reference related PRs in descriptions
Merging Changes
Pull the latest changes from the target branch into your working branch.Merge Process
From the Git panel:- Click the dropdown arrow next to Open pull request
- Select Merge
- Press
Cmd/Ctrl + Kand select Merge
Before Merging
The workspace checks if you’re behind the target branch:- Up to date: Merge proceeds normally
- Behind target: You’ll be prompted to rebase first
Rebasing
Keep your branch up to date with the target branch.Rebase Process
From the Git panel:- Click the target branch dropdown (e.g., main)
- Select Rebase from the menu
- Press
Cmd/Ctrl + Kand select Rebase
Handling Conflicts
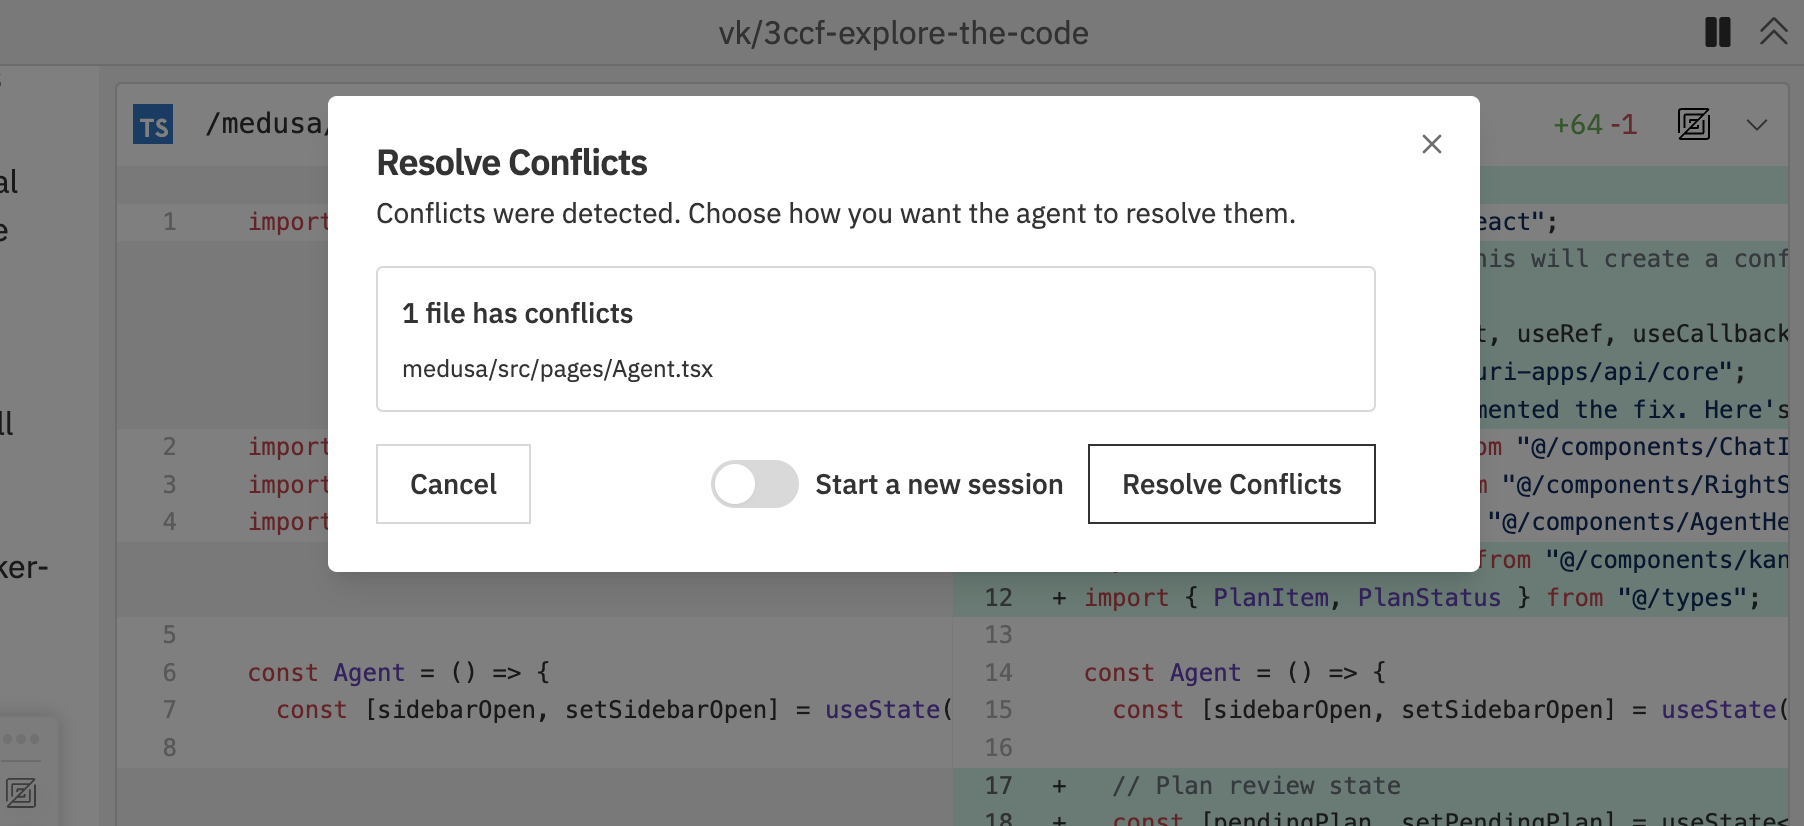
- The workspace shows a conflict resolution dialog
- List of conflicting files is displayed
- Resolve conflicts in your editor
- Mark files as resolved
- Continue or abort the rebase
When to Rebase
- Before creating a pull request
- When the target branch has new commits
- Before merging to ensure a clean history
- When prompted due to being behind target
Changing Target Branch
Switch the branch you’re merging into.Changing the Target
From the Git panel:- Click the target branch dropdown (e.g., main) in the Git section
- Select a new target branch from the list
- Press
Cmd/Ctrl + Kand select Change Target Branch - Choose the new target branch
Use Cases
- Switch from
developtomainfor release - Target a feature branch instead of main
- Correct an incorrectly set target
Pushing Changes
Push your commits to the remote repository.When Push is Available
The Push command appears when:- You have unpushed commits
- A pull request is open for the branch
Pushing
From the Git panel:- Click the Push button when it appears (shows when you have unpushed commits)
- Press
Cmd/Ctrl + Kand select Push
Push is contextual - it only appears when there are changes to push and a PR exists.
Multi-Repository Git Operations
For workspaces with multiple repositories, manage each repo independently.Per-Repository Actions
Access via command bar’s Repo Actions page:Coordinating Changes
When working across repos:- Make related changes in each repository
- Create linked PRs referencing each other
- Merge in the correct order based on dependencies
- Verify integration after merging
Conflict Resolution
When git conflicts occur:Conflict Dialog
The workspace displays a conflict resolution dialog showing:- List of conflicting files
- Options to resolve or abort
Resolution Steps
- Open conflicting files in your editor
- Resolve the conflicts manually
- Save the resolved files
- Return to the workspace
- Continue the operation
Aborting
If you can’t resolve conflicts:- Click Abort in the conflict dialog
- The operation is cancelled
- Your branch returns to its previous state
Best Practices
Branch Hygiene
- Rebase regularly to stay current with target
- Create PRs early for visibility
- Use descriptive branch names
- Delete merged branches
PR Workflow
- Complete your changes
- Review diffs in the changes panel
- Rebase if behind target
- Create a PR (draft if work continues)
- Address review feedback
- Merge when approved
Multi-Repo Coordination
- Plan cross-repo changes upfront
- Document dependencies between PRs
- Merge in dependency order
- Test integration thoroughly
Troubleshooting
'You have uncommitted changes' error
'You have uncommitted changes' error
What it means: You have modified files that haven’t been committed.Solutions:
- Let the agent finish its current work (it may be about to commit)
- Check the Changes panel to see what’s modified
- Commit the changes using the terminal:
git add . && git commit -m "WIP" - Or stash them:
git stash
'Branch is behind target' warning
'Branch is behind target' warning
What it means: The target branch (e.g.,
main) has new commits that your working branch doesn’t have.Solution: Rebase your branch to include the new changes:- Open command bar (
Cmd/Ctrl + K) - Select Rebase
- Resolve any conflicts if prompted
Merge conflicts during rebase
Merge conflicts during rebase
What it means: Your changes and the target branch’s changes modify the same lines of code.Solutions:
- Vibe Kanban shows a conflict dialog listing affected files
- Open each conflicting file in your editor
- Look for conflict markers (
<<<<<<<,=======,>>>>>>>) - Choose which version to keep (or combine them)
- Save the file and mark it as resolved
- Continue the rebase
PR creation fails
PR creation fails
Possible causes:
- Not authenticated with GitHub
- No changes to create a PR from
- Branch doesn’t exist on remote
- Check GitHub integration in Settings → Integrations
- Ensure you have committed changes
- Try pushing the branch first using the terminal
Can't push to remote
Can't push to remote
Possible causes:
- No remote configured
- Authentication issues
- Remote branch is protected
- Verify remote is configured:
git remote -vin terminal - Check GitHub authentication in Settings
- For protected branches, create a PR instead of pushing directly
Related Documentation
- Multi-Repo & Sessions - Working with multiple repositories
- Command Bar - Git commands and shortcuts
- GitHub Integration - GitHub setup and features